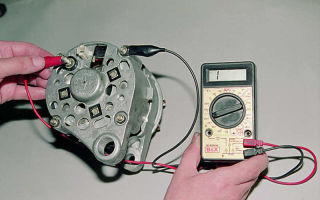
We learn how to independently test the generator for performance
The generator is quite stable in operation. Its failure, as a rule, occurs due to environmental factors, for example, in the form of condensing moisture on contacts and metal, causing corrosion and breakdowns, as well as as a result of mechanical wear of rotating parts.
To know how to check the charging of a generator, you need certain basic knowledge about the structure of the unit, its components and the principle diagram of the operation of some of its parts.
To measure electrical resistance, you will need a special testing and measuring device: the so-called multimeter or ohmmeter.
How to check the generator stator for the integrity of its windings
Before checking the generator winding with a tester, it is necessary, first of all, to inspect it for the presence of external damage to the insulation, burns in the winding resulting from short circuits. If visible damage is detected, the stator must be replaced. If no external damage is found, then we proceed to a step-by-step check of the integrity of the stator winding using an ohmmeter.
The stator must be disconnected, the winding terminals must not contact each other.
Need to check:
- no winding circuit break
- absence of short circuit of the windings with the housing.
We set the ohmmeter to test and measure the resistance.
In the first case, the ohmmeter tips are connected in turn to each of the three winding terminals. If the winding is faulty, the control device will show infinite resistance (i.e. one in the left digit of a digital multimeter and a maximum deviation to the right if the multimeter is analog).
In the second case, the ohmmeter tips are connected to the winding terminal and to the stator housing. If there is a short circuit, the test device should show low resistance.
A serviceable stator, therefore, in these two tests should show low resistance in the first case and infinitely high resistance in the second.
Checking the serviceability of the voltage regulator in the generator
Before checking the generator voltage regulator, it must be removed and disconnected. Next, you need to make sure that the brushes are intact, have no defects or chips, and move freely in the channels of the brush holder. If brushes protrude less than 4.5 mm, the voltage regulator needs to be replaced.
The voltage regulator itself is checked using additional power sources: 12-14 V and 16-22 V.
Accordingly, the first source can be a battery, the second source can be a battery with 1.5-volt batteries connected in series to it.
We connect the positive output of the battery to the output of the device, the negative one to the ground of the voltage regulator. A 12-volt light bulb is connected between the brushes.
If the regulator is working properly when voltage is applied:
- 12-14 V the light should be on;
- 16-22 V the light should go out.
In all other cases, the voltage regulator is faulty, cannot be repaired and must be replaced with a new one.
Checking the capacitor for functionality
A rough check of the capacitor can be carried out by charging it for a few seconds with a voltage not exceeding the maximum indicated on it, and then closing its contacts with an iron object insulated from the hands. If the capacitor is in good condition, i.e. with its ability to charge and retain a charge, a spark should appear.
Before you check the capacitor with a multimeter, you need to clarify that they can be polar, i.e. which must be connected strictly in accordance with the polarity indicated on the outputs, and non-polar.
Polar Capacitor Test
First, we close the contacts of the capacitor, removing the charge stored in it. It is necessary to install a control device to ring and measure resistance.
Then we connect the ohmmeter contacts in accordance with the polarity of the capacitor.
A working capacitor begins to charge, the resistance indicator will increase until it begins to approach infinity. These are the results for a working capacitor.
A non-working capacitor will:
- cause the ohmmeter to squeak and show zero resistance;
- immediately show infinite resistance.
Non-polar capacitor test
We set the megaohm values on the control device and touch it with the contacts of the capacitor terminals. At low resistance values (less than 2 mOhm), the capacitor is most likely inoperative.
Checking the generator diode bridge with a multimeter
The task of rectifier diodes is to correctly pass current in the direction from the generator and block its passage in the opposite direction. Any deviation in its operation is considered a malfunction of the diode bridge. Let's take a closer look at how to check the diode bridge of a generator.
First you need to remove the diode bridge from the generator and disassemble it to gain access to the diode contacts. The soldered leads on the stator need to be unsoldered.
The multimeter switch should be set to ring. Diodes are semiconductors and belong to microelectronics. To ring a diode bridge, you need to understand its structure and have a circuit diagram.
Checking power diodes
The negative contact of the multimeter is connected to the diode bridge plate, the positive contact is connected to the diode terminal. The current must pass. The device readings should tend to infinity. We connect the positive probe of the multimeter to the diode bridge plate, the negative probe to the diode terminal. The multimeter should show a resistance of 400 to 800 ohms.
Checking Auxiliary Diodes
We connect the negative output of the multimeter to the auxiliary diode plate, and the positive output to the diode output. The multimeter should show a value between 400 and 800 ohms. We connect the positive contact of the multimeter to the auxiliary diode plate, the negative contact to the diode terminal. The device readings will tend to infinite resistance.
Bearing Inspection
A bearing is a mechanical part whose failure involves a change in its physical properties. This could be corrosion, cracks, wear, damage, play, or difficulty rotating. An outward sign of a problem with the generator bearing is the hum and noise produced by the generator.
In this case, the rear bearing is removed and examined for the above-mentioned part defects. The bearing ring should rotate freely without creating any extraneous noise.
If we talk about a car generator, its front bearing is usually mounted in the cover. The check is carried out according to a similar principle, rotating the lid and holding the center. The bearing should not jam or make noise.
A bearing with poor rotation or deviation along the axis of rotation must be replaced.
Thus, checking the generator for functionality is not very difficult. The main thing is to understand the essence of the processes occurring in the device. The fundamental problems that happen with a generator are simple and standard. Armed with a multimeter and the knowledge gained, you can easily find a fault in the generator.
Let's see how to check the generator with a multimeter in the video
Source: http://elektrik24.net/elektrooborudovanie/generator/kak-proverit-2.html
How to Check a Removed Generator for Operation
How to check the generator for performance? Self-check and repair of the generator
A generator is a kind of power plant that provides energy to all engine systems: power, cooling, ignition, so its failure will inevitably lead to other malfunctions. To prevent breakdowns, it is necessary to systematically diagnose it, and if problems cannot be avoided, repair it immediately.
In this article we will talk about how to check the generator for performance without resorting to the help of specialists. But first, let's look at the symptoms of its possible malfunctions.
Main signs of generator malfunction
The following signs will indicate that the generator has failed or there are problems with its operation:
- constant lighting of the warning light in the form of a red battery on the dashboard, which indicates that the generator is not charging or is producing insufficient current;
- constantly discharging battery;
- interruptions in the operation of electrical equipment (lighting and alarm units, multimedia, heating and ventilation) while the engine is running;
- the appearance of a characteristic burnt smell in the cabin (engine compartment);
- excessive heating of the generator stator;
- hum (rustle, whistle) of the generator.
The appearance of such signs is a serious reason to conduct a diagnosis. To do this, it is not at all necessary to go to a service station, since to check the generator ’s functionality on your own, especially if you have even the slightest skills in handling a car tester. But first, let's talk about the main breakdowns.
Main faults
The generator may have malfunctions of both mechanical and electrical nature. These include:
- failure of the voltage regulator;
- malfunction of the diode bridge (rectifier unit);
- short circuit of the rotor field winding;
- short circuit of the stator windings;
- brush wear;
- bearing wear.
Next, we will talk about how to test the generator for performance yourself, based on the symptoms present and possible malfunctions.
Checking the voltage regulator
The regulator is designed to stabilize the generated voltage before supplying it to the vehicle's on-board circuit, including the battery for recharging it.
The only way to determine its serviceability yourself is to check the charging of the generator, or rather, the amount of voltage it supplies to the battery terminals. Depending on the make and model of the machine, it can range from 13.5 to 15.5 V.
Therefore, before checking the operation of the generator to ensure that the regulator is working properly, you need to find out exactly what voltage it should produce. This information can be obtained from the vehicle's owner's manual.
How to test a generator with a multimeter? To do this, switch the device to voltmeter mode and, observing polarity, connect its probes to the battery terminals with the engine not running. A voltage between 12-12.8 V is considered normal.
Next, start the engine and repeat the procedure. The voltage at the battery terminals should increase to 13.5-15.5 V. Only in this case can the regulator be considered operational.
An increase or decrease in voltage, on the contrary, indicates that it is faulty.
Quick check of the GENERATOR without installing it on the car
I’m showing another way to check a generator without installing it on a car.
How to check a VAZ generator
Checking the VAZ 2101-2107 generator
How to check the diode bridge of a generator without removing it from the car
The diode bridge acts as a kind of rectifier, converting the alternating current generated by the generator into direct current.
It usually consists of six semiconductor diodes, three of them are “positive”, the other three are “negative”, i.e. the first pass current in one direction, the second in the other.
The rectifier can be checked either with the generator removed or without dismantling it. Let's consider both options.
Before checking the diode bridge of the generator without removing it, it is necessary to disconnect all wires from it and from the voltage regulator, having first disconnected the ground terminal from the battery. First, let's check the rectifier for a short circuit.
Turn on the multimeter in ohmmeter mode, connect the positive (red) probe to terminal “30” of the generator (positive contact of the bridge), and the negative one to the generator housing. With a working rectifier, the device readings will tend to infinity.
If the resistance is several ohms, the rectifier is faulty.
Now let's talk about how to check the generator diode bridge for breakdown. Let's start with the positive diodes. Again, connect the positive probe to the corresponding bridge contact (pin “30”), and the negative probe to the rectifier mounting bolts (brackets). In this case, the resistance should also tend to infinity. Otherwise, one or more diodes are broken.
Let's move on to "negative" semiconductors. We attach the red probe of the tester to the rectifier mounting bolts, the black probe to the generator housing. Resistance tending to infinity is a sure sign that the diodes are intact.
Checking the rotor winding
A common malfunction of a car generator is short-circuiting of the windings. This can happen as a result of a sudden voltage surge, water ingress, wear of brushes, etc.
Since you can check the generator with a multimeter for the integrity of its windings only by gaining full access to them, you will need to dismantle the entire assembly. We will not describe this process, since it differs for different cars.
Before checking the removed generator for operability of the rotor winding, it naturally needs to be disassembled.
After removing the rotor, we find slip rings on its shaft. There are only two of them. Having turned on the multimeter in ohmmeter mode, we connect its probes to these rings. The device should produce a resistance within 2-5 Ohms.
These are normal indicators for a working rotor. A higher resistance indicates poor contact between the rings.
In the opposite case, when the instrument readings approach zero, an interturn short circuit most likely occurs.
How to check the generator for the operability of the stator windings
Let's move on to the stator. It has several windings, each of which must be checked separately. But before this, you must definitely disconnect the wires connecting the terminals of the windings and the diode bridge.
We connect the probes of the multimeter, switched on in ohmmeter mode, to the terminals of each of the windings in turn. The working winding should have a resistance of about 0.2 Ohm.
Next, you need to measure the resistance between the common terminal (zero) of the stator and the terminal of any of the windings. It should be at least 0.3 Ohm.
Generator brush wear
If the generator has already been dismantled and disassembled, it would not hurt to check the condition of the brushes. They can fail due to prolonged use, or as a result of problems caused by misalignment of the rotor shaft. If the brushes show signs of great wear or their geometric shape is damaged, they must be replaced.
Generator bearing wear
A car generator has two bearings. One of them is fixed to the rotor shaft, the second is pressed into the central part of the cover.
A hum or whistle coming from the generator while the engine is running is a sure sign that one of the bearings has given up its life. A related symptom may be heating of the generator housing.
If you notice these signs, hurry to replace the bearings. Otherwise, this will lead to distortion of the rotor shaft or jamming with all the ensuing consequences.
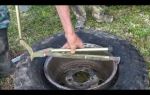
You can check the bearings by removing the alternator belt and turning its shaft by hand. If the rotor rotates easily, without jerking or play, the bearings will still serve. If rotation is difficult or there is play in the shaft, do not delay replacing the bearings.
Source: http://5net.ru/kak-proverit-snjatyj-generator-na-rabotosposobnost/
How to check a car generator with your own hands
The task of the generator, as the main source of electricity in a car, is to generate and maintain voltage at a certain level, regardless of the level of load on the on-board network.
Voltage stability is maintained by an electronic relay regulator, which in most cases is built directly into the generator.
Its failure sharply limits the ability to operate the machine: in this case, the only source of energy will be the battery, which will soon be discharged.
What breakdowns occur with this device, how to check the generator and what causes the breakdowns are discussed below.
Signs of a generator malfunction
Complete or partial failure of a device can be determined by the following symptoms:
- The warning light on the instrument panel, usually in the form of a picture of a battery, begins to flash or stays on. This indicates that the battery is not charging or the current supplied to it is insufficient.
- Constant failures in electrical equipment: unstable operation of external and internal lighting, when the lamps burn brighter or dimmer, heating when the engine is running (if the engine is turned off, then everything functions normally). By the way, problems with lighting can also occur if headlights need to be polished.
- The battery is constantly and frequently discharged.
- There is a burning smell in the interior or engine compartment.
- A whistle or excessively loud rustling noise is heard from the generator.
- The generator makes a loud noise during operation: the diode bridge or stator windings are faulty.
The appearance of the above symptoms indicates the need for immediate diagnosis. But how to check the generator yourself? If you know how to use a multimeter, then diagnostics can be carried out without going to a car service center. However, first you need to determine the nature of the breakdown. Damage can be either electrical or mechanical.
Generator malfunctions and reasons for its failure
First, a little about the design of the device. The main components of the generator are a stator (fixed element), rotor (rotating part), brushes, a built-in relay-regulator unit, a diode bridge and a housing with bearings.
And now - about the most typical malfunctions:
- Bearing jamming. This problem most often occurs with a generator that has been in operation for a long time. Dirt, dust, and moisture gradually do their job: as a result, the bearings jam, the rotor of the device stops spinning and the drive belt breaks. There is a nuance here: sometimes the generator does not stop completely - it gets stuck. In this case, a characteristic whistle will be heard, indicating increased friction in the falling apart bearings. When replacing these elements, it is recommended to install two new ones at once (in the rear and front cover of the generator).
- Combustion, interturn short circuit of the rotor or stator winding. The reasons for this malfunction are also not original: moisture and salt on the roads, which in “steam” corrode the varnish insulation of the windings, resulting in a short circuit and ultimately burnout of the wires.
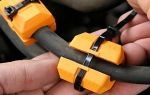
- Breakage or wear of the brushes. By design, they are graphite square or rectangular products in contact with the copper tracks (slip rings) of the stator. Most often the brushes wear out, less often they break. Sometimes their performance can be determined visually: put the car in a dark garage and start the engine, first opening the hood. Sparking inside the generator indicates worn brushes.
- Malfunction of the voltage regulator. This is an electronic unit whose task is to maintain the voltage at the same level, ensure the supply of rated current to the battery and prevent it from overcharging (which leads to boiling off of the electrolyte).
- Malfunctions of the rectifier unit. It consists of several electronic components that form a diode bridge. If at least one of them fails, the current stops being rectified, the functioning of the voltage regulator stops: the on-board network begins to be powered only by the battery, which has a limited service life.
How to check battery charging and generator performance with a multimeter
To carry out this procedure, it is not at all necessary to have a professional tester: a regular multimeter, which has modes for measuring resistance (ohmmeter) and voltage, will do. First you need to take measurements with the engine not running.
Attach the multimeter probes to the battery terminals: the tester should show at least 12.5 volts (with a normally charged battery). Now start the car and, without turning on any consumers, measure the voltage again: it should be in the range of 13.8-14.5 V.
At the next stage, you will need to connect the load to the on-board network: heater at full power, multimedia, headlights (high beam), fog lights and heated rear window. Look at the device: if the generator is working, the voltage will drop to 13.7-14 V. If the value is lower, you will have to test the generator.
The following describes ways to check the generator and its components without removing the device from the car.
Voltage regulator
The purpose of this block (some call it a “chocolate bar” or “tablet”), built into the generator, is to stabilize the on-board voltage. To check the generator with a multimeter along with the regulator, you do not need to remove the latter from the car.
You will need to carry out the operation described above: that is, measure the battery voltage with the engine off and running. A deviation from the norm to a lesser extent indicates a malfunction of either the voltage regulator or the generator.
But exceeding the parameter of 14.5 volts indicates a failure of the relay, which is fraught with constant boiling of the battery. To more accurately check the voltage regulator, it must be removed.
This is not difficult and dismantling can be done directly on the installed generator: just unscrew 2-3 screws (the number depends on the car model). Further actions:
- disconnect the positive terminal from the battery;
- take the regulator and connect the “+” of the battery to its terminal (where the thin wire from the generator is connected), and connect the minus to the second contact of the relay (“ground”);
- Connect any car lamp rated for 12 V to the voltage regulator brushes using wires;
- its glow will indicate the serviceability of the unit.
Checking the diode bridge without removing it from the car
The function of this block is to rectify a variable to convert it into a constant. The bridge most often includes 6 semiconductor diodes. Three of them conduct current only in one direction, three - in the other.
To check the generator with a multimeter and at the same time the integrity of the diodes, you will need to remove the wires connected to the voltage regulator and generator. Don't forget to disconnect the "-" from the battery. Switch the tester to the resistance range.
Connect the positive probe (it has a red tint) of the device to terminal “30” of the generator (the thickest cable stretched from the battery fits here), the negative probe (black) to the body (“ground”) of the device.
Checking diodes with a multimeter on a dismantled and disassembled generator
The bridge includes a pair of aluminum plates: one of them is “negative”, the second is “positive”. Take the tester and place one of its probes on the plate, and with the other, touch the contacts of the diodes fixed on the plate in turn. The device should show infinity or resistance (usually several kiloohms).
Then change the probes: you should get the opposite picture. We do the same with the second plate. If the readings on any diode are zero, it means it is broken and needs to be replaced.
If all the diodes show a certain resistance, and one of them shows infinity, then this means a break: the electronic component also needs to be replaced.
Checking the rotor windings
When the generator brushes are not worn out and their length is 4.5 mm or more, and the diode bridge is intact, you can start checking the rotor. To do this, the generator will have to be removed and disassembled. The dismantled device must be divided into two parts by unscrewing the mounting bolts. On one of them you will see a shaft on which copper slip rings are fixed.
How to check the generator in this case? You just need to set the measuring device to ohmmeter mode with a measurement limit of 50-100 Ohms and attach each probe of the device to the slip rings. The needle (or numbers will appear) of the multimeter will deviate to 2-5 ohms. If it is higher, then this is a sign of unreliable contact between the rings (poor soldering of the winding leads is possible).
With lower resistance, interturn short circuit of the windings is obvious.
To be sure of the condition of the rotor, it is worth carrying out another check.
A voltage of 12 volts from the battery should be supplied to the slip rings; connect the tester to the gap in the negative or positive wire, setting it to current measurement mode (observe the polarity of connecting the probes of the device).
Its value should be in the range of 3-4.5 A. A higher current strength indicates an interturn short circuit of the windings. You can also determine if they are inoperable purely visually: the dark color of the wires and the burning smell will tell you this.
Insulation resistance test
You will need 220 volts and a lamp designed for this voltage. Connect one wire to any slip ring, the second to the rotor body. If the winding is intact and open, the light will not light. If you observe its burning or even a slightly weak glow, the winding will have to be repaired (rewinded in a specialized workshop) or replaced.
Checking stator windings
This procedure also requires dismantling the generator and then disassembling it. This part of the device has several windings, so you will have to check each one. First, disconnect the wires leading from the diode bridge to the windings (you may need a soldering iron). After:
- Switch the measuring device to ohmmeter mode, to the minimum limit - usually 1 (whichever is better) or 10 ohms. It is recommended to carry out all measurements using a more accurate digital device.
- Connect the tester probes one by one to the terminals of the windings. The device should “produce” almost 0.2 Ohm.
- Test the resistance between one of the coil terminals and the “zero” (common wire) of the stator. The normal tester reading is 0.3 Ohm.
- Also check the integrity of the insulation. Connect one wire, connected to a 220 V household outlet, to the rotor body, the second - through a regular 25-40 W filament lamp, connected in series, to the winding terminal. If the latter has no defects (the insulation is not broken), the lamp will not light up.
At the same time, carefully inspect the “insides” of the stator and rotor: no traces of contact are allowed here. If they are present, this indicates wear of the bearings or bushings, which is confirmed by the “abnormal” noise made by the generator when the engine is running. By the way, if the engine does not start well when cold, this may be a sign of several malfunctions at once.
Checking generator brushes and slip rings
Their performance is determined visually. The minimum length of these products is 4.5 mm (new ones are 8-10 mm). The main reason for brush failure is their long-term use.
Sometimes they quickly wear out and even break due to misalignment of the rotor shaft, which is associated with a manufacturing defect or deformation of the device due, for example, to an accident.
The brush assembly is most often structurally combined with a voltage relay, so removal of this unit is possible without dismantling the generator. But you will have to buy the entire unit assembled: relay-regulator and brush holder.
To replace, unsolder the contact wires from the winding and remove the rings with a puller. New ones can be sanded on a lathe before installation: this will eliminate beating associated with surface unevenness and eliminate burrs.
Generator bearing wear
To replace them, the generator must be removed from the machine and disassembled as described below:
- remove the back cover (usually it is made of plastic) by releasing the clips or removing the screws;
- disconnect the brush assembly combined with the relay regulator;
- remove the diode bridge by unscrewing 3 screws;
- remove the metal back cover located under the plastic one and pull out the stator;
- pull out the rotor and clamp it in a vice to remove the pulley, having first unscrewed the nut securing it to the shaft;
- Remove the front cover along with the bearing: according to the manufacturer, it should be replaced as an assembly.
If you decide to replace the bearing separately, take an electric drill with a drill with a diameter of 4 mm and drill the cover at the core points. Knock out the old bearing, insert a new one and seal it. It is easier to remove the rear bearing: just use a puller with two legs.
For some car models, the generator is non-separable: the stator winding is soldered to the cover. Then you will have to solder the wires to remove the stator.
When choosing a bearing, you should also pay attention to analog spare parts - their cost is usually lower, and the quality may not be inferior to the original.
General recommendations and nuances
It often happens that the generator stops functioning only when the engine is warm. This phenomenon is due to the natural expansion of the metal with increasing temperature or a change in the properties of semiconductors (diodes) for the same reason.
In this case, you should first check the functionality of the generator on a warm car, and if this does not bring results, then dismantle the device and check it after heating it with a hair dryer.
In conclusion, it is worth noting that independent replacement of generator components such as stator or rotor windings and bearings in domestic conditions is advisable only if you have the appropriate equipment, tools, and experience.
If it is not there, then if the battery is not charging, limit yourself to trying to replace the relay-regulator combined with the brush assembly. To do this, you don’t have to buy a new device: you can install a known good one and evaluate the result.
Source: https://djago.ru/dvigatel/kak-proverit-generator/
How to check a generator on a car yourself with a multimeter
The main source of electricity in a car is the generator. It starts simultaneously with the engine starting, after which it generates energy and charges the battery. If it fails, the battery charge will not be enough to operate the car for a long time, so the driver is obliged to monitor the condition of the generator.
There are a lot of problems that can cause a generator to fail during operation. These can be either mechanical or electrical problems. Generator malfunction is also manifested by various symptoms, the most common of which are:
- The appearance of extraneous sounds emanating from the generator;
- Problems with the battery: discharging, overcharging, boiling off of the electrolyte;
- Reduced brightness of headlights with increasing speed. This situation is considered normal if it occurs briefly when switching to first gear from idle on a cold engine;
- Warning lamp warning about low battery while the vehicle is moving;
- Electronic malfunctions, including dim headlights and a weak sound signal.
If the symptoms described above occur, the vehicle's alternator must be checked. Diagnosis is most often performed according to four parameters:
- Checking the recoil current strength;
- Diagnostics of diode bridge operation;
- Checking the generator voltage regulator;
- Checking the field windings.
Depending on the problem identified during diagnosis, the question of whether it is advisable to repair the generator is decided.
Safety rules when checking a generator
Before you start checking a car generator, you should familiarize yourself with the basic safety rules that will help maintain the health of the diagnostician and not damage the unit. The basic rules for safe inspection and repair of a generator are as follows:
- It is forbidden to check generator valves with voltages higher than 12 Volts;
- It is unacceptable to check the generator using the short circuit method, which is also called “spark”;
- If, when repairing a generator, it is necessary to replace the wires in the wiring, it is necessary that they be of the same cross-section and the same length as the wires installed previously;
- Before diagnostics, you should check the tension of the generator belt;
- You cannot disconnect consumers from the generator if its operation is being checked. It is prohibited to operate the generator with the battery disconnected;
- It is forbidden to connect terminals “B+” and “D+”. On some generators these terminals are designated "30" and "67".
Please note: If you are not only checking the generator, but also welding work on the car body, you must completely disconnect the generator and battery from the vehicle’s on-board power supply before starting.
Checking the output current strength of the generator
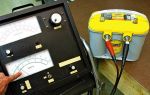
For this test of the generator, you will need a multimeter equipped with a special probe to measure the current flowing in the wire. This probe looks like a clamp that wraps around a wire, and is most often supplied with the diagnostic device. To check the output current strength of the generator you need to:
- Place the clamp on the wire that goes to contact “B+” (“30”) of the generator;
- Next, start the engine and set high speed;
- After this, one at a time, you need to turn on the electrical consumers on the car - radio, air conditioning, heated steering wheel and others. When turning on each consumer, the readings from the multimeter should be recorded;
- Next, you need to measure the strength of the output current when all consumers are turned on together (which were turned on in the previous test).
When all measurements are received, it is necessary to compare the total indicator of sequential switching on of consumers and the indicator of instant switching on of all consumers. It is considered unacceptable if the indicator for instantaneous switching on of all consumers is 5 or more Amperes less than the amount for sequential switching on.
Checking the generator diode bridge
To check the condition of the generator diode bridge, you need to switch the multimeter to AC measurement mode. Connect one test probe of the diagnostic tool to output “B+” (“30”), and the second to ground. The voltage when connecting the probes in this way should be no more than 0.5 Volts. If the voltage is higher, the diodes have probably shorted.
You can also check the diodes for breakdown. To do this, disconnect the battery from the generator and also disconnect the wire that goes to the “B+” (“30”) terminal. Next, the multimeter is connected between the disconnected generator wire and “B+” (“30”), after which readings are taken. If the discharge current of the multimeter shows more than 0.5 mA, there is a high probability of breakdown of the diodes.
Checking the generator voltage regulator
To diagnose the condition of the car generator regulator, you must use a voltmeter or multimeter in voltmeter mode. Before starting measurements, you need to start the engine, turn on the headlights and let the engine run for 15-20 minutes.
The measurement itself is carried out using probes that are connected between ground and the “B+” (“30”) terminal of the car generator being diagnosed. The obtained values are recorded, after which they must be compared with normal figures for a specific car model.
These numbers can be found in the technical documentation of the machine. For most machines, normal voltage ranges from 14 to 16 volts.
If there are deviations from the standards specified by the car manufacturer, there is a high probability of failure of the voltage regulator, in which case it will need to be replaced.
Checking the field windings
To check the serviceability of the field windings of a car generator, you must first remove the regulator and brush holder to gain access to the slip rings.
For diagnostics, you will need an ohmmeter, the probes of which should be applied to the slip rings of the generator. As a result of the test, the resistance should be at a level of 5-10 ohms.
You also need to make sure visually that there are no breaks in the winding.
To diagnose a short circuit of the excitation winding to ground, you will need to connect one ohmmeter probe to any slip ring, and attach the second to the generator stator. As a result of the measurement, infinite resistance should be displayed on the screen.
When diagnosing a generator, it is also necessary to inspect it for mechanical damage. Based on the results of all checks, the feasibility of repairing the device or replacing it with a new one is determined.
(340
Source: https://okeydrive.ru/kak-proverit-avtomobilnyj-generator-multimetrom/
How to check the generator for performance – Automotive facts
In a car, the main source of electricity is the generator. If the generator is faulty, the battery will not be recharged. As a result, electrical appliances are gradually de-energized, making it impossible for the vehicle to continue moving. That is why it is very important to always monitor the performance of this important automotive unit.
A malfunctioning generator can manifest itself in a variety of ways. If suddenly extraneous noise appears in the unit, or the battery is not being recharged fully or is not charged at all, then all these signs indicate a possible imminent failure of this device.
You need to pay attention to the generator, for example, in this case, if when you tried to start the car nothing happened, and you lit a cigarette from another vehicle.
Then you drove a certain distance, and after stopping, when you tried to start the car engine again, you failed again. In such a situation, it is possible that the generator has failed and is not charging the battery, or the battery itself has served its purpose.
Another reason could be a blown battery charging fuse.
Identifying generator mechanical problems
If you hear extraneous noise, hum, or whistle, this may be a sign of failure of the bearings located inside the generator.
There is nothing complicated here.
If you hear extraneous noise, hum, or whistle, this may be a sign of failure of the bearings located inside the generator. They must be checked for wear.
If a visual inspection confirms this, then they should be replaced with new ones. As a rule, the cost of generator bearings is not very high.
In addition to bearings, noise can appear due to interturn short circuits in the windings of the solenoid relay or stator. A short circuit of the windings to the housing can also cause extraneous noise.
Generally speaking, during the mechanical interaction of various elements of the generator, during its operation, an unpleasant sound appears. Such malfunctions can be detected by visual inspection of the generator, since such interaction of parts must necessarily leave traces.
Having assessed the severity of the malfunction, it will be possible to draw a conclusion about the maintainability of the generator. But the listed defects are not the only ones.
Checking the generator voltage
Checking the generator voltage
By checking the output voltage of the generator, you can determine the degree of its performance and find out the causes of failure.
For this procedure, a voltmeter connected to the battery poles is most often used. Sometimes, but less often, a multimeter or ohmmeter is used. The terminal voltage should be within 8 V when starting the engine.
It is advisable to carry out such measurements on a warm engine.
Then it is necessary to increase the engine speed to 3000 to activate the battery charging process and again measure the voltage at the battery terminals. If the voltmeter readings are below 12.5 V, then the battery is not charging enough, and you should think about repairing the generator.
Before dismantling a faulty generator, it is necessary to disconnect the ground terminal from the battery. Then you need to use a screwdriver to unscrew the fasteners from the voltage regulator.
Further, after dismantling the generator, it is imperative to carry out a visual inspection of it, before further more thorough diagnostics. During this, you need to clean the slip rings from carbon deposits, if any, and also evaluate the wear of the generator brushes.
One of the common causes of generator breakdown is the failure of the voltage regulator. It is recommended to change it periodically without waiting for the expiration date.
Reinstalling the generator occurs in the reverse order. After installing the generator, you need to connect the ground terminal to the battery. When the generator is mounted in its place, you need to start the car engine again and raise the speed to 3000 per minute. If the voltmeter readings are not lower than 13.5 V, this means that the generator malfunction has been eliminated.
Next, without turning off the engine, you need to check the voltage stabilization. For this simple procedure, you need to turn on the car headlights in high beam mode and measure the voltage again.
If the deviations of the voltmeter readings do not exceed 0.4 V from the previously obtained results, then there is nothing to worry about.
As can be seen from the above, all these procedures can be carried out by any car enthusiast with a standard set of tools, the skills to use them and a voltmeter.
Diagnostics of automotive energy saving circuit
Diagnostics of automotive energy saving circuit
It is possible to check the automotive energy saving circuit using various measuring instruments. In order to check the diode bridge, you need to connect a voltmeter to ground and the generator terminal.
A voltage reading exceeding 0.5 V will indicate a faulty diode. To determine their breakdown, you need to connect a voltmeter to the disconnected generator wire and to terminal “30”. If the current reading does not exceed 5 mA, then everything is fine.
To check the voltage regulator, you must first warm up the engine for 15 minutes with the headlights on. Then, using a voltmeter, you need to measure the voltage at output “30” and at “ground”. Indications vary for different vehicles.
Additionally, you can check the vehicle's regulated voltage. To do this correctly, you need to turn on all devices that consume energy, and raise the engine speed closer to maximum.
For each modification of the car, these results will be individual.
To check the resistance in the field winding, use a multimeter or ohmmeter. First you need to dismantle the brush holder and voltage regulator.
Then, after making sure that there is no damage to the winding, it is necessary to clean the slip rings, since the contacts of the measuring device are connected to them when checking the resistance.
Indicators of 5-10 Ohms are considered within normal limits.
A multimeter will help check for a short to ground. To do this, one of its probes must be connected to the slip ring, and the second to the generator stator. If there is no short circuit, the resistance on the multimeter will be shown to be infinitely large.
As can be seen from the above, you can diagnose the generator and eliminate many of its malfunctions with your own hands. For more complex repairs, it is better to contact specialists at certified service stations.
Source: http://autofuct.ru/kak-proverit-generator-na-rabotosposobnost/