We insulate the hood on the Spasiya
We insulate the hood on the Spasiya
Dmitry Kovalenko aka Dmitry_54.
In the north, insulating hoods is a common thing, which I observed back in my childhood. It must be said that this is not a Russian invention; Japanese foreign cars produced for their northern territories have standard hood insulation. These winter Spasiks proudly bear the inscription SNOW VERSION on the back door.
I don’t know what reasons prompt designers to equip cars with hood insulation, I haven’t read smart books on this subject, I can only guess. My specific reasons are: 1) in the fall, you have to warm up the car even after a short stay, which wastes gas and time.
2) After a trip, the hood heats up and if snow falls while parked, then after a while ice forms on the hood, which will melt during the next trip and freeze again, etc. Subjectively, this is annoying, although the car is not an airplane, it won’t fall due to ice :)
DESIGN
MATERIAL
The choice of material is important; during my childhood they insulated with felt. But firstly, I haven’t seen it on sale for a long time, and secondly, in my opinion, dark felt is not the best choice since the insulation should not only insulate heat, but also reflect it.
I think that the best solution is polypropylene foam with foil; it is used for thermal insulation in bathhouses, and it is sold in construction stores. It is polypropylene, because unlike polyethylene, it is able not to deform up to 150 degrees. Polyethylene begins to intensively deform already at 80 degrees, and at 200 it simply melts.
Polyethylene and polypropylene are chemical names; in practice, manufacturers use trade names, for example ISOLON. Izolon pure water polyethylene foam. Externally, polypropylene foam is usually gray, and polyethylene foam is white. The foil should be metal, and not some kind of shiny film, again due to heat resistance.
And so the material was chosen: two pieces: 1m x 1m, one foil 5 mm thick, the other regular 8 mm thick. So the final thickness would be 21 mm. Why should the thickness be like this? This is simply my assessment of reasonable sufficiency.
ATTACHING LAYERS
How to glue them together? I counted five options, who had more :) In the end I settled on a glue gun, for those who don’t know, this is a heater that melts polymer tubes.
FASTENING THE INSULATION
All that remains is to decide how to attach it to the hood. As I already said, hood insulation for the winter version is a standard thing, so apparently for them there are 9 holes for clips in the hood stiffeners. I didn’t even consider the option of gluing the insulation to the hood, because after winter there will be summer and what should I do, tear it off? The bourgeois clips were purchased at a car store.
MANUFACTURING PROCEDURE
1) remove the pattern; a piece of regular wallpaper will do. Using clips, we pin the wallpaper to the hood and cut it to the required size on the spot. Don't forget to note the protruding ribs.
2) Then we transfer the pattern to a foil piece and a regular one, respectively, this will be the 1st and 2nd layer.
3) The third layer is needed in pieces so that it fits between the stiffening ribs 4) Glue all three layers together and we get an excellent “pie” 5) Punch holes in the “pie” for the clips
6) We hang it on the hood, if necessary we cut it in place with a knife.
QUESTION PRICE:
Two pieces of polypropylene 1m x 1m, you need less, but they didn’t sell smaller pieces - 390 rubles. Clips 6 mm 9 pieces – 45 rubles.
HOW IT WAS and HOW IT BECAME
EXPLOITATION
I achieved the first goal, now when I come for lunch the car doesn’t have time to cool down and from lunch I just get in and drive. I also achieved the second goal, the hood is absolutely cold, the snow will not melt!
The main disadvantage of this design, in comparison with the same felt, is that it cannot be rolled up for storage.
http://spacio.vdlabs.ru
Source: http://www.toyotaownersclub.ru/pubs/view/85.html
Hood insulation
We are pleased to welcome you to our forum, dedicated to all owners and lovers of the Toyota Matrix!
Please read the Forum Rules .
In addition to the general Forum Rules in the “Repair and Operation” section:
1. Please fill out the Vehicle column adequately. Sometimes you ask questions on the forum or ask for help, and it can be difficult for people to answer, just because the car is not indicated in your profile or is not indicated accurately, for example, the year or modification is not indicated, or the name simply says Toyota Matrix. Therefore, the entry in this column should look like,
for example like this: Toyota Matrix 2004. (XR or XRS)(AWD-4wd or FWD-2wd)(Automatic or MECHANIC)
model year, equipment affect the answers!
2. Fill in the My City column. For a similar reason, please indicate your city of residence (for Moscow, Moscow region and St. Petersburg region too). We are not from the FSB, not from the tax office - we promise we won’t come to visit you), but it will be easier to answer your questions, and the answers will be more accurate.
Thank you for your understanding and welcome!
Page 1 of 1
- You cannot create a new topic
- You can't reply to the topic
Posted 07 November 2011 – 00:57
I came across the fact that on my Masha there is simply no hood insulation. Only the clips stick out. Apparently one of the previous owners was greedy and kept it for themselves 😀 So, the original (and there is no other one on the market) costs 7,400 wooden ones.
Not only does the price sting, but the salesman himself refused to deliver it to me when ordering, citing the fact that it was simply not in stock. I was offended by them and decided not to stick my nose in there anymore with this order.
Maybe someone installed it from other machines or knows an alternative? Of course, I’m waiting for meaningful advice like: seal the areas with guerlain or other noise-canceling material, but the anticipation of a non-aesthetic kind of joy does not add.
Sent 07 November 2011 – 01:24
I would also do this procedure...
Sent 07 November 2011 – 20:49
I’m thinking of buying Shumka sheets at the camp, there are different ones, they cost from 150 rubles, cut to size and that’s it!
Sent 07 November 2011 – 21:58
white51 (November 07, 2011 – 00:57) wrote:
Of course, I’m waiting for meaningful advice like: seal the areas with guerlain or other noise-canceling material, but the anticipation of a non-aesthetic kind of joy does not add.
What is there to admire there? There are special materials for soundproofing the hood. For example, this one looks quite aesthetically pleasing, in my opinion http://www.carobka.ru/imgs/b/8595.jpg
Sent 07 November 2011 – 23:09
Mort (07 November 2011 – 21:58) wrote:
What is there to admire there? There are special materials for soundproofing the hood. For example, this one looks quite aesthetically pleasing, in my opinion, yes, you don’t have to admire it on the ninth family of cans. I sealed it and it will work.
Although, if I had chosen a normal Shumka, I would have sealed it with isotone, and then put insulation on top. :rolleyes: Wouldn't it work on a Rafik 4 or an Avensis in the T22 body?
The most interesting thing is that it was in America. Photos from the auction confirm this.
dashaw, Shumka sheets like those shown on the nine?
Sent 22 March 2012 – 17:21
Mort (07 November 2011 – 21:58) wrote:
What is there to admire there? There are special materials for soundproofing the hood. For example, this one looks quite aesthetically pleasing, in my opinion http://www.carobka.ru/imgs/b/8595.jpgIn my opinion, that’s correct!!! I want to do this myself, it may not look beautiful, but it’s neat and at least fulfills its function, and it’s not every day that you let strangers look under the hood!!! Think about it.
Sent May 20, 2012 – 20:01
everything under the hood heats up, and all the self-adhesives fall off, so the manufacturers make the Shumka rigid and on clips (I got it from the old owner - it fell off)
Sent May 20, 2012 – 21:47
I personally glued Spt to the hood, everything holds up perfectly. And what falls off is what you put 200 rubles on the hood.
Sent 02 November 2012 – 11:35
guys, look how many clips are needed for the hood insulation. orig No. 90467-09050
Sent 02 November 2012 – 14:41
summer resident (November 02, 2012 – 11:35) wrote:
guys, look how many clips are needed for the hood insulation. orig No. 90467-09050
Mish, if I’m not mistaken, then 8 pieces
1
Sent 02 November 2012 – 20:07
KSUSHA (November 02, 2012 – 14:41) wrote:
Mish, if I’m not mistaken, then 8 pieces
Thank you ! and who will clarify))))
Sent 02 November 2012 – 21:17
I specially went and looked, 8 pieces
1
Sent 02 November 2012 – 21:39
kolyuchij13 (November 02, 2012 – 21:17) wrote:
I specially went and looked, 8 pieces
Thank you )))) (+)
Sent 02 November 2012 – 22:36
On Yapkats, in the table opposite the part number, the quantity is indicated (8) and you don’t even have to open the hood...)
http://s1.ipicture.ru/uploads/20121102/1EwL2vU8.jpg
1
Sent 03 November 2012 – 09:23
and thank you)))) where have you been before? a man walked on the street))))))))
Page 1 of 1
- You cannot create a new topic
- You can't reply to the topic
Source: http://toyota-matrix.ru/index.php?/topic/6780-%D1%83%D1%82%D0%B5%D0%BF%D0%BB%D0%B8%D1%82% D0%B5%D0%BB%D1%8C-%D0%BA%D0%B0%D0%BF%D0%BE%D1%82%D0%B0/
We insulate the hood of Toyota
Yes, winter is over, and I just started to see the light. But I taxied out the time, and here I am. I came to the garage, talked to the fishermen, listened to stories, oh, epics about the last fishing trip, they say they pulled out one pike worth 8 kg.
We watched as the drug addicts pushed their car out of the garage and dragged it away. We dug a 10-15 meter hole for melt water and directed it into the well. He heated the stove. He turned on the TV. The film began - “Gyulchatay”.
That's it, you can start what you planned.
1. Everything under the hood is dirty.
For some reason there is nothing from the factory! But many Japanese cars have factory noise. 3S-FE is considered a rather noisy engine. Yes, the remnants of vibroplast that were glued on a year ago are still visible. 2. I wash the hood first with water, then with solvent, because... There is enough Japanese soot. 3. Of any shape, but approximately into the free spaces of the hood plane, cut out and glue the vibroplast, heat it with a Hairdryer along the perimeter of the sticker, then smooth it first in the middle, then the borders of the junction of the foiled vibroplast.
ATTENTION: When using a hairdryer, be careful not to overheat the metal of the body parts, as It is very easy to overheat and it is possible that the paint (varnish) will bubble (burn).
4. It is very inconvenient to work, because... The plane to be isolated is facing downwards. There is no assistant, but I even decide to glue the sound insulation myself, and even in one piece.5. Yes, my mistake. I didn’t get the exact size, which is why the crease started. I start to smooth it from the corner, gradually, the material of course stretches a little, but not very well. Gradually tearing off the protective paper, I press down the insulating material. Halfway through I had to cut off half the sheet. I trim the edges with a “stationery knife.” After applying the sticker, I carefully blow it with a hairdryer, which makes the foil part stretch and the factory roughness disappears.
Starting to paste over the 2nd part, iii, oops, force majeure. The tee of the washer (nozzle) broke. It’s good that there was one stored away from aquariums in the garage. It’s a little out of size, but with a little magic and adjustments I can still restore the system. You can hide the washer system under the hood.
But first I’ll have some tea with homemade bread and kokushki6. I’ll paste the 2nd part in the same way.
All is ready. I haven't checked the noise suppression yet. The car is in the garage. The film is not over. What should I do? I take out the old (original) Toyota stabilizer struts, which I removed due to cracking of the anthers. I'm changing the anthers, which I once purchased from a friend of ours. The camera did not turn on, so I did not photograph the process of replacing the stabilizer strut boots.
The film is already ending with a good ending... our Gyulchatay is in good hands, he has gone home.
Let's see how long this heat-vibration-noise will last. And it looks much more aesthetically pleasing than the felt on the engine.
And good luck to you in such a simple operation.
toyota caldina, 95 onwards, – sold mazda familia, 98 onwards, – sold Matiz, 11 onwards, – sold SKODA Rapid 14 onwards, SsangYoung Actyon 14 onwards,
Audi A1 14th century
Source: http://forum.pavlodarauto.kz/viewtopic.php?p=58478
How to insulate a car hood with your own hands?
As usual, in the fall, car enthusiasts rejoice at the last warmth, since winter will soon come, which will bring frosts, and, consequently, problems for cars. During winter, very low temperatures at night are common. The car travels a large number of kilometers in winter, after which it is parked.
While the owner was doing his business, the engine had time to cool down, and when the driver arrived, the car needed to be warmed up again. This operation will have to be carried out constantly until the car owner resorts to purchasing and installing insulation under the hood.
Thanks to this improvement, the motor will cool down longer, which means it can be used even after several hours of inactivity.
Content
Why did they even come up with insulating the engine compartment?
Motorists note that in winter it is much more difficult to start the engine. Starting a cold engine is a blow to its life. And everything happens like this because in extreme cold the physical properties of oils and fuel in the car’s systems change.
Frost causes the lubricant to thicken and stop penetrating into hard-to-reach corners of the engine. Lack of lubrication negatively affects the stable operation of the engine. The piston group and cylinders will first feel that there is not enough lubrication. The so-called oil starvation causes the pistons to move “dry”. You can’t save on insulation so that you don’t have to bite yourself later.
In addition, you can insulate the hood of your Lada for only 1000 rubles. It will be much cheaper to buy and install insulation on the hood than to carry out a major overhaul of the internal combustion engine. It should also be noted that when fuel freezes, just like lubricant, it changes its physical properties.
Frozen fuel practically does not evaporate, which worsens the rich mixture. In winter, the battery suffers no less. The charge is already more difficult to release. Even poured special oil, which, as a rule, should help with starting, will do nothing in severe frosts.
What can you say about the standard insulation?
It is worth noting that the factory insulation is not designed for Russian winters. With the arrival of really severe cold weather, this material becomes practically useless. It has proven itself well in countries with warm climates, where winters with a maximum comfortable temperature are -10 degrees.
Therefore, you should choose additional insulation before winter. Some factories specially produce cars that are already prepared in advance for cold countries. Such cars are already equipped with serious insulation that can withstand severe frosts. Other versions do not have this innovation.
In order to somehow help themselves, car owners independently equip their “iron horses”.
What to choose for hood insulation?
Car owners insulate the engine compartment with any available items. The most commonly used are professional blankets and felt. Felt itself is a good insulator, but the problem is that a piece of sufficient size is difficult to find, and it is difficult to sew. This kind of insulation helps, but is not enough. You can purchase professional capes designed for this purpose.
Separate kits are produced for each brand. The main advantage of choosing branded insulation is the ease of fastening and dismantling. The production of such products is established only in small batches in private firms. Therefore, purchasing such professional insulation is not easy.
Manufacturers present two types of insulation on the market: for the hood and for the entire car. Few people use the second option, since it is expensive and difficult. Most drivers simply insulate the engine compartment with something made with their own hands.
Who produces insulation?
There are few manufacturers of hood insulation. “Standard-Plast”, “Standard” and “Hermes” have proven themselves well in the market. Customer reviews are only positive. "Standard" produces insulation materials "Isoflex" and "Tiviplen". "TiviplenP" is made of polyethylene foam and equipped with a self-adhesive surface.
In addition, this insulation contains a PVC layer, but it does not contain foil. Her absence does not prevent him from fulfilling his task. The thickness of the products varies from four to fifteen millimeters. Isoflex is not well suited for engine insulation, as it has more sound-proofing properties than heat-insulating properties.
The products of these companies are universal and can be used not only for protection from the cold, but also to get rid of noise.
What is a car blanket?
You can buy hood insulation at an auto parts store without any problems. Wide selection of models.
But, if a person has the necessary materials and is not afraid to take on unfamiliar work, then he can make such an accessory himself. This blanket is based on special cotton wool. Sometimes there is even glass wool.
Such material can be taken from a fireproof shield. In industry, glass wool is used to insulate gas and oil pipelines.
https://www.youtube.com/watch?v=934u3Im3fxE
The positive properties are that this material conducts heat poorly and does not burn. Fiberglass fabric withstands high temperatures and is also neutral with respect to various chemical liquids.
Thanks to this material, you will need to spend not 15, but 3 minutes to warm up the car. In addition, if you leave the car after a trip, you can start it without problems, and the temperature sensor will be at operating level.
The cost of such blankets is very high, but the result is a very big plus in efficiency.
How to properly insulate a hood?
To protect the engine, you can use a car blanket. But what to do if you need to insulate the hood? Experts recommend installing polypropylene foam, which is stitched with foil. This material sits on the shelves of construction supermarkets. It is perfect because it does not allow heat to pass through and perfectly protects the engine from incoming cold.
This material is not afraid of high temperatures, so it is perfect for insulating the hood of a car. The thickness varies. It is best to choose a product with a thickness of no more than 2 cm.
You can make insulation yourself from purchased material. To do this, it is necessary to give a piece of material a shape that maximally follows the silhouette of the car hood. The resulting insulation must be attached using special clips.
The remaining material is used to insulate the stiffeners on the hood.
It is important to know
Before gluing the insulation, you need to clean and degrease the surface. This will ensure that the material does not come off while moving. Now the engine will not be afraid of even the most severe frosts. The car can be operated without fear that the engine will simply need to be warmed up.
It is important to note that thanks to this improvement, ice will no longer accumulate on the hood. Plus, all the material is available anywhere. Insulation with foil applied to it is perfect for solving this problem.
By the way, this material is very cheap, and its properties are in no way inferior to professional blankets.
Tests to determine the best insulation
Experts conducted many comparisons in which they determined the best material. The “test subjects” were penofol with applied foil, a special blanket and felt. Also, native Zhiguli insulation materials were added to the competition, but they passed out of the competition, showing not the best results.
The measurements were carried out three times. In the first experiment, they measured the period of time during which the engine could warm up to operating temperature. In the second - the time during which the unit cools down. The third test was aimed at determining the degree of ignition.
All experiments were carried out at a temperature of -20 degrees.
In the first test, the car was warmed up for 10 minutes. In one case, insulation was installed, and in the second, not. According to the results, it turned out that the motor with the blanket cooled down completely in 6 hours. The standard installation insulation lasted 4 hours.
The foil material did not allow the engine to cool for 3.5 hours. This is a good result, since the motor without insulation cooled down in 3 hours. The felt achieved an average result; it cooled for 5 hours. What about the third competition - the best ignition rate for a car blanket.
Insulation with applied foil is very cheap, but it also burns very well. If a short circuit occurs, this material will ignite within seconds.
In addition, if the foil insulation is installed incorrectly and sagging appears, then the battery terminals can reach the protection and close the circuit.
We draw a conclusion
With such seemingly inexpensive and easy-to-maintain things, you can thoroughly prepare for the coming winter, which comes unnoticed. No need to wait for the first frost. You need to immediately buy the necessary materials and make patterns. Or there is an option to use standard insulation.
Thanks to this improvement, the power unit will operate more efficiently. In addition, the likelihood of breakdown, in this case, will be much reduced.
Good insulation of the engine compartment will improve engine performance and also reduce fuel consumption to autumn levels. Very frequent and sharp temperature changes will not occur, which will greatly delay the process of “overhauling” the power unit.
The article describes well all possible insulation for the hood, so after reading the article, everyone should learn a worthy lesson.
Video
Source: http://autoiwc.ru/other/uteplit-kapot-auto.html
Insulating a car hood, a step-by-step guide using the example of Toyota Corolla Spacio
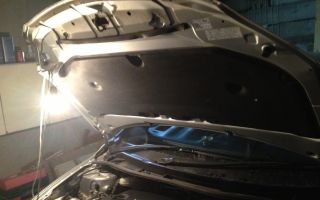
Insulating the hood in winter when operating a car in central Russia is a very important detail, as it allows you to save fuel and time for warming up the engine. We offer a step-by-step guide to insulating the hood using the example of a Japanese car.
Japanese cars produced for northern regions are often supplied with an insulated hood, as evidenced by the SNOW VERSION , usually applied to the rear doors. There are many reasons for additional insulation of the hood and the main ones are:
In our age of total lack of time and money, not every modern car enthusiast can afford to wait until the engine warms up. And in order not to damage the appearance of the car, special expensive polishing of the body will be required.
In a word, to the question: “To insulate or not to insulate?” - the answer is definitely affirmative!
Material and clips for insulating the hood
The process of insulating the hood begins with a trip to the store, where you can choose the necessary material and tools. The simplest material that can be used to insulate a hood is, of course, felt .
It is inexpensive, you don’t mind it, and, despite its unsightly appearance, it doesn’t wear out so quickly. However, its main drawback is that it is almost impossible to purchase these days.
So it is best to opt for polypropylene foam with foil , which is sold in construction stores.
The polypropylene foam material, sold everywhere under the trade name "Izolon" , is not subject to deformation even at a temperature of 150 degrees Celsius, so it is easy to adapt it to the task of retaining heat under the hood. To insulate the hood of a car, it is best to create a layer about twenty millimeters thick. It may be necessary to lay a double layer of Isolon.
So, the material has been selected, now it’s time to strengthen it in the right place. The answer is easily suggested by an inspection of the SNOW VERSION car, in which the removable insulation is secured using special clips. These clips, by the way, are easy to buy where they sell Toyota spare parts wholesale.
Insulating the hood, step-by-step process
- Cut out the pattern for the hood insulation. To make it, a piece of wallpaper that was left unclaimed during repairs will be useful.
Using clips purchased at a store that sells spare parts for foreign cars, we attach the wallpaper to the hood and cut out a piece of the desired shape, marking the protrusions of the ribs;
- Next, using a pattern, cut out the required piece(s) from Izolon;
- We prepare another piece of “Izolon” for insulation in the area of the stiffeners;
- Glue together the cut pieces of insulation;
- In the finished insulation we make holes for clips that coincide with the holes on the hood;
- We fix the insulation with clips on the hood and cut off the excess with a knife.
Thus, by insulating the hood of your car, you can get behind the wheel even in the most severe frost and go about your business, forgetting about the need for a long and careful warm-up of the engine in the cold. Well, there won’t be any ice on the hood either. That's what we need.
Source: http://autocarinfo.ru/2010/06/uteplenie-kapota-na-toyota-corolla-spacio-poshagovoe-rukovodstvo/
Soundproofing of a Toyota Corolla car according to the “PREMIUM” option
SOUND INSULATION OF TOYOTA COROLLA ACCORDING TO THE “PREMIUM” OPTION IN ONE WORKING DAY IN YOUR PRESENCE
The ANTI-NOISE network of studios presents to your attention a photo report on the sound insulation of the Toyota Corolla in one working day!
We are pleased to offer you high-quality sound insulation of Toyota Corolla STP (StP) materials in Moscow, St. Petersburg, Yekaterinburg, Kazan, Nizhny Novgorod, Chelyabinsk, Krasnodar and Tyumen, and in any of our studios the work will be carried out exactly as this is described in this photo report. All of the above work is carried out in one day and in your presence. If you cannot be present in our studio all the time of work, we will provide you with a full photo report of our work!
Many Toyota Corolla cars of various generations have visited our studios, so our masters are familiar with this car firsthand!
Toyota Corolla sedan came to us for soundproofing with complaints about a noisy engine, “empty” and ringing doors, muffled acoustics, as well as a high overall noise level in the cabin when driving at speeds above 100 km/h. Since the car is used for frequent work trips, the car owner chose the maximum “Premium” , and also ordered additional services for sound insulation of all wheel arches and fender liners.
The price for complete soundproofing of the Toyota Corolla interior according to the “Premium” option is 29,000 rubles.
The price of soundproofing the front panel with removal is 8,000 rubles.
The price of sound insulation for one pair of wheel arches and fender liners is 4,000 rubles.
The price for modifying door seals for 4 doors is RUB 3,000.
So, let's start our photo report about the sound insulation of the Toyota Corolla interior with a story about the sound insulation of the roof.
SOUND INSULATION OF THE ROOF OF A TOYOTA COROLLA CAR ACCORDING TO THE “PREMIUM” OPTION
Soundproofing a car roof is an important stage in soundproofing the interior, because in essence the roof is a huge thin-walled membrane that vibrates under the influence of oncoming air flows and creates a low-frequency background noise in the cabin.
In order to make the roof more rigid and “silent”, we carefully, working only in new and clean gloves, disassemble the upper part of the cabin, dismantle the passenger handles, sun visors, lighting lamps and free the roof lining. We then lower it as far as possible to gain full access to the outer metal.
At the same time, we under no circumstances remove the headliner from inside the car. This is not only useless for our further work, but can also lead to creases and damage to the standard casing! We carry out all work as carefully as possible - after all, cleanliness and the absence of signs of disassembly are our priority.
Before applying materials, we, of course, degrease the roof metal to ensure maximum adhesion of our materials.
As the first layer of roof soundproofing, we use vibration-insulating material STP AERO, which does not require heating (the temperature in our studio does not drop below +18 C), and after careful rolling it will reliably protect the roof metal from vibrations!
As a second layer when soundproofing the roof of a Toyota Corolla car, we use a 20 mm thick STP Biplast Premium relief sound absorber! According to the measurement results, this material is much more effective than felt, and due to the relief front surface, direct reflection of sound waves from the material is eliminated.
After applying two full layers of the most effective and environmentally friendly StP materials, the sound insulation of the Toyota Corolla roof is completed and we can carefully assemble the upper part of the cabin. At the same time, we naturally work only with clean gloves, so that not a single trace remains after our work!
SOUND INSULATION OF THE BOTTOM OF A TOYOTA COROLLA CAR ACCORDING TO THE “PREMIUM” OPTION
Sound insulation of the lower part begins with complete disassembly and sound insulation of the bottom of the Toyota Corolla. Carefully remove all the seats, center console and standard carpet. After this, we check the condition of the standard vibration isolation: we open any existing bubbles and cracks. Now we vacuum, wipe and degrease the bottom before soundproofing.
As the first layer we use the most effective vibration insulator STP AERO+. It has high vibration insulation properties, but at the same time it is very plastic and, after rolling, perfectly repeats complex surfaces! This means that there will be no bubbles or cavities with air under the material, reducing its effectiveness.
The second layer on the bottom is the sound and heat insulator STP Barrier. In different places of the bottom, the thickness of the material varies from 4 to 8 mm, depending on the criticality of the subsequent assembly. This material does not absorb moisture at all, does not rot or decompose. This is very important on the bottom!
As the final layer for soundproofing the bottom, we use a unique heavy sound insulator STP NoiseBlock with a thickness of 2 mm. This rather thin, but very, very dense material, precisely due to its high specific gravity, effectively dampens low-frequency hum, which no “soft” material can do!
After applying three full layers on the underbody, the sound insulation of the underbody of the Toyota Corolla is completed and we can proceed to assembly. We reinstall the stock carpet, center console and all seats. During the assembly process, we vacuum the carpet again and wipe the plastic, so that after our work the interior of your car becomes cleaner and fresher! Now let's move on to soundproofing the trunk of the Toyota Corolla.
SOUND INSULATION OF THE TRUNK TRUNK OF A TOYOTA COROLLA CAR ACCORDING TO THE “PREMIUM” OPTION
Sound insulation of the rear part of the cabin is important to reduce the level of noise from the rear wheels, which often prevails in modern cars.
And although this procedure is more relevant for cars in hatchback and station wagon bodies, with the Toyota Corolla sedan fully soundproofed, leaving the trunk untouched is unacceptable! After all, the metal here is thin and loud, which means the noise from the rear wheels will easily get inside the car.
The rear wing of the Toyota Corolla has a significant area, and only a small strip of standard vibration isolator is applied to this entire area. This means that the wing resonates at the slightest vibration, increasing the rumble of the arches.
The situation is similar on the opposite side. There is room for sound insulation in the trunk of a Toyota Corolla!
We apply the first layer to the degreased and dried metal - vibration isolators STP AERO+ and STP Bimast Bomb Premium. We apply the heaviest, hardest and most effective Bomb on the flat surfaces of the rear arches, and on the curved surfaces of the spare wheel well we use the soft and plastic STP AERO+!
Soundproofing the trunk of a Toyota Corolla takes us about 1.5 hours, and the bulk of this time is spent on high-quality rolling of the first layer!
We do not try to cover the entire surface with our materials, because we understand where and how each of them works.
To achieve maximum effect, it is necessary to cover about 70% of the area of the thin-walled part with a vibration isolator.
At the same time, rigid body elements, amplifiers, relief stampings and junctions of several metal parts do not need vibration isolation at all, since their resonance frequency is already quite low.
After vibration isolation of the metal, we move on to the actual soundproofing of the Toyota Coroll trunk. To do this, we use the sound and heat insulator STP Barrier, as well as the sound absorber STP Biplast. The first material is applied to the lower part of the trunk, and the second to the rear arches.
We glue a 30 (!) mm thick relief sound absorber over the entire area of the rear wings!
After applying two full layers of our materials, the soundproofing of the trunk of the Toyota Corolla is completed and we move on to carefully assembling the rear of the car. We put the rear arch trims in place, put the spare tires, jack and all accessories in place. After this, we move on to soundproofing the doors of Toyota Corolla.
SOUND INSULATION OF TOYOTA COROLLA CAR DOORS ACCORDING TO THE “PREMIUM” OPTION
Soundproofing car doors is an important stage of our work! After all, the total surface of all car doors is perhaps the largest area among its elements. In addition, gluing the Toyota Corolla doors will affect not only the sound insulation, but also the sound quality, and even the sensations when opening and closing the doors.
That's why we pay special attention to soundproofing doors! Before applying our materials, we carefully disassemble the door, remove the plastic trim, remove the standard vapor barrier film and degrease the outer metal of the doors. After drying, we apply the first layer to the outer metal - vibration isolator STP AERO.
This lightweight but effective vibration damper will allow us to significantly reduce the resonant frequency of the metal without overloading the loops with excess weight!
After carefully rolling the first layer, we proceed to applying the second. Its task is to minimize the amount of noise entering the car interior from the outside. And the STP Accent Premium material is perfect for this! It has a moisture-resistant adhesive layer and also does not absorb moisture at all, which is very important for the internal volume of the door!
We complete the work of soundproofing the doors directly by applying a third layer to them. This is a layer of STP AERO vibration isolator, which will replace the standard polyethylene film, becoming a serious barrier to both moisture and noise!
After completing the soundproofing of the doors, we move on to their plastic trim. We apply a relief sound absorber STP Biplast Premium to them. This soft and viscous material will reliably press all the wires and cables located under the casing, preventing them from rattling and squeaking. It will also effectively absorb sound waves wandering around the interior of your car.
After installing the door trims and fixing them, we wipe them down so that not a single trace of our work remains. At this point, the sound insulation of the Toyota Corolla doors is completed and we move on to the sound insulation of the hood and trunk lid.
SOUND INSULATION OF THE HOOD AND TRUNK LID OF A TOYOTA COROLLA CAR ACCORDING TO THE “PREMIUM” OPTION
Sound insulation of the hood can significantly reduce the engine noise level, because a considerable part of it enters the cabin through the thin metal of the hood and the same thin windshield.
And if it is technically difficult to increase the thickness of the windshield, then making the hood more massive is quite possible! To do this, we will apply a layer of vibration isolator STP AERO to it.
But first you need to clean and degrease the surface!
On the clean and grease-free outer metal of the hood we apply the first layer - a lightweight but extremely effective vibration insulator STP AERO.
If there is standard upholstery under the hood, we also apply a second layer. This is a sound absorber and body insulator STP Accent Premium. If there is no standard upholstery, we limit ourselves to one layer of vibration isolator. After completing the soundproofing of the hood of your car, we move on to soundproofing the trunk lid.
We apply a similar layer of vibration isolator STP AERO to it. And on the trunk lid trim there is a layer of STP Biplast sound absorber.
After completing work on the hood and trunk lid, we once again check the quality of the interior assembly: the position of trim parts, seals, controls, and the functionality of all electrical circuits that were turned off during the work. Now you can vacuum and wipe the interior again, and the soundproofing of your Toyota Corolla is complete!
SOUND INSULATION OF THE TOYOTA COROLLA INTERIOR IN THE “PREMIUM” OPTION IS COMPLETED
Since the start of work, about 7 hours of leisurely work by two or three of our specialists have passed, and the complete soundproofing of the interior has already been completed, and your Toyota Corolla has become a much more comfortable car! After visiting us you will feel all the charm of real pleasure from long trips.
Finally, the engine that bothers you with its noise will calm down.
The doors close with a more dull and “noble” sound, the interior has become solid and collected, extraneous sounds have disappeared when tapping the door trims, and the standard acoustics have become much, much more interesting! Now long journeys will become much more enjoyable for both the driver and passengers.
At speed, you can now calmly talk with the passengers in the back row, and you will now listen to the radio with pleasure at a much lower volume than before, because from now on it will not have to shout above the noise of cars passing nearby and the noise of the engine.
The thermal insulation of the interior of your car will also improve, and now the air conditioner will be able to cool the car interior that has become heated in the parking lot much faster in the summer, and the heater can warm it up in the winter.
The cost of the specified work on soundproofing the Toyota Corolla interior according to the “PREMIUM” amounted to 29,000 rubles.
This cost is complete and final and includes all the materials used and our work.
ANTI-NOISE studios in Moscow, St. Petersburg, Yekaterinburg, Kazan, Nizhny Novgorod, Chelyabinsk, Krasnodar and Tyumen .
You can read hundreds of real reviews “REVIEWS” !
In addition to sound insulation of the interior, you can order sound insulation of the front panel with removal (8,000 rubles), sound insulation of wheel arches and fender liners (4,000 rubles per pair), modification of door seals (3,000 rubles), as well as replacement of acoustics (from 3,000 rub.).
TOYOTA COROLLA ARCHES USING VIBRATION INSULATION MASTIC STP NOISELIQUIDATOR
The process of soundproofing wheel arches using vibration-proof mastic STP NoiseLiquidator is described in detail in the video.
The cost of processing one pair of arches (front or rear): 4,000 rubles.
Working time: 3 hours
UPGRADES OF DOOR SEALS FOR SOUND INSULATION
On most cars (especially Japanese and Korean), door seals are a hollow, thin-walled rubber tube, which after some time of use wrinkles and can even “cake” under the constant pressure of the door.
Obviously, even if there is no headwind whistling through such a seal, it certainly will not ensure reliable fixation of the door in the doorway.
And reliable fixation of the door in the doorway is necessary primarily to reduce vibrations of the door, its glass and metal parts. The stiffer the structure, the less vibration, the less vibration, the less noise.
To implement our plan to increase the rigidity of the standard seal (replacing the seal with something else was not even considered for aesthetic reasons), we selected cords of various diameters.
It is solid cords, not tubes, since tubes under variable loads quickly become unusable (sag or crack). And the rubber cord remains elastic. So, we pull the cord inside the hollow part of the seal.
We leave a small margin in length, since when pulled, the cords stretch, and after a while they return to their usual state, slightly decreasing in length. After installing the seal in the opening, we cut the cord in place or “loop” it if this allows us to create a gap between the opening and the door.
We have already implemented this solution on many cars, and owners respond very positively to this improvement. The doors close tighter, sit in the opening more rigidly, with a slight preload. The level of aerodynamic noise is reduced and extraneous sounds of seal friction disappear.
The cost of modifying the seals of 4 doors: 3,000 rubles.
Working time: 1 hour
If you have any questions, feel free to contact specialists from the nearest ANTI-NOISE , telephone numbers and addresses of all studios are listed in the “CONTACTS” . We will be happy to help you!
If you think that you have found a better offer for sound insulation of your car, check out the section of our website “Remaking sound insulation” , where you will find reports on our work with cars that have been in other sound insulation studios.
Sincerely, the team of the network of noise insulation studios ANTI-SHUM.RU
Source: http://www.anti-shum.ru/shumoizolyaciya-toyota-corolla