Replacing the fuel filter (the clips took 2 days to complete the job) — logbook Toyota Corolla E120 from Japan 2002 on DRIVE2
Hi all!
After studying a lot of BZs on Corolla cars, I came across one very interesting www.drive2.
ru/r/toyota/409538/logbook/ (I hope the author doesn’t mind) from which I learned a lot for myself) In particular, based on this BZ I’ll get myself heated mirrors)) but more on that later) In the end, because The mileage was approaching 60 thousand.
it was decided to change the fuel filter. Everything was already in stock from the last purchase, but I’ll throw out the names and numbers again: 1) Toyota coarse fuel filter (23217-23010) 193.14
2) Fine fuel filter from Japan Parts (FC-234S) 359.14
And so) it all starts with preparing the tool) We will need: 1) A narrow slotted screwdriver 2) A Phillips screwdriver 3) A lot of rags and a bucket of water)
Everything in principle)
P.S. there were few photos, but in the above described BZ there were a lot of photos) I did everything based on them)
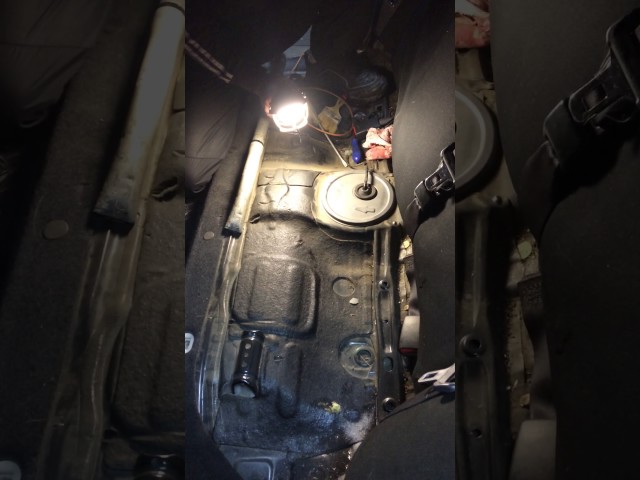
The first thing we do is pull off the sofa with a sharp movement directed upward (it is secured by two latches and one guide), don’t be afraid to pull it short)
Many people have a lot of garbage under the sofa) Mine was generally clean)
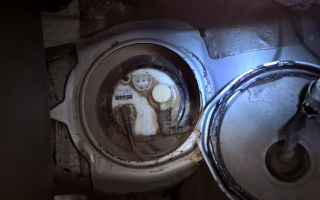
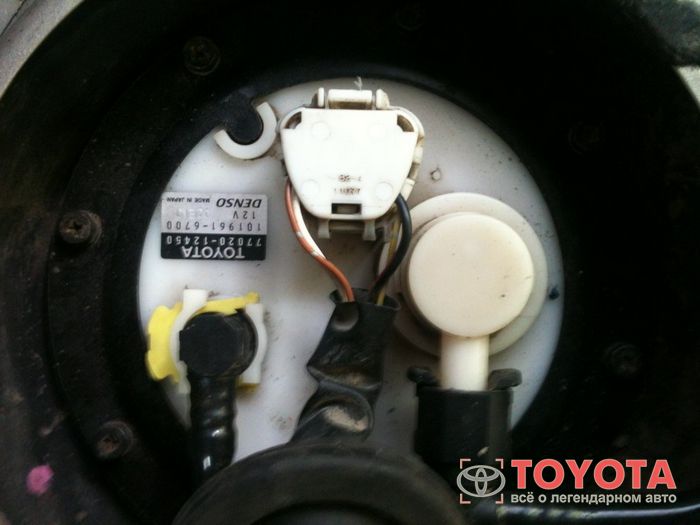
We see a metal circle with a wire in the middle. It is removed with a flat screwdriver (it is held on by sealant).
But behind the lid it was dirty... I took a rag with a bucket and quickly cleaned everything) although how quickly... it took about 25 minutes, there were a lot of stones that didn’t want to be pulled out... we don’t want this dirty stuff to get into the tank... In the end, from this unequal I came out victorious in the battle... Then the chip, 1 black tube... came off without any problems (except that a screwdriver helped remove the chip... The plastic was stiff... But with the tube that directly pumps out gasoline (with a nasty fastening like petals, whoever did it will understand), it’s easy I didn’t want to come off like that... Ideally, as intended by the manufacturer, you press two petals and it snaps off... but that’s ideal. And with me it didn’t want to come off at all, they even pulled with three pairs of hands... I almost broke the petals with a screwdriver I just didn’t get around to it, bent it, dented it, scratched this poor plastic, but it just sat there and still sits...breaking it is absolutely not recommended if you don’t want to storm the analysis)) Because. It’s not in the catalog)) We probably suffered for about 40 minutes (the phalanges of our fingers turned blue)) Because It was already getting dark - it was decided to take a timeout for the day (The next day I got to all this quickly... Again there were a lot of poses. I took aim for about 20 minutes and eventually found a way to stick a screwdriver)) You insert two thin screwdrivers under the petals - the main thing is to push them further away to lift them on the lump in the plastic) and it is safely removed) I didn’t even believe at first that I had succeeded) By the way, advice for the future, it is better to drain gasoline from the entire system by pulling the fuse on the fuel pump and let the engine run until it stalls and unscrew the tank cap, in order to relieve pressure, for what? When you remove the same pipe with the petals, gasoline will flow out... about 200 ml leaked out. — it will be unpleasant to flood the interior...
Then we unscrew, in my opinion, 8 nuts... and pull out the filter, pull it out at an angle because... the float is on a wire at a decent distance - it’s impossible to pull it out... There was a little dirt in the tank, and some strange sawdust was glued to the coarse filter (mesh))) the color was quite dark... (it was not for nothing that I bought a new mesh)
Old mesh with new one) the difference is obvious)
We bring all this stuff home (it stinks of gasoline))), we disassemble the old filter, the main thing is not to lose the rubber bands... it would be better to buy new ones, but I forgot about them.
As it turned out, mine were in very good condition, it was decided to leave them...
The only rubber band that was problematic to get was on the top of the fuel pump, deep in the filter.
It was decided to cut the filter next to this rubber band (I still wanted to cut it to see what was going on)
This is a fine filter
We put the rubber bands in the same places in the new filter and put everything together. The coarse filter went in with some difficulty (I helped with a hammer) very carefully, but I didn’t spare the lock washer that secures the filter because... I didn’t want to get dressed at all) but strength decides)
Assembled filter
During the change process, gasoline periodically leaked from the filter element directly onto the table (the room stank, of course)) So more rags)
We put everything in place, tighten the nuts and put on the tubes, there is no need to assemble it yet (you need to check whether it works or not).
We insert the key into the ignition and turn the starter a couple of times, but don’t start it, to pump gasoline through the system! I cranked it 3-4 times, in theory you should hear the fuel pump working, but I didn’t hear anything))) And we tried to start - it started with half a turn, as always in principle) Everything works, it doesn’t stink of gasoline, which means you can assemble everything is in reverse order. The metal cover is glued to the same sealant.
Bottom line: I didn’t notice any changes after the change, but I hope the engine will be better than before) According to the manual, it is recommended to change the fuel filter once every 80 thousand km
This is the end of the fairy tale, click like and comment))
Smooth roads!
Price tag: 552 ₽ Mileage 58000 km
Source: https://www.drive2.com/l/4627230/
Replacing the Toyota Corolla fuel filter –
Increasingly, designers' cars are abandoning quick-change fine fuel filters: by placing a large-area cartridge directly in the fuel module body, they include in it a service life equal to the theoretical life of the fuel pump. The only replaceable fuel purification element on such cars is the mesh at the inlet of the fuel pump. retaining the bulk of mechanical impurities. However, taking into account the quality of the fuel, it bears the main burden.
By replacing the fuel filter on a Toyota Corolla yourself, the owner can protect himself from many “surprises” in the future: as a rule, jerks during acceleration are the result of a filter that is suitable for a critical level of contamination.
Other problems that amateur writers love to scare so much have nothing to do with this: neither deterioration in starting nor the engine tripping at idle does not occur, since fuel consumption in such modes is minimal, and even with a clogged filter, the fuel pump manages to supply a sufficient volume gasoline into the highway - if the filter is so clogged that it is noticeable even at idle, then such a car would not be able to drive independently for a long time.
How often should I replace it?
Replacing the Toyota Corolla fuel filter in 120 (2000-2007) and 150 (2008-2012) bodies is not provided by the manufacturer as a routine operation. Such work is performed only at the beginning of diagnostic procedures, if a drop in pressure is detected when the load on the engine increases (that is, at times when the engine’s fuel consumption is highest).
Considering that the fuel filter is built into the body of the fuel module and is not cheap even in its non-original form, few people will decide to perform such a procedure as a preventive measure, especially since it is quite labor-intensive. We also recommend performing this procedure first when purchasing a car with more than 70-80 thousand kilometers or when there are specific signs of excessive filter contamination.
Choosing a fuel filter for Toyota Corolla
To search for non-original substitutes, you need to focus on the following factory assembly numbers:
- 120 body, production from January 2002 to June 2004 – 77024-12010
- 120 body, production from June 2004 to February 2007 – 77024-02040
- 150 body – 77024-12030
The cardinal difference here is the price: original filters for a 120 body cost about 1,500 rubles, while for a 150 body the price exceeds 4 thousand. Therefore, it is not surprising that for this particular model there is a more affordable non-original in the form of JS Asakashi FS21001 and Masuma MFF-T138.
For the 120 body, non-original filters are difficult to find, but the price of the original is not so high.
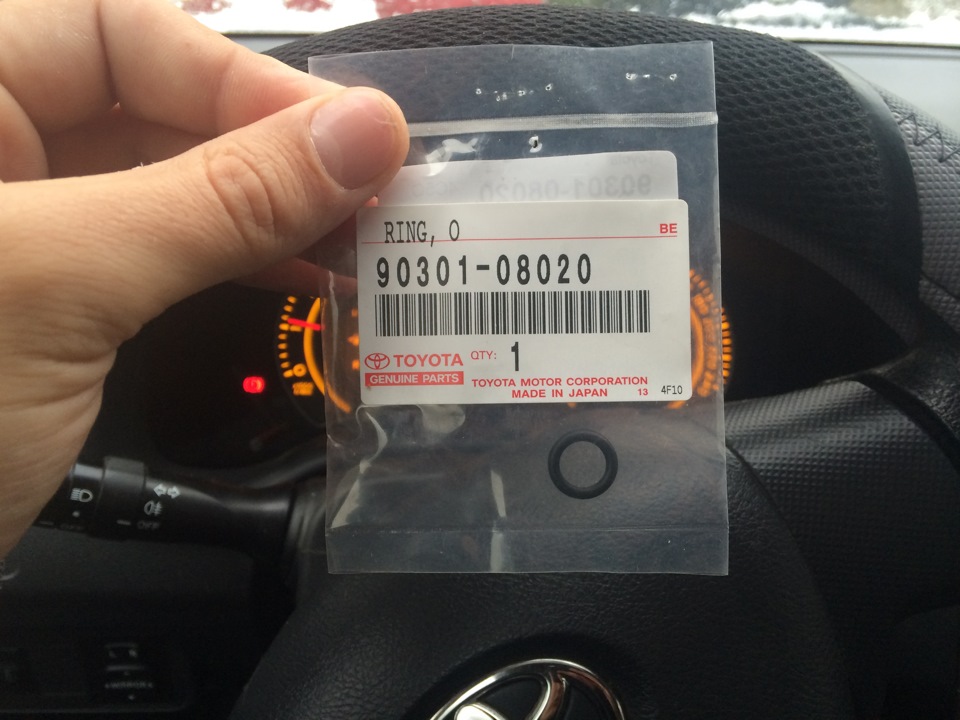
You will also need a filter o-ring - its number is 90301-04012.
Instructions for replacing the fuel filter
Before replacing the fuel filter, you need to drain the tank as much as possible, without, of course, bringing the level to critical - otherwise, along with the filter, you will have to change the fuel pump. If you do not empty the tank, then when removing the fuel module there is too great a risk of gasoline spilling into the cabin.
In the future, we will write about cars in the 150 body, since replacing the fuel filter with your own hands on both models is similar in principle, but here it is somewhat more complicated. Let's start by accessing the gas tank flap, which is located under the rear seat of the car.
On the 120 body the hatch is round, glued to non-drying mastic.
At 150 – egg-shaped, attached in exactly the same way.
Now you need to start the engine and at the same time disconnect the connector from the fuel pump - the engine will generate almost all the pressure in the line, and when disconnecting the fuel supply pipe there will be no risk of getting a jet of fuel under pressure.
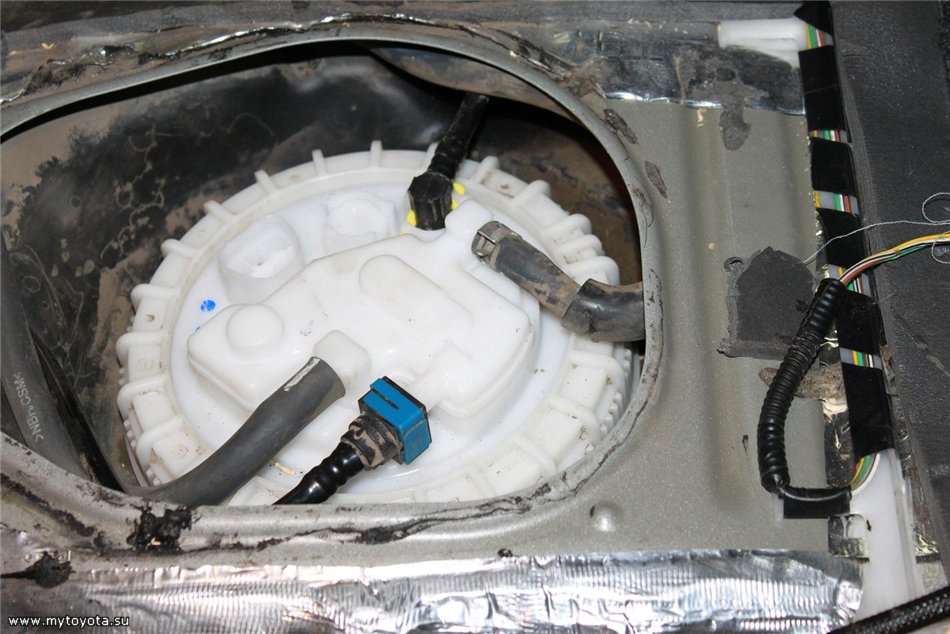
Disconnect the fuel supply pipes, fan and adsorber. Before doing this, you should wash the fuel pump cover - it is better to work with the fuel system with clean hands.
The fuel pump is held in place by a shaped nut. You can unscrew it without the original puller by giving a few tangential blows to the edge - after that you can tighten it with your hands.
We remove the fuel pump, being careful not to spill fuel into the cabin.
Now you need to separate the filter assembly from it - the order of operations is easy to understand by placing a new part next to it. Having removed the pump itself from the assembly, we change the sealing ring and the fuel inlet mesh on it.
We fix the new fine filter in place and connect the pressure pipe to it.
Now you can install the assembly in place, paying attention to the fact that it sits evenly before tightening the nut - otherwise the sealing ring of the cover will not fit tightly.
Video:
Source: https://zamenafiltr.com/zamena-toplivnogo-filtra-tojota-korolla/
Replacing the fuel filter Toyota Corolla 120 body: video, photo
Like the Toyota Corolla E150, the 120th body has a fuel filter located in the gas tank. To be more precise, this is part of the design of the fuel pump itself. In order to change the gasoline filter element, you will have to remove the fuel supply element directly.
Video about replacing the fuel filter in an E120 body
The video will tell you how to quickly and correctly change the fuel filter element, and also how to avoid making mistakes during the process.
The process of replacing the fuel filter on a Toyota Corolla E120
The process of dismantling a car fuel filter.
Before you begin the process of analyzing the procedure for replacing the Toyota Corolla 120 fuel filter, it is worth warning that car enthusiasts who cannot change the part using the instructions should contact a car service center so that a specialist can carry out the procedure.
Algorithm of actions
So, let's consider the sequence of actions aimed at changing the fuel cell on a vehicle:
- As in any case, remove the negative terminal a of the battery.
- To get to the fuel pump, which houses the fuel filter, you need to remove the rear sofa.
We remove the rear seats to get to the fuel pump.
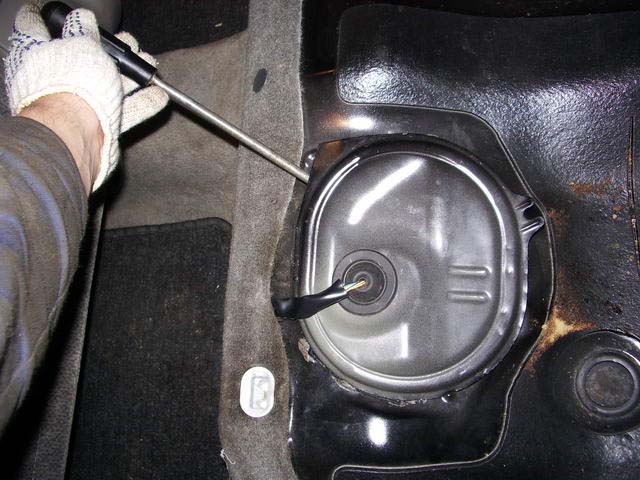
- Having reached the protective cover, you need to pry it off with a flat-head screwdriver and open it.
We pry up and tear off the protective cover of the fuel pump.
- Under the cover we find the fuel pump. To dismantle it, you first need to disconnect the power contacts.
Disconnect the fuel pump contacts.
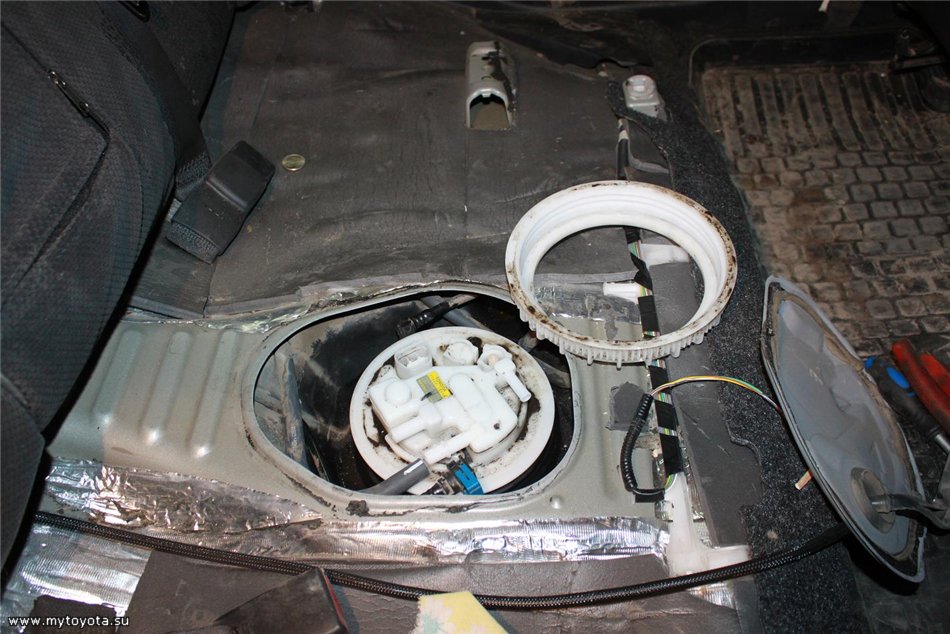
- To dismantle the entire fuel supply unit, you will have to unscrew 8 mounting screws.
Remove the fuel pump from the gas tank.
- We disassemble the fuel pump and remove the filter.
We disassemble the fuel pump and remove the fuel filter.
- We replace the element with a new part and assemble the unit.
It is worth remembering that the recommended interval for changing the fuel filter element is about 80,000 km. Considering that good gasoline is extremely rare in the CIS, it is therefore recommended to reduce the interval to 60 thousand km.
Selection of parts and articles
Old and new fuel filter article number 23217-0D090
23217-0D090 – catalog number of the original fuel filter for Toyota Corolla in the E120 body. The average cost of a product is 500 rubles.
Conclusion
Changing the fuel filter on a Toyota Corolla E120 is not so easy, since the product is located in the fuel tank. Not every car enthusiast is able to change this spare part on their own, and therefore many turn to a car service center.
Source: http://carfrance.ru/zamena-toplivnogo-filtra-toyota-corolla-e120/
Replacing the fuel filter - logbook of the 2006 Toyota Corolla 120 Hatchback on DRIVE2
I have long wanted to change the fuel filter, but I was afraid to remove the fuel hoses, because the previous owner had already climbed there, and broke off the spout on the pump, and then glued it together with a soldering iron. I didn’t know how reliable it was and therefore decided to order a contract pump BOSCH 0580313085. I bought it from Dan-Corolla, for which I thank him very much.
Such pumps are installed on English-assembled Corollas, Avensis 2003-2008. The mileage on this pump is a hundred and a few kopecks, but since I had the filter for a long time and decided to change the key. To replace it you need 1. The Toyota filter itself is 23300-0D0202. Corrugated fuel tubes from a vase, length 20 cm - 2 pcs (+1 just in case) 3. A key for unscrewing the plastic nut that holds the pump.4.
Hair dryer for heating pipes.5. Bolt 17 for pushing out the pump.
After the replacement, I learned from Allegator386 that you can buy a Masuma MFFT116 filter, which comes with tubes. I think they will be better than VAZ ones.
Making a key
Don’t be lazy to make such a key, because I removed the fuel pump 2 times, and if there was no key, I would have gasped...
Why 2 times read on. 🙂
Let's start with the replacement itself
Raise the seat and unscrew the four bolts.
We turn off the power supply, cover the filter with rags and remove the fuel hose and the absorber hose. Gasoline will flow, soak up the gasoline with a rag and remove it from the passenger compartment. It is easier to remove the absorber hose with two flat screwdrivers, sliding it under the antennae. The fuel hose can be removed more easily, there is no need to invent anything. Next, we put our wrench and unscrew the nut with a ratchet.
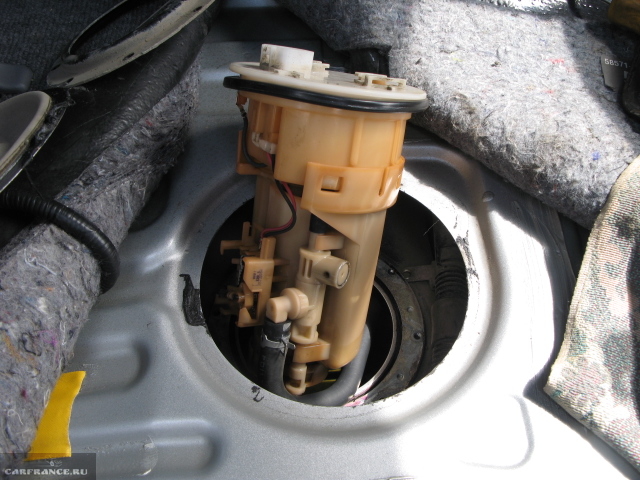
Full size
And here he is in all his glory.
We heat the long hose at the base with a hairdryer, and use a screwdriver to pry it off
Press on the 3 black fuel filter clips around the perimeter
Next, disconnect the chips from the pump and fuel sensor. By pressing the clamps, remove the sensor.
Full size
Fuel level sensor
We disconnect the filter from the pump cover, you can cut it off with a knife, but it’s better to remove everything with a hairdryer. The filter has an inlet and an outlet, you need to remember and not mix it up during assembly. Using a utility knife, carefully cut off the remaining tubes.
Use a 17mm bolt to press the pump out of the filter; if that doesn’t work, you can hit it lightly with a hammer.
Full size
Bosch 0580453484
Now we set the hairdryer to 180C and heat the tube and the wiener itself on which we put it, if you don’t heat it up, the tube will quickly cool down, and you may not have enough strength to pull it all the way. Now what not to do.
You don’t need to heat the tube with a hairdryer and put it on at the same time, so it puts on very easily, but at the same time it’s not too tight. And there is no need to warm the tube once it is already on.
Because of this, I had to buy new tubes and remove the pump again.
Next, we clean the filter with a heap of carbocleaner, and put it in place
We assemble and check that when the pump is compressed, all the tubes bend normally, and the gas pump is in a compressed state in the gas tank.
And now about my mistakes. After the first assembly and installation in the gas tank, my car started the second time. The fact is that in our cars the fuel pump turns on only when the starter is running, and the first time, due to poor sealing of the pipes, there was not enough pressure in the line. And only the second time it started.
I removed the fuel pump again. Connected a regular pump and pumped up the pressure
So that you can see where the air is coming from, I washed it with soap.
In general, I screwed up about 5 tubes until I achieved sealing, and even then it was not ideal; in an hour the pressure dropped from 3.5 to 1 kg. But this does not affect the launch. When the car did not start the first time, the pressure dropped within 1 minute.
Well, I think that's all. Go for it.
Source: https://www.drive2.ru/l/9969224/
Toyota Corolla Forum
Materials on do-it-yourself maintenance and repair of Toyota Corolla
mytoyotaClub Archivist Messages: 251 Registered: Jan 26, 2013, 10:13 pm Thanked: 6 times
#1
Post by mytoyota » 04 Feb 2013, 19:43
The mileage on the car is 110,000 km.
Signs: Eats a lot of gasoline, gets dull when accelerating, has no grip from the bottom, well, generally doesn’t drive normally)) In order to change the fuel filter we need: - The filter itself Code 77024-12050 - CARB CLEANER mesh cleaner - Two wooden ones a cap (block) and two hammers to unscrew the filter ring Well, that seems to be all we need, well, stock up on desire and strength :) We start by removing the back seat. Next, we open the lid that sits on the sealant, in my case it gave in easily. The arrow shows the ring that needs to be unscrewed, we unscrewed it together using wooden caps, in order to avoid breaking the ring. (We inserted wooden caps into the grooves of the ring and the two of us beat counterclockwise in time with hammers and the ring unscrewed well and without damage to it) Before unscrewing ,everything was vacuumed, the fuel pump terminal and rubber hoses were disconnected.[/b]mytoyotaClub Archivist Messages: 251 Registered: January 26, 2013, 10:13 pm Thanked: 6 times
#3
Post by mytoyota » 04 Feb 2013, 19:51
mytoyotaClub Archivist Messages: 251 Registered: Jan 26, 2013, 10:13 pm Thanked: 6 times
#4
Post by mytoyota » 04 Feb 2013, 19:54
TRD777
New filter.
The mesh is washed (I used the same carburetor cleaner CARB CLEANER) The mesh was pretty dirty, you can see from the photo that there were already rags in the mesh. The fuel pump, float and mesh were all rearranged from the old filter. After which everything was assembled in the reverse order.
P.S. I forgot to take a photo of the washed and clean mesh (((
mytoyotaClub Archivist Messages: 251 Registered: Jan 26, 2013, 10:13 pm Thanked: 6 times
#5
Post by mytoyota » 04 Feb 2013, 19:56
TRD777
Well, this is actually the old and new filter.
Next, everything is put back together in the reverse order and put back in place. The new filter is in place.
The filter is in its rightful place
Well, that's all!
If you have any questions please ask.
P.S. Out of curiosity, I opened the old filter (sump) and what I saw inside........what do you think???? nothing more than COAL
I haven’t disassembled the filter myself yet. In the last photos that I disassembled and there is COAL, it’s a gasoline sedimentation tank and not the filter itself. The filter itself is small and a pump is inserted into it! P.S. One of these days I’ll disassemble the filter itself and show you what’s inside Messages: 7 Registered : 04 Feb 2013, 22:07
#6
Message by that » 06 Mar 2013, 22:55
did the car drive better after all the procedures for replacing the filter? seryk76 Messages: 50 Registered: March 02, 2013, 14:01 Location: Karaganda
#7
Post by seryk76 » Mar 08, 2013, 07:01 pm
mytoyota, It looks like you replaced not only the fuel filter, but the fuel module assembly without a fuel pump, and the fuel filter you supposedly cut was something other than a fuel vapor absorber. The absorber consists of activated carbon granules and has a high absorption capacity with a small volume. Gasoline does not flow through this unit, but the vapor phase of the fuel accumulates, which is purged with a vacuum by opening the absorber purge valve (located in the engine compartment) and the entire delicate mechanism is regulated by the processor. Fuel vapors enter the intake manifold through the pipeline and burn out in the cylinders. If there is a problem with the fuel vapor absorption system, according to the manual, problems actually arise with the engine (speed, idle). Logically, there should also be a smell of gasoline in the garage and when the fuel filler neck is opened, fuel vapors escape noisily, especially in hot weather. I had this happen at the previous matsuda626. I was wondering where the fuel filter is actually installed, and most likely it is made of some kind of synthetic filter membrane and not anthracite. If anyone knows where, please post. And mytoyota, write about changes in the behavior of the car after replacing the coga module.Apanat Messages: 3 Registered: Apr 02, 2013, 11:47
#9
Post by Apanat » April 22, 2013, 3:50 pm
Good afternoon,
mytoyota, how did the process of tightening the retaining ring go after installing the fuel module? I had to tinker with it quite a bit. with the visible absence of thread breakage, after two or three turns of tightening, he began to twist it with wooden caps by hand and the ring was torn off the thread. Share how this final stage went for you.
kantima Honorary Toyota Driver Messages: 3065 Registered: 08 Jan 2013, 15:55 Car: Sold Corolla 150, 1.6, 12.2007; RAF4, 2015, 2.0, Comfort, mechanics,
Toyota oil 0W-30
Location: Moscow Thanked: 24 times Thanked: 19 times
#13
Post by kantima » April 28, 2013, 8:16 pm
140 sput, did not change and do not intend to ON-Vladislav Honorary Korollovod Messages: 382 Registered: 08 Jan 2013, 01:43 Car: Corolla 2007, 1.4 l, manual transmission Location: Azov RO Thanked: 2 times Thanked: 1 time
#14
Post by ON-Vladislav » Apr 29, 2013, 11:18 pm
here is the number: 23217-76040. Someone on the mytoyota.su forum shared...di1978Honored Korollovod Messages: 385 Registered: 09 Jan 2013, 12:00 Car: 1.
6 2007 manual transmission Location: St. Petersburg Thanked: 1 time
#15
Post by di1978 » April 30, 2013, 09:35
This is the mesh from an antique Corolla. And on our 150, from the photo it looks more like the LFB613ZE1 mesh from Mazda. But I have a question about the fasteners.
ON-Vladislav Honorary Korollovod Messages: 382 Registered: 08 Jan 2013, 01:43 Car: Corolla 2007, 1.4l, manual transmission Location: Azov RO Thanked: 2 times Thanked: 1 time
#16
Post by ON-Vladislav » Apr 30, 2013, 3:34 pm
then I think you need to take the fuel pump and go to the store to select a coarse filter specifically for the pump hole. There will be no difference if gasoline is filtered by a non-native mesh HelloWorld Messages: 30 Registered: Jan 20, 2013, 1:16 pm Thanked: 1 time
#18
Posted by HelloWorld » 03 Jun 2013, 23:55
I also replaced the filter, now when I fill up a full tank, gasoline flows out from under the ring and flows down the chute on the gas tank under the car.
I tightened the ring tightly (I specially made a puller), the rubber ring is also in place...
di1978Honorary King Leader Messages: 385 Registered: Jan 09, 2013, 12:00 Car: 1.
6 2007 manual transmission Location: St. Petersburg Thanked: 1 time
#19
Post by di1978 » 04 Jun 2013, 09:00
Could it be too much that the rubber gasket has been crushed?
Go
Source: http://tc-club.ru/viewtopic.php?t=250
Fuel filter Toyota Corolla
This passenger car model of Japanese origin has been pleasing us since the beginning of 1966 to this day. For trouble-free operation over a long period, it needs timely, high-quality care and maintenance. Therefore, let's talk about Toyota Corolla fuel filters and changing them.
The design of the fuel filter and its necessity
Its presence in the fuel system of any vehicle is an important point. It plays a big role in the reliability and trouble-free operation of the motor. Two such devices can be installed in the car. One is installed at the inlet of the fuel pump, the other can be installed in the line, between the pump and the fuel rail.
The first of them is mounted in the pump housing, so to change it it is necessary to remove it from the gas tank. The design features of filter modules depend on the modification of the car body. Thus, Toyota Corolla cars with the 120th and 150th bodies, produced in the period 2007-2008, have different filter modules, but the principle of replacing them on both modifications is absolutely the same.
Fuel filters have the same purpose when installed in a vehicle's power supply system; this is to clean the incoming gasoline or diesel fuel into the engine cylinders from various impurities, solid particles, and water. This ensures long-term, trouble-free engine service.
Signs that replacement is needed
If you read the car's operating instructions, it states that the change should be made after 80,000 km.
It happens that the filter element lasts more than 100 thousand km, and sometimes it has to be thrown away earlier than the specified period. This depends on the quality of the fuel used.
While the quality of domestic automobile fuel does not meet Japanese standards, this must be taken into account when operating the car.
What should the owner of a Toyota Corolla be wary of during its operation? Do not allow the machine's fuel filters to become completely clogged. This can reduce the service life of the engine. Contamination does not occur immediately, but over a period of time. Therefore, the following signs of machine behavior should raise alarming concerns:
- Uneven operation of the engine in different operating modes.
- Slower acceleration, worsening vehicle dynamics.
- Instability when starting the engine.
- Spontaneous engine stop.
About fuel filters for the Toyota Corolla model
Retail chains and automobile markets can offer a choice of at least three different types of such products for Toyota Corolla.
Today, their production is established in China and Korea, and original products from Japanese companies are supplied for sale. There is no consensus among owners about which one is better or worse.
Everyone believes that the most important thing is the correct installation of the sealing gaskets from the entire kit.
The choice of a fuel filter for a Toyota Corolla depends on several factors, such as the modification of the body and the year of its manufacture.
Products for cars manufactured before and after 2007 are strikingly different in design. There are such fuel supply products that changing the filter element is only possible with the whole module.
Since 2008, Toyota Corolla has been equipped with modules that allow changes to be made separately from the fuel pump.
About changing the filter element on the 120th Toyota Corolla body
I would like to immediately warn you about the strictest compliance with fire safety rules when performing this operation. Before starting work you need to prepare:
- Empty container for remaining fuel.
- Rags or rags.
- New filter element.
- Sealing gaskets.
- Flathead and Phillips screwdrivers, as well as a vacuum cleaner.
To begin removal, you need to lift the rear passenger seat of the car, and then remove the underbody upholstery. It is secured with two screws and a piston. To release them, you will need a “10” key and a screwdriver.
The mat is lifted onto the seats and secured with seat belts so that it does not interfere with further operations. It is necessary to remove the foam layer under the mat. After this, the fuel pump cover will become visible, which can be easily removed if you pry it off with something sharp. Do not begin replacement until all debris accumulated there has been removed with a vacuum cleaner.
The pipes are removed from the fuel pump and the remaining gasoline is drained into an empty canister. After this, you should start the Toyota Corolla engine to completely exhaust the available fuel in the power system. After stopping the engine, turn it over with the starter several more times and remove the terminals from the battery.
After this, you can begin to remove the block with the pump. You will need the help of a Phillips screwdriver and an “8” wrench, as well as a rag or rag for spilling gasoline. When the block with the pump is removed, you can begin to dismantle the filter element.
It is necessary to release two latches on the body and several clips. Then you can easily remove it from the case with little effort. Having taken out the old one, insert a new fine cleaning element into the fuel pump housing. At the final stage, the fuel intake mesh is washed and purged, and assembly is performed in the reverse order.
Differences between similar operations on the 150th Toyota Corolla body
Performing similar operations on this modification is somewhat different from the previous model. The main difference is in the fuel pump cover, where the metal cover has been replaced with a plastic one. To remove it, just use wooden sticks to turn the lid counterclockwise.
Then they begin to replace the fine filter of the fuel pump in the same way as the previous model. Some parts may differ from the 120th body, but the principle of replacement remains the same.
Only timely care and maintenance of the Toyota Corolla will ensure its reliability and comfort during operation.
Source: http://CorollaCar.ru/ekspluataciya/osobennosti-zameny-toplivnyh-filtrov.html
Replacing the fuel filter on Toyota Corolla 120, 150
The causes of malfunctions in the fuel system in a Toyota Corolla 120 may be different. Diagnosis and timely prevention of problems with fuel supply is important. The performance of the fuel pump directly depends on how regularly the Corolla fuel filter is replaced.
Structurally, car manufacturers do not provide for quick replacement of the fuel filter element. Engineers combined it into a single unit with a pump and placed it inside the tank into which fuel is poured. Therefore, to replace it, you will need to remove the lower part of the rear seat. To do this, pull the sofa up, freeing it from the plastic fastenings.
Replacing the Corolla 120 fuel filter does not differ in the procedure from the same operation in a Toyota car in the 150 body. However, the latter modification will require a special U-shaped puller. It can be replaced by a self-made device made from wooden planks. It is necessary to unwind the knot.
When purchasing a filter element, you should know exactly its article number, since some elements from the old unit will need to be installed on the new part. Give preference to the original manufacturer. Filters for Toyota 120 and 150 are not interchangeable despite the fact that they perform the same functions.
Disassembly procedure
Under the rear seat in the central part there is a hole through which access is made to the place where the unit is attached.
To avoid damaging the electrical connector, open the cover using a flat-head screwdriver and then unfasten the electrical connector. Only then will it be possible to remove the cover.
Next, replacing the Corolla 150 (120) fuel filter is carried out as follows.
- Disconnect the two fuel lines.
- Using a socket or Phillips screwdriver, remove the mounting bolts located around the cover.
Do not rush to open the lid. Usually a lot of dust and dirt accumulates around it. Prevent it from getting inside the tank. - Carefully remove the assembly without damaging the float and bracket with L-shaped filter.
Place the filter on the table. Use a small flathead screwdriver for disassembly. - Remove the top cover. To do this, bend the latches one by one.
- Disconnect one connector located in the unit body.
- Detach the lower housing.
- Remove the rubber plug.
- Remove the retaining ring holding the L-shaped mesh.
- Remove the float assembly by pulling it towards the top of the filter.
When dismantling the cleaning elements, pay attention to how the rubber seals are located (they are not included in the package of the new filter). It is best to replace them with new ones, but if this is not possible. It is allowed to rearrange from the old node.
- Remove the remaining parts of the assembly, including the fuel pump, and install it in the new filter housing.
- Install a new filter into the tank.
- Connect the heat pipes and electrical connectors.
Replacing the fuel filter on a Toyota Corolla 120 (150) requires an open fuel tank, so the use of open fire and some electrical appliances is strictly prohibited.
Signs that replacement is needed
When may it be necessary to replace the fuel filter on a Toyota Corolla 150 (120)? The first signs of the need for this procedure may be a slight decrease in power, especially when moving up.
It would also be a good idea to measure the pressure pumped by the fuel pump into the fuel line. Obvious symptoms of the need to replace the fuel filter are:
- deterioration in acceleration dynamics;
- increased fuel consumption;
- At low speeds, traction deteriorates;
- The engine may have difficulty starting after being idle or stall at idle.
Be sure to focus on the mileage of the vehicle. It is recommended to replace the Toyota Corolla fuel filter upon reaching 80 thousand km. However, if you monitor the quality of fuel, you can easily overcome the 120 thousand km mark.
If the material was interesting or useful for you, publish it on your social network page:
Source: http://jrepair.ru/to-toyota/zamena-toplivnogo-filtra-na-toyota-corolla-120-150
Toyota Corolla 150 body replacing the fuel filter video

Toyota Corolla is a real bestseller in the global auto industry. At the moment, this Japanese-made model is included in the Guinness Book of Records as the best-selling car on our planet.
In many ways, such success came to the Corolla thanks to its reliability, unpretentiousness and good characteristics. However, even taking these theses into account, one cannot be ruled out - the model, like any other, requires periodic maintenance.
In today's material, our resource decided to take a closer look at one of the types of maintenance for Toyota Corolla in 120 and 150 bodies, concerning the replacement of the fuel filter.
How does the fuel filter work on a Toyota Corolla?
Due to the fact that their service life depends on the quality of the fuel entering the injector and engine, the Japanese did not shy away from organizing fuel filtration on their iconic model.
The Toyota Corolla fuel filter is a completely standard unit of this type for an ordinary passenger car.
The fuel filter of the model is located in the gas tank and is part of an entire fuel module, which combines:
- two filter elements: one is designed for coarse purification of fuel from moisture and large impurities, the other is for fine filtration of fuel from smaller fractions;
- gasoline pump;
- fuel level sensor;
- fuel lines.
The fuel filter for Toyota Corolla 120 and 150, as a rule, is changed in conjunction with a one-piece fuel module.
However, structurally it is a collapsible part, so if desired, any owner of the model can purchase exclusively filter elements, dismantle the unit and replace only them, saving significantly on repairs.
Choosing between possible replacement options is solely the prerogative of the car owner, but it is simply necessary to carry it out from time to time.
When is it time to change the filter?
Due to the fact that the Corolla fuel filter in any version is built into a special module, it is extremely irrational to disassemble it each time for inspection.
Taking this factor into account, the question reasonably arises: “How do you know when it’s time to change the filter?”
Answering it is not so problematic, because it is enough to carefully monitor the behavior of the car and identify some signs in its operation that directly indicate a malfunction of the fuel unit.
For the most part, the symptoms of a dirty fuel filter on a Toyota Corolla are manifested by the following malfunctions:
- difficult or completely impossible to start the engine “cold”;
- Unstable engine operation at idle;
- reduction in the dynamic and power characteristics of the vehicle when driving;
- the appearance of characteristic shaking, jerking and spontaneous braking of the car while driving.
It is worth noting that in the case of a fuel filter malfunction, the nature of the symptoms is not spontaneous, but gradually intensifying. That is, the appearance of these signs in one day is impossible, of course, if the breakdown of the fuel filter is taken into account. If the symptoms are spontaneous, you should look for the problem in other parts of the car, but definitely not in the filter.
According to official information from the Japanese manufacturer, the fuel filter of Toyota Corolla 150 and 120 should be serviced within the following periods:
- every 15,000-20,000 kilometers - check the condition;
- change every 80,000 kilometers.
Replacing the unit
Replacing the Toyota Corolla fuel filter is a procedure that is quite feasible for any owner of this model. It does not have any special subtleties or difficulties, but to carry it out competently, it is useful to know the essence of the whole event.
First you need to prepare properly. Preparatory activities include:
- Purchasing a new part. It is advisable to take original fuel filters for the Corolla. Their articles are as follows:
- coarse filter element - LFB6-13-ZE1;
- fine filter - 77024-12050;
- gaskets and rings - 77169-0D030, 9030108020, 9030104013;
- fuel module assembly - 23221-11050.
- Preparing the necessary tools. You will need the following tools:
- flat and Phillips screwdrivers;
- broom or vacuum cleaner;
- rags;
- container for gasoline;
- directly replacement parts.
- Ensuring fire safety. Before starting repairs, be sure to make sure that there are no sources of open fire near the repair site and that there is a working fire extinguisher nearby.
Having carried out a basic list of preparatory measures, you can begin the repair. Directly replacing the fuel filter of Toyota Corolla 120 and 150 bodies is carried out using the same algorithm of actions, which looks like this:
- First of all, park your car in a spacious and well-transparent place that satisfies the previously mentioned safety precautions. Having done this, secure the car with the handbrake and open the rear doors wide.
In general, replacing the Toyota Corolla fuel filter in 150 and 120 bodies is quite simple. The main thing in the repair process is to know the basic nuances and have some skills in carrying out this procedure.
In today’s material, all the features of replacing the fuel filter on a Toyota Corolla have been discussed, so we strongly recommend that you adhere to them when carrying out repairs of this kind. We hope the article was useful to you.
Good luck on the roads and in repairs!
Video about replacing the fuel filter in Toyota Corolla 120 and 150:
Watch an interesting video on this topic
Source: https://eurasia-avto.ru/toyota-korolla-150-kuzov-zamena-toplivnogo-filtra.html