Replacing the Toyota Corolla alternator belt
Often, motorists are faced with a problem in the form of a whistle from under the hood; this sound is caused by a large load on the electrical part of the car in the form of turning on the high beams of the radio and emergency lights.
Subsequently, it turns out that the problem is the weakened tension of the generator belt or its wear and tear. This belt is needed to generate battery power.
How does this happen?
Several pulleys are connected to each other by a belt, after which the pulley with the torque element is the driving one, and the second one is the driven one. The belt covers the upper side of both pulleys, rotation occurs from the drive shaft to the driven one. The part of the belt that rotates towards the drive pulley is tensioned significantly more than the driven side.
Features of the alternator belt
One of the advantages of the belt is its ability to withstand large overloads; it also has a silent design and smoothness of jerks. The pulleys help drive the power steering pump, alternator, water pump, and air conditioning compressor.
But the belt also has disadvantages, the most important thing being its short service life.
Also, if the belt is poorly tightened, this leads to its rapid wear and the inability to operate the machine normally.
When the belt is under high tension, this creates additional stress on the shafts and bearings. Accordingly, after all this, the car begins to gradually fail.
In order for your iron horse to work properly, you must constantly check the condition of the alternator belt. There should be no cracks or drops of oil on it.
To check the state of the belt tension, it is necessary, with the car turned off, to press your finger on its free branch, applying a force weighing approximately 6-12 kg. If the belt bends 7-10 cm, then everything is in order. If you notice folds, bulges or peeling on the outside of the belt, this means that it has outlived its usefulness.
When to change the Toyota Corolla alternator belt
It is advisable to change the alternator belt every 50,000 km. Do not try to save on purchasing a belt, since its price is affordable for everyone who owns a car, and failure to replace it in a timely manner may lead to aggravating circumstances, after which you will have to completely repair the entire car.
The belt may break even while the car is moving, but the car will not fail instantly; it will continue to operate until the battery runs out. But it will run out very quickly, since it will not be supplied with electricity.
That is why, try to treat the replacement of this item with care.
Undoubtedly, this procedure can be carried out independently, despite the fact that the speed of the car depends on the belt, even for a novice Toyota Corolla driver this will not be a problem.
Replacing the alternator belt
To replace the alternator belt on a Toyota Corolla, you must do the following:
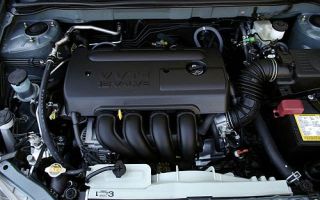
- The alternator belt is located under the hood on the left side of the engine. Be careful and avoid possible injuries and burns; before work, you must turn off the ignition and disconnect the negative cable from the battery. It must be checked for wear and possible damage.
- If there is no reason to worry, you need to check the tension level. Due to the weakening of the belt, it slips on the generator pulleys and shaft, which causes a very loud whistle. To properly check the belt, you need to press on it and tighten it slightly; to replace it, remove it completely.
- When checking the tension of the generator drive belt, the nominal deflection should be as follows: new - 7-8.5 mm; used – 11-13 mm; The power steering pump drive belt is as follows: new – 8-10 mm;
used – 11-13 mm.
- It is important to know that the new alternator belt must be similar to the failed one, otherwise you risk damaging your vehicle.
- To remove a worn alternator belt, use a wrench to turn the tension roller clockwise to the side.
- A new belt purchased must be installed in exactly the same way as the previous one. Next, you need to tighten the belt using the tension bolt, but do not overdo it, as this is fraught with consequences.
- After finishing work, carefully check whether you have forgotten the wrench under the hood of the car.
- Connect the negative cable to the battery.
- To check the reliability and correctness of the new belt, you need to turn on the car and load its electronics to the maximum: turn on the headlights, air conditioning, music and hazard lights, then press the accelerator pedal. If the whistling continues, then the belt needs to be tightened further, but if not, then you have coped with the task perfectly.
Read also
Source: http://grandrepairauto.ru/zamena-remnya-generatora-toyota-corolla.html
Toyota Corolla Forum
Engine operation (and everything on it), problems, repairs and spare parts
sabramo Posts: 6 Registered: Jan 12, 2013, 9:30 pm
#1
Post by sabramo » Jan 15, 2013, 10:20 pm
Thanks for the detailed report. A little off topic, but still. My dealer recommended replacing the pump drive belt because... after 65 thousand km, cracks appeared there. They cost about 4 thousand rubles. A little expensive for the strap. Guys, can anyone suggest inexpensive, high-quality analogues?
Last edited by Karp on January 16, 2013, 00:02, edited 2 times in total.
Reason: the question could have been asked in the smoking room... and since there isn’t even a topic about belts yet, it’s better to create one.
kantima Honorary Toyota Driver Messages: 3065 Registered: Jan 08, 2013, 03:55 pm Car: Sold Corolla 150, 1.6, 12.2007;RAF4, 2015, 2.
0, Comfort, mechanics,
Toyota oil 0W-30
Location: Moscow Thanked: 24 times Thanked: 19 times
#2
Post by kantima » 16 Jan 2013, 05:56
I bought the original for 1600.
BegemotHonorary member of the club Messages: 966 Registered: January 15, 2013, 14:23 Car: Corolla 150 MMT with transformation into Hyndai ix35 Location: Krasnodar Thanked: 1 time
#3
Post by Begemot » Jan 16, 2013, 03:57 pm
Taking into account that belts cost 100 thousand, and the only available way to screw up a belt is to jam the pump, then IMHO the place for belts is near the pump, so to speak, a complicated case of replacing the pump...
PS. I bought a belt at 30k when I changed the pump, and I’ve been driving it in the trunk for three years now.
Sergeich Messages: 76 Registered: 07 Jan 2013, 15:53 Location: Berezovsky, Sverdlovsk region.
#4
Post by Sergeich » Jan 16, 2013, 4:36 pm
I was offered to change the belt at 40...TO (before that at 30...TO they said that cracks appeared, but up to 40...TO you can drive), after which I bought and put a new belt in the trunk, still (55 t.km) came in handy (ttt).
And so, the opinion of a mechanic I respect: “Any rubber part will crack after a short time, as long as it doesn’t break.
And for everything else, just don’t be lazy in a timely manner to inspect and diagnose the chassis, attachments and, listening to official dealers, divide everything by 18!!!”
TC 1.4 – 2008 – manual
adeo Messages: 25 Registered: 11 Feb 2013, 22:12 Location: St. Petersburg
#5
Posted by adeo » 12 Feb 2013, 18:51
Tell me what does it mean: automatic belt tensioner??? Doesn't it really need to be regulated at all??? And if you’re not too lazy to write: what is the principle of action? The fact is that something is creaking under the hood - they advised me to tighten the belt, but then it turned out that an automatic belt tensioner was installed. Engine 4zz-fe.
VITALY Messages: 45 Registered: Jan 19, 2013, 5:31 pm Car: 2008 4ZZ-FE Location: Karelia
#6
Post by VITALY » 12 Feb 2013, 21:36
the word AUTOMATIC itself means that there is no need to adjust/tighten the belt
The tensioner ensures uniform belt tension regardless of temperature. very good thing.
I changed the belt at 90 thousand. Using a key (I don’t remember how much), the roller is pressed out and the belt is removed and installed. Everything is just outrageous
adeo Messages: 25 Registered: 11 Feb 2013, 22:12 Location: St. Petersburg
#7
Posted by adeo » Feb 16, 2013 10:03 pm
How long is the belt? And what analogue would you recommend, otherwise the original is a bit expensive)))
48RONINModerator Messages: 2629 Registered: 07 Jan 2013, 17:42 Car: May 2007
1.6 manual transmission 17 Location: Lipetsk Thanked: 39 times Thanked: 65 times
#8
Post by 48RONIN » Feb 16, 2013, 11:27 pm
adeo, what kind of engine do you have? Here are the recommendations of the confectioners from Maytoyota.
The first three for the 1.6L engine with Conder: 48RONINModerator Messages: 2629 Registered: 07 Jan 2013, 17:42 Car: May 2007
1.6 manual transmission 17 Location: Lipetsk Thanked: 39 times Thanked: 65 times
#10
Post by 48RONIN » Feb 16, 2013, 11:45 pm
The Japanese document speaks of a resource of 100 thousand and periodic replacement during such runs. * - For those who do not have Google translations, here is a literal translation of the hieroglyphs:
The timing belt, the rotating parts inside the engine (crankshaft and camshaft), is connected to rotate.
Continued use of the belt in a state of degradation, deviation between rotating parts and flying tooth fractures, as this can lead to serious damage to the engine, must be replaced on a periodic basis. In addition, since the belt cover, etc. are considered in daily checks difficult to understand.
Let the condition worsen during regular checks.
VITALY Messages: 45 Registered: Jan 19, 2013, 5:31 pm Car: 2008 4ZZ-FE Location: Karelia
#11
Post by VITALY » Feb 16, 2013, 11:56 pm
adeo wrote that the engine is 4ZZ-FE6PK1693 Contitech 1987947979 BOSCH
I installed BOSCH. Price approximately 600 rubles. was
adeo Messages: 25 Registered: 11 Feb 2013, 22:12 Location: St. Petersburg
#13
Posted by adeo » 17 Feb 2013, 15:42
I came to the store today and asked: is 6PK1693 Contitech, 1987947979 BOSCH available? but according to the article number 6PK1693 Contitech, they gave me some German 6PK1690. Gone. Already getting into the car, I decided to go back and check by VIN number, fortunately there was an opportunity - it turned out to be the wrong belt...48RONINModerator Messages: 2629 Registered: 07 Jan 2013, 17:42 Car: May 2007
1.6 manual transmission 17 Location: Lipetsk Thanked: 39 times Thanked: 65 times
#14
Post by 48RONIN » 17 Feb 2013, 19:26
adeo, that’s what I’m talking about, the manufacturers’ markings indicate the length quite informatively, 1693 is not your size, choose from the list using my links and if Contitech, then 6PK1705. Although the original “Toyota” length is 1700mm*, perhaps 5mm does not play a role.
* -if the car is equipped with air conditioning.
48RONINModerator Messages: 2629 Registered: 07 Jan 2013, 17:42 Car: May 2007
1.6 manual transmission 17 Location: Lipetsk Thanked: 39 times Thanked: 65 times
#16
Post by 48RONIN » Feb 17, 2013, 10:44 pm
Year of issue?
In principle, it makes no difference, according to the catalog, part number 90916-02664 is exactly the same as 1ZR-FE. I think it will do.
GroSSHonorary member of the club Messages: 667 Registered: 07 Jan 2013, 19:11 Car: Nissan Qashqai+2 Location: Ryazan, Kolomna MO
#18
Post by GroSS » 17 Feb 2013, 22:53
90916-02679 Drive belt 2zr-fe
90916-02604
90916-A2016
90916-A2018 Pumps are the same as 1ZRFE.
*Amendment. Chinese Corollas with engines 1ZRFE, 2ZRFE, 3ZRFE have the same belts 90916-C2002, which means the belts on all engines are interchangeable.
Branch of the forum on social media VKontakte networks
Go
Source: http://tc-club.ru/viewtopic.php?t=150
Toyota Corolla alternator belt: replacement, causes of breakage
Almost every fourth average vehicle owner has encountered a situation where an unfavorable combination of circumstances leads to actions that cannot be postponed. Drivers of Toyota Corolla cars are no exception, and this time we will consider what needs to be done in order to avoid breakage or wear of the alternator belt.
This problem occurs if the belt is too tight or, conversely, does not make good contact with the pulleys that depend on it.
Such carelessness of the car owner leads to rapid wear of the above-mentioned part due to mechanical loads exceeding the norm.
If this trouble does occur, then with a failed generator, the car will still be able to function for a short period of time due to the electricity remaining in the battery. But this additional “opportunity” can be fraught with consequences.
What causes a belt to break?
This happens due to the fact that the part of it that rotates in the direction of the driving pulley is stretched much stronger than when rotating in the dependent direction. As mentioned earlier, there is excessive load on the belt, which is the result of a break. In this case, the replacement of this part cannot be delayed even for a short period of time.
Advantages and disadvantages of the Toyota Corolla alternator belt:
- + withstands fairly high mechanical stress;
- + operates without unnecessary noise;
- + ensures uniform jerking;
- — short service life;
- — accelerated wear and the inability to drive a vehicle in case of insufficient belt tension;
- - gradual disruption of the functionality of the car due to constant additional load on the shafts and bearings due to excessive stress.
Alternator belt replacement process
The driver of this car model must change the alternator belt every time the car has driven 50 thousand kilometers. During this distance, the owner should periodically check the condition of the belt, which indicates whether replacement is currently necessary.
The test is as follows: after turning off the vehicle, you need to press your finger on its accessible part with a force equal to a mass of at least 6 kilograms; if the shape of the tested part is deformed by 7-10 mm, then its condition is in perfect order.
Replacing the alternator belt on a Toyota Corolla:
- Before starting work, turn off the ignition and disconnect the negative cable from the battery to avoid burns and other unnecessary injuries.
- The part you need is located on the left side of the engine under the hood. In non-emergency situations, first check the belt tension.
- Nominal deflection of generator belts in different states:
- 7-9 mm – new belt;
- 10-13 mm – previously used;
- 8-10 mm – initial production state of the power steering pump drive part;
- 10-13 mm – previously used power steering pump drive belt.
- The faulty part must be replaced with exactly the same one. This is very important for the proper functioning of your vehicle.
- Using a wrench, turn the tension roller clockwise and remove the worn part.
- The new part is installed in the same way as the old one was removed.
- Tension the new part using the tension bolt, but be very careful and gentle.
- Return the car to the condition it was in before performing the first step (connect the negative cable to the battery), and then make sure that the replacement was done correctly.
Replacing the Toyota Corolla alternator belt Link to main publication
Source: http://CorollaCar.ru/remont/dvigatel/remen-generatora-tojota-korolla.html
Malfunctions, repair and replacement of the Corolla 120, 150, 170 generator
13.03.2018
The Toyota Corolla generator structurally consists of an outer aluminum casing, inside of which there is a coil, a stator, and a rotor on roller-type bearings. During operation, alternating current is converted into direct current using a diode rectifier (bridge). The generator brushes transmit voltage from the regulator to the rotor.
Thanks to such coordinated work, the unit constantly produces voltage in the range from 13.8 to 14.7 Volts. The final indicator directly depends on the actual engine speed. The higher they are, the greater the voltage and vice versa.
The generated current is consumed by the on-board network of the technical device, and is partially used to charge the battery.
Even the most minor breakdown in the operation of the generator leads to rapid discharge of the battery and its complete failure. The car stops moving independently and the engine does not start. An indicator on the center instrument console indicates a malfunction in the electrical power system.
Corolla 170
Malfunctions and diagnostics
The symptoms are typical for most generators, including the Japanese brand Toyota Corolla. Faults are classified into two main groups: with a mechanical or electrical component. Among other breakdowns, the following should be highlighted:
Difficulty starting the engine
The first sign of unstable work. The algorithm for supplying current from the source to the battery is broken. A “depleted” battery is unable to fully crank the starter for a long period. The opposite effect cannot be ruled out when the battery receives excess charge, which also has a detrimental effect on the unit as a whole. The electrolyte boils away in the “jars”, the plates fall off, and a short circuit occurs.
On Japanese Toyota cars, a relay is preinstalled that scans the voltage online. As soon as the indicator drops below the “12V” mark, the engine will not start, despite the full operation of the battery and starter. Ignorance of this subtlety leads to the fact that an inexperienced master initially follows the wrong path.
Ultimately, the repair cannot be completed due to an error at the beginning of the algorithm.
A faulty alternator is the cause of battery drain
Flickering light, dim lighting fixtures
The second “obvious” symptom of a malfunction in the power supply system. True, it is noticeable only at night. There are two reasons for unstable operation: the generator or the drive belt. To a lesser extent, the reason is insufficient fixation of the instrument panel and contact connectors.
A yellow indicator on the center console
indicates a breakdown.
The battery is not fully charged; it is impossible to determine the exact resource. In practice, the duration does not exceed several tens of kilometers.
As soon as the battery stops supplying current and a spark to the spark plugs, the car will stop. To extend the “trip” as much as possible, turn off all third-party consumers of electrical energy.
Standard Toyota Corolla batteries become unsuitable for further use after the first, deep discharge.
Characteristic whistling of the drive belt
In most cases, the reason lies in a weakening of the tension, a broken belt, deformation of the tensioner, or mounting of the generator.
Ignoring the malfunction leads to incomplete charging of the battery due to the lower rotation speed.
At the same time, we expect problems with the air conditioning system supercharger, crankshaft and camshaft. A total of four mechanisms are driven, not counting the deflection rollers.
Burning smell from under the hood
Light smoke from the engine compartment is a sign of a short circuit in the electrical wiring or a jammed drive belt on the generator.
Ringing metallic sound from under the hood
Due to systematic loads and elevated temperatures, rolling bearings fail prematurely. The lubricant is pushed out of the cavity, the rollers jam, and the bearing is destroyed. The cause of the squeak can also be a faulty damper coupling. It is necessary to carry out diagnostics to identify the breakdown.
Uncharacteristic hum
Noise is produced by electrical appliances that operate unstably. The hum is identical to the sound of high-voltage wires when they are energized.
Selecting a generator for Corolla 120, 150, 170
You can purchase a new power supply for your car yourself; you don’t have to go to a workshop for help. Using the original markings below, you can select the part. Difficulties will arise when trying to install a non-standard generator for the purpose of tuning or local upgrade. However, such cases are exceptions rather than the rule.
Generator for Toyota Corolla E170
To select the correct spare parts, we recommend that you always check the vehicle’s compliance with the VIN number; this is the only way to virtually eliminate the possibility of error, since even on cars of the same modification and the same year of manufacture, sometimes spare parts from different series are used that are not always the same in parameters and fastenings.
Toyota Corolla 120
- DENSO DAN1079;
- HC-PARTS CA1965IR, JA976IR, JA142IR, CA2027IR;
- Corolla alternator brushes FCC JNDX34, 27370-35060, FCC JNDX37;
- WAIglobal 13482N, 13486N, 13649N;
- NIPPARTS J5112050, J5112088.
150, 170
- Generator coupling HELLA 10PT 368 069-084, 9XU 358 039-071;
- generator HC-PARTS KB1928KL (Denmark, 14V, 100A, PL78 connector);
- Krauf WAN1926, ALN2027;
- generator brushes 27370-31220, JNDX-34, 27370-75060, JNDSX-41 FCC, 27370-35060, LONG LN2737035060, SAT PREMIUM 2737035060, 2737031220, 27370-54450, 2737 0-02010;
- TRW LRA03353;
- DENSO DAN1019, DAN1057, DAN1011, DAN1061.
Based on the given article numbers of original spare parts, the owner can independently purchase the part he needs. All you need to know is the year of manufacture of the car and the series.
What to do if your belt whistles
The whistling of the drive belt is the first sign of wear and damage. Sometimes installing a new drive does not bring results, since the reason lies in damage to the pulley or idler roller. It is important to accurately identify the source to prevent similar breakdowns in the future.
What needs to be done: check the Corolla generator belt, its integrity, degree of tension, troubleshoot the shaft, inspect the pulleys, check for mechanical damage. You can replace the belt yourself, if you have experience and repair skills. There is no time for independent maintenance - entrust the work to service station professionals.
Corolla generator repair and replacement
The decision to repair or replace with a new generator is made by the technician after dismantling the unit from its original location. Once assembled, it is impossible to inspect the condition of the internal parts.
Preparatory stage: a set of automotive tools, sockets, ratchet, flat-tip screwdriver, screw puller, hammer, caliper, multimeter.
We dismantle the generator, unscrew the three nuts on the back side, and remove the cover. Disconnect the insulating sleeve of the power contact. Using a multimeter, we check the resistance of the rotor winding on the rings. The data range is 2.3 - 2.7 Ohms, if the arrow goes to infinity, we replace the rotor, since the winding is damaged.
Second stage: checking the condition of the diode bridge: one wire to ground, the other to the rectifier. We change places one by one. In good condition, the bridge should only allow current to flow in one direction. If in both, replace it, since the fault is obvious.
To replace the rectifier bridge, unscrew the five mounting bolts from the rear side, remove the brush holders and the generator bearing. It is mandatory to diagnose the generator brushes and their protrusion size. If the indicator exceeds 4.5 mm, replacement with new ones is required.
The final stage: shorting the rotor winding to ground. We connect the multimeter probes to the rotor and slip rings. Resistance is maximum. The diameter of the rotor slip rings is not less than 14 mm.
This is the minimum acceptable size. Based on the data received and the results of the analysis, the technician makes a decision on repair or replacement.
Sometimes it is cheaper to install a new generator than to restore an old one.
Subject to proper use, the service life before the next repair is 80 - 100 km. The data are averaged, as they differ in each specific case.
Source: http://jencar.ru/toyota/corolla/generator-remont.html
Toyota Corolla Alternator Belt Replacement
Read and see how to change belt on a Toyota Corolla
A motorist should never forget that a car is, first of all, a technique, and it has the ability to break down, and usually always suddenly. Although can a breakdown be expected? When planning a long-term or short-term trip, you must always be prepared for any surprises.
This could be a tire puncture, a brake water leak, or a broken alternator belt , so that these little things do not spoil the driving memory.
Drivers often observe this situation, specifically a whistle from under the hood. The story of the owner of a Lada Priora hatchback, replacing the alternator belt on a Priora with power steering. The sound is especially amplified by the load on the machine's electrical system. For example, if the radio is on, or the hazard signal is on, or the high beam headlights are on.
All this indicates wear or low tension on the alternator belt .
When the alternator belt needs replacing:
- if unusual sounds are heard from under the hood, the belt needs to be tightened or replaced;
- There is also a scheduled replacement of the alternator belt on the Toyota Corolla.
- It is carried out after the car has driven for about sixty or eighty kilometers;
- A broken alternator belt definitely requires replacement.
After making sure that the belt requires replacement, you need to decide how to actually change it. The Toyota Corolla alternator belt may fail due to wear. Replacing it requires a few simple steps. The easiest way is to go to a service station and a specialist will make a replacement.
Or you can try to do it yourself.
Replacing the Corolla E120 drive belt
Replacing the drive belt on Toyota 3ZZ-FE (1ZZ, 4ZZ) engines.
Replacing the drive belt on a Corolla
My daughter and I stopped in the garage for ten minutes to change the belt . Actually, the alternator belt on a Priora car with power steering is replacing the alternator belt. She filmed this process on her phone
The first time you need to take this seriously and understand how to change the alternator belt on a Toyota Corolla .
Procedure for replacing the belt:
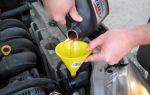
1) the first and most important thing is to purchase a new belt .
2) then lay out the tools so that everything is at hand;
3) second, turn off the engine and remove the ignition key. How to remove and replace the heater radiator, generator belt roller, Toyota Avensis. Next, you need to open the hood and disconnect the negative cable from the battery;
4) the alternator belt is located to the left of the engine, so you need to visually inspect it again and make sure that it needs to be replaced;
5) the main nuance of the entire procedure is to sketch or photograph the attachment points and location of the generator belt before removing it. This will eliminate the possibility of errors when installing a new belt;
6) then we proceed directly to the replacement.
In order to remove the old belt, you need to loosen the tension. This is done by removing the tensioner bolt. Replacing the tension roller and belt of the 4zz-fe generator. This bolt does not need to be unscrewed at all; the belt will loosen immediately after turning the bolt;
7) visually compare the old and new belts, they must be identical;
8) if the belts are the same, we begin the installation process, the belt must be put on the pulleys;
9) using the tensioner bolt, we adjust the belt tension on the Toyota Corolla;
10) after all this, connect the battery and check that the installation is correct. To do this, we put a load on the car’s electronics. Replacing the alternator belt on a Priora with power steering. If the whistle is heard again, you need to increase the belt tension. Proceed carefully and with extreme caution so as not to break the belt .
the alternator belt installation process is completed. If you act carefully and carefully, with a little effort, then this repair is quite possible to do yourself. The car is in good working order again and can be driven.
Source: http://sis26.ru/zamena-remnja-generatora-tojota-korolla/