Why does a car's suspension need stabilizer bars?
When a car corners, its body tilts to the side. The angle of inclination, properly called the roll angle, depends on the magnitude of the centrifugal force, as well as on the design and elasticity of the suspension.
The load can be distributed equally on the left and right suspension elements, and then the roll angle will decrease. The element that transmits force from one strut or from one spring to another is the stabilizer. The design of such stabilizers is described in more detail below.
Their design, in theory, consists of an elastic bracket and two rods. And the rods are also called “racks”.
Typical anti-roll bar
To understand how a stabilizer works, it’s easier to immediately study its structure:
Suspension stabilizer in modern cars
The couplings 6 allow the tubular bracket 5 to rotate freely. The bracket, in turn, is connected to the shock absorbers, but not through couplings or hinges, but through struts 3. Each strut or rod is the stabilizer strut discussed in the title.
Note that the shock absorber strut plays an important role in the design of a modern suspension. The shock absorber itself not only dampens vibrations, but also serves as a guiding element.
Roughly speaking, the entire suspension “walks” along the shock absorbers, but if you remove the stabilizer links, little will change. Unless the roll angles observed in turns increase.
There were cases when the rod broke while driving, and the owner did not notice the deterioration in controllability.
Types of stabilizer struts
The racks themselves (rods, links) can be completely symmetrical (Fig. 1). Then they can be “flipped” and also rearranged from left to right. The design of most cars uses asymmetrical racks, which, however, can be rearranged from left to right. And the most “difficult” option is when the left and right posts are different (not shown in the photo).
Stabilizer struts for VW GolfStabilizer struts for VAZ cars
It is clear that the most vulnerable part of the stabilizer is its struts (rods). In some cars, their service life is 20 thousand km. It is recommended to inspect and check these parts more often - every 10 thousand km. But a breakdown can occur in the middle of this interval.
What stabilizer bars are has been fully explained, but we’ll look at where to look for them in the car right now.
How to find struts in the car itself
You can take it and see what is under the bottom of the Lifan crossover. The struts of two stabilizers, front and rear, are not covered by anything:
X60 rear suspension links
In general, this option, when the racks are not protected, is atypical. Moving units are usually covered with anthers, corrugations, and covers. But the symmetrical rods shown in the photo contain a pair of anthers directly in their design:
Boot of symmetrical stabilizer link
Loss of boot seal is not the most common defect. However, this option cannot be ruled out either.
What do struts look like in Chinese cars?
You need to remember a banal rule: the rear stabilizer struts are never symmetrical, unlike the front ones. For example, this is what the rear linkage looks like in a Lifan X60:
Rear left link
It is impossible to move such a unit from the left side to the right, and it is even more impossible to turn it over during installation. These “prohibitions” do not apply to the A-pillars. But they, that is, the front struts, fail more often. So, everything is logical.
In the spare parts catalog, each of the racks is designated by one number. That is, it is considered one detail:
Car name Front right Front left Rear right Rear left| Lifan Solano | B2906200 | is the same | – | – |
| Lifan X60 | S2906210 | is the same | S2916260 | S2916210 |
| Lifan Smily | – | – | F2916210 | is the same! |
The Solano sedan has springs installed at the rear, and there are no struts in the stabilizer design. They are not present in the front suspension of the Smily car either - the bracket here is “threaded” into the lever couplings:
Front suspension design Smily
Each of the couplings, designated 10, does not interfere with the longitudinal movement of the bracket. This option is suitable for small cars.
We identify all problems ourselves
It has already been said here that the most unreliable, most “fragile” part of the stabilizer is the struts. This is done on purpose so that in the event of an accident, the least damage can be caused. Let's name the main symptom accompanying the breakdown of stabilizer struts or rods.
This is a dull knock that occurs when driving over any irregularities, potholes and even small stones. And sometimes the car begins to roll out of the roll worse - conclude that one of the struts has already been torn off.
But knocking will be observed in 90% of cases! It can come from both the front and rear suspension.
Creaks and crunches, especially when cornering, usually indicate the destruction of the boot. But the defect itself, we repeat once again, is rare. The hinge shown in the photo will begin to deteriorate over time. And the creak should then turn into a grinding sound.
Ball joints inside the struts
Video on replacing the front stabilizer link
Source: http://LifanoVod.ru/chto-takoe-stojki-stabilizatora-i-kakuyu-rol-oni-vypolnyayut-v-avtomobile/
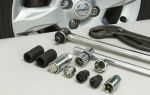
Do-it-yourself replacement of stabilizer struts
Modern vehicles must have excellent performance characteristics, which include: ease of control, stability, reliability, safety and road comfort. All these characteristics are provided by the depreciation system, which consists of:
- stabilizer's pole,
- springs,
- ball joints
- and other details.
Stabilizer struts are special devices that dampen forward waves during movement that arise from vibrations of different parts of the car when driving on uneven surfaces.
The stabilizer struts are attached using special lugs in the front suspension and on the rear beam.
The approximate service life of racks, which are installed at manufacturing plants, is 120,000 kilometers.
How is one of the car suspension elements replaced, namely the stabilizer struts? To begin with, we note that there are no major or minor parts in a car’s suspension. All parts are equally important, especially for modern cars, since the design of these cars is very complex.
Therefore, as soon as one of these parts fails, it must be replaced or repaired as quickly as possible. Stabilizer struts are also no exception, because their untimely repair or replacement can cause very serious damage to the car and can even lead to an accident.
Fortunately, the stabilizer links can be easily changed yourself.
How to check stabilizer links?
This will be evidenced by the characteristic knocking sounds that the car will make when driving around corners and on bumps.
When choosing new stabilizer links, you must be careful, since you should only use those struts that are designed specifically for a specific car model.
You may find that the racks are the same both in length and in angle of inclination, but this does not mean that they are interchangeable. There are two articles on the topic of diagnostics on our website: how to check shock absorbers - here and diagnostics of a car suspension - here.
Replacing rear struts.
So, when starting to replace the stabilizer struts located at the rear, it is necessary to raise the car’s axle using a jack or lift, so that the suspension will come into balance.
However, keep in mind that when the wheels are lifted, the stabilizer will pull the suspension down, so even if you manage to remove the rear strut, it is unlikely that you will be able to put on a new one correctly, so you must first tighten the handbrake and place stops under the rear wheels.
In order to unscrew the strut, you need to grab the edge on the ball pin. You can unscrew the stand only when you are sure that the tool is fixed. Often the thread on the finger is very rusty, so it can be sawed off with a grinder or a hacksaw.
Remember that you cannot cut the strut itself, as the CV boot may be damaged. Then the old one is taken out and a new rack is installed. After this, the nuts are not tightened completely, but simply tightened.
They are subject to final tension only when the car is lowered and the replaced part is in the required position.
By the way, the anthers, which are located on the hinges of the stand, protect it from dust and moisture. They can be damaged by a broken key when tightening the rack, which can lead to accelerated wear of the part. Therefore, manufacturing plants often install protective shipping caps on the anthers, which are removed before starting the work described above.
After the struts have been replaced, you don’t have to adjust the wheel alignment, since replacing these parts does not affect the angle of the wheels; here is an article on how to make wheel alignment yourself.
Replacing front struts
When you have decided on the choice of struts, it's time to start removing the old ones and installing new front stabilizer struts. It’s not difficult to do this yourself, even if you don’t have a garage. However, before replacing the stabilizer struts, it is better to buy spring ties and removable steering rods: this will greatly facilitate the process of replacing the struts.
First, the front wheel is removed, but be sure to place a brick or stump under the car for insurance. The support cup is unscrewed with a special key. The strut is disconnected from the hub and steering rod: three nuts are unscrewed from the strut and pull it down.
After removing the strut, you need to remove the springs and unscrew the nut from the rod. The gas wrench must be placed as high as possible, since burrs accidentally made on the rod from above do not reach the shock absorber seal. The racks are assembled in the reverse order.
After all this work, you will still need to adjust the wheel alignment; this can be done either independently or at a technical station.
Video on replacing stabilizer struts
I recommend reading:
Source: http://autoepoch.ru/remont-i-obsluzhivanie-avto/zamena-stoek-stabilizatora-svoimi-rukami.html
Replacing the stabilizer link • MOYMEKHANIK.RF
The main purpose of the stabilizer struts is to dampen forward waves that arise in various parts of the car body when driving over uneven terrain. To attach the stabilizer struts, special lugs are provided, located in the front suspension and on the rear beam.
The design of the parts may be different, and this does not greatly affect the cost of replacing the stabilizer link , but in any case they have a central part made of metal or even plastic, at the ends of which attachment points are located. The latter are two hinges, either a bushing and a hinge, or a thread at one end and a hinge at the other. When replacing stabilizer struts, shock absorbers are usually also replaced due to approximately the same service life.
Types of racks
At the moment, the most common are racks with tips, which are ball joints. The hinge joint consists of a steel ball pin resting on a plastic bed, treated with a special temperature-dynamic lubricant, and pressed on top with a metal or plastic cap.
At the point where the tip attaches to the metal rod there is a thin section, often called a “neck”.
This is necessary so that in the event of a certain excess of the prescribed load on the rack, the rod breaks in this particular area.
If this does not happen, the strut may turn into a metal rod that can pierce the underbody, enter the interior and cause harm to people.
Structurally, the racks are:
- Symmetrical;
- Strictly individual.
In the first case, elements can be used on both the right and left sides of the axis. Others are intended only for specified wheels. This should be taken into account and parts should not be confused during the installation process. There are also front and rear racks. Longer elements are installed on the front suspension because the suspension travel is longer. The rear pillars are shorter.
The approximate service life of the racks is set by manufacturers within 120,000 km. But this point is very subjective, since it depends on the driving conditions of the car.
In city conditions and with asphalt pavement, the service life of parts is longer, in rural areas it is shorter. Accordingly, taking into account the state of domestic paved roads, replacement of stabilizer struts is required more often than in Western European countries.
The “survivability” of the struts is also influenced by adjacent suspension elements: levers, shock absorbers, etc.
Keep in mind
In most cases replacing stabilizer struts , the price of which is quite affordable, requires certain skills, special equipment and time. For quick and high-quality repairs, it is better to contact specialists and call a specialist to come out.
An experienced mechanic will replace the front stabilizer struts with a guarantee and use certified consumables.
The cost of such work is low; when performing work on site, the steering end can also be replaced without a wheel alignment to save money.
New stabilizer link
Stabilizer link wear
Comparison of old and new stabilizer link
Our recommendations
When driving on uneven road surfaces, in front of potholes and ditches, the brakes must be released, thus unloading the suspension.
When the wheel rotates, the unevenness is smoothed out quite well due to the optimal redistribution of energy. In such cases, it is sometimes better to “throw it out” a little.
Before replacing the stabilizer links, it is better to purchase original parts and not save money when purchasing them. You should also periodically inspect the chassis.
What signs indicate that you need this service?
The services of an experienced mechanic will be needed if, during acceleration, rattling sounds occur in the suspension area, knocking sounds when driving over uneven surfaces, or if body roll increases.
List of main works
- the car is placed on an overpass or in a pit;
- wheels are removed;
- threaded connections are treated with anti-corrosion penetrating liquid;
- the axle nut is unscrewed;
- the rack is being replaced;
- connections are tightened to a specified torque.
Preparing to replace the stabilizer link
Work on replacing the stabilizer link
Replacing the stabilizer link
Source: https://MyMechanic.ru/services/stabilizer-replacement/
How to change stabilizer bars on a Volkswagen Polo sedan video
Very often, owners of the Polo sedan complain about the poor functioning of the suspension, as well as its individual elements. Although manufacturers assure that it is very durable and reliable, numerous analyzes of the external and internal condition of the chassis do not confirm this.
The front-mounted independent Polo suspension, which is mounted on most modern models, is, in principle, quite high quality. But strong rolls when turning and even its appearance do not guarantee long-term operation.
At the rear of the Polo there is a semi-independent suspension made of cheaper materials and with very poor sound insulation, but the advantages are that even a beginner can repair it in 30 minutes.
Many car owners associate the main problems and incidents with the suspension with incorrect behavior of the anti-roll bar. In addition to this, problems often arise with stabilizer links and rubber bushings, as they are of rather poor quality.
Polo stabilizer design and its features
The stabilizer, as an addition to the chassis, appeared immediately after the cars were released, when they were able to reach speeds of 20 kilometers per hour. Large rolls when turning were the main reason for the invention of this part.
The stabilizer, first of all, protects the car from rollovers and rollovers, since, as is known, the load on the inner wheels when turning is reduced, and on the outer wheels, on the contrary, it increases.
At such moments, the car sways strongly and this device helps to keep it on the road without allowing it to roll over.
How to replace stabilizer bushings on a Polo sedan yourself
According to the recommendations of experts, bushings should be changed every 30 thousand kilometers, or if there are signs of failure. It is very important to replace two bushings at once.
Replacing the stabilizer bushings yourself will take no more than half an hour and will not require any special skills.
We will need the following tools and devices:
- A crowbar or strong iron beam about a meter in size.
- Keys for “10, 13, 15, 17, 24, 27” with heads
- Screw jack or lift.
- Treatment of fasteners with special lubricant WD-40 or its equivalent.
- Graphite grease.
- Several (2-3) metal clamps.
Step-by-step replacement of bushings
— Raise the front of the car with a jack or lift.
— Remove the front wheels.
— Unscrew the bolts of the bracket, which is hidden behind the nuts.
— Remove the bolts holding the bracket in the mounts.
— Lift the bracket and remove the bushing.
Install a new bushing and mount all unscrewed parts in reverse order.
Watch an interesting video on this topic
Source: https://eurasia-avto.ru/kak-pomenyat-stoyki-stabilizatora-na-folksvagen.html
Replacing stabilizer bushings with your own hands - causes of wear
The vehicle suspension is one of the most important parts, subject to heavy loads and taking on all the impacts of a rough road. Thanks to its operation, the driver can feel comfortable and not be afraid that while driving the situation may get out of control.
However, due to heavy loads, especially when driving on bad roads, which is not uncommon in the Russian Federation, its parts often fail. The most common problem is broken stabilizer bushings.
Let's take a closer look at why this happens and how the stabilizer bushings are replaced.
What are stabilizer bushings used for?
The answer to the question: “Why are stabilizer bushings needed?” very simple. The main purpose of this car part is that it will influence the noise produced by the suspension while the vehicle is moving, reducing it. It is also used to attach the stabilizer to the body of your car.
A special feature of this part is its elasticity. Due to the fact that it is made of materials such as polyurethane or rubber, you will not hear any sounds when changing the height of the wheel. The choice of these materials allows you to attach the stabilizer to the body, despite the constant change in the distance between them that occurs during bending.
Why change stabilizer bushings?
If you do not take care of timely replacement of stabilizer bushings, the following will happen. When entering a turn or driving on a road with an uneven surface, the vibration of the suspension that occurs during these actions will not be dampened. The finishing of the stabilizer bar on the car will also worsen.
You can drive with such faults for quite a long time, but this will wear out the life of your suspension and the entire car much faster. In addition, the failure of stabilizers leads to the appearance of rather unpleasant noises.
How to identify signs of wear on stabilizer bushings?
The occurrence of the following malfunctions during vehicle operation will indicate a malfunction of the stabilizer bushings:
- The first warning sign when the bushing fails will be the appearance of noise and knocking in the suspension when the car is moving. The difference from faults with shock absorbers will be that the suspension will knock not only when passing uneven surfaces, but also when entering turns with a small radius. Moreover, the road surface in this case may be in good condition and not contain any unevenness;
- If you do not pay attention to the knocking sound in the suspension and continue to drive the car, the situation will begin to worsen. The noise in the suspension will increase and will be caused by any change in the position of the suspension. This will happen due to an increase in cracks and deformation of the stabilizer bushings;
- the next step will be the appearance of a large roll of the car when making turns with a small radius. The body will sway violently;
- In some cars, play in the steering wheel may occur. This is due to their design features;
- Further ignoring the situation will lead to the car's controllability deteriorating. The car may start to move from side to side when trying to make any maneuver.
You should not bring your car to this state, because this endangers not only your life, but also the safety of other road users.
If you do not have the opportunity to take the car to a service center for diagnostics, you can verify that the bushings are faulty on your own. To do this you need:
- find an overpass or pit for inspection. In this case, you should not use jacks or lifts. The fact is that the test will be accompanied by strong rocking of the car and strong physical impact on the stabilizer. Because of this, the car may lose stability and jump off these devices. At best, this can result in injury, at worst, death. Therefore, to ensure maximum safety, it is recommended to use overpasses and pits;
- Next, a visual assessment of the condition of the rubber bands is carried out. If any cracks or breaks are detected, such a part must be replaced;
- Next, you need to make a strong physical impact on the stabilizer. Tug it in different directions. Creaks and noise accompanying this action will indicate the need to replace the bushing.
How to change stabilizer bushings?
Repair of rubber bushings is cheap and can be carried out at a service center with the help of experienced specialists. This procedure should not put a big dent in your budget. If you prefer to carry out repairs on your own or you do not have the opportunity to visit a service center in the near future, then you need to perform the following steps:
- drive the car to a pit or overpass. You can use a lift or jack, but these are less reliable and safe methods;
- loosen the wheel bolts next to which the faulty parts are located, and then remove them;
- the next step is to remove the nuts that secure the strut to the stabilizer. At the end of this procedure, disconnect the strut and stabilizer;
- Next, you should pay attention to the bracket mounting bolts. The rear ones need to be loosened and the front ones unscrewed;
- The next step is to remove dirt and clean the installation area for the new stabilizer bushings. Carry out this procedure carefully, because the service life of the new bushings will depend on the quality of its implementation;
- Lubricate the bushings on the inside. To do this, you can use silicone spray or regular soap solution;
- insert new bushings into their mounting location and return the vehicle to its original condition.
The most difficult part is the process of replacing the front bushings of the vehicle. During its implementation, additional difficulties may arise due to the design features.
What can cause stabilizer bushings to fail?
The main reason why these parts wear out is the strong impact on them during machine operation of the following factors:
- exposure to chemicals. It occurs due to its close location to the wheels of the car. During movement, various chemical compounds come into contact with the open parts of the bushings. The most dangerous of them are substances used in winter to remove ice on the road. They have a strong impact on the structure of the bushings, promoting their drying out and the appearance of cracks;
- strong mechanical impact. The quality of roads in each region differs from each other. However, even in the most favorable areas there are many trails whose quality leaves much to be desired. Accordingly, the more the car is used on roads with serious damage, the faster the strength of the parts is consumed. This happens due to the increase in friction that occurs when the suspension compensates for uneven road surfaces;
- the quality of the material from which the bushings are made. Typically, even the best rubber bushings have a relatively short service life. But most manufacturers install them on their cars. Therefore, when replacing old bushings with new ones, experts recommend using products made on the basis of polyurethane. These products have a significantly greater safety margin and will last you significantly longer.
Which cars most often experience problems with stabilizers?
This type of breakdown, sooner or later, occurs on all cars. However, there are vehicles that experience these problems more often than others. These include the following cars:
- Lada Vesta;
- Volkswagen Polo;
- Skoda Rapid;
- Renault Megane;
- Mercedes Sprinter.
What tools may be needed when replacing stabilizers yourself?
Performing this work will not require the driver to use high-tech devices. To do this you need to have the following tools:
- jack;
- extension for key;
- socket wrench for 10 and 13;
- ruler;
- socket heads for 13 and 14. Preferably elongated;
- ratchet wrench.
This is the minimum required set of tools, without which you definitely cannot carry out repairs. However, you may need an additional set. This need may arise when removing the fastening nuts.
The fact is that during operation they can stick to the part. In this case, you may need a grinder or a hacksaw. You need to use these tools very carefully, because you can damage the stabilizer links.
If this happens, then you will need to change them too.
Conclusion
Despite the simplicity of eliminating this type of malfunction, perform all actions with the utmost care. Especially in cases where a jack is involved in the process.
Any careless movement can end in disaster. If possible, contact a service center where your car will be repaired quickly and inexpensively, without endangering your health and the condition of the vehicle.
Source: https://djago.ru/podveska/zamena-vtulok-stabilizatora/
How to change stabilizer struts Logan
The operation to replace the stabilizer link on a LoganMachine...
Greetings, car enthusiast on the autoblog AAuhadullin.ru! Today's video will be devoted to replacing the stabilizer struts of Renault Logan.
Before starting work, I purchased a set of brackets and separately self-locking nuts for the strut mounting bolts, which for some reason were not included in the kit.
To work we will need the following tools:
- Star key from the set.
- Open-end wrench X13.
- The pliers are large.
- Small gas wrench.
- Standard wheel wrench.
And also WD40 liquid or Z40 liquid wrench to remove rust from the bolt when unscrewing. If they are missing, you can simply wet a rag with water and apply it to the connection, and the nut will easily come away from the bolt.
Before starting work, for safety reasons, it is necessary to place wheel chocks under the rear wheels on both sides of the wheel.
On the left side, you will need to remove the front wheel and dismantle the old bushings, install new ones and reassemble everything in reverse order.
The process of replacing Logan stabilizer struts
Remove the protective cap on the disk, loosen the wheel bolts and lift the body with a jack. After the wheel has risen above the ground, completely remove the bolts and remove the wheel.
For some reason, the wheel does not “want” to be removed from the hub, so we will use a rust remover, spraying it on the protruding part of the hub and allowing it to soak in. The anti-rust liquid wrench worked immediately and the wheel came off the hub easily.
After removing the wheel, we place it under the hub for greater safety. For the same purpose, a second iron jack was installed through wooden blocks.
Next comes the actual process of replacing the bracket bolts. The bolts must be cleaned of dirt with a brush, treated with an anti-rust compound and given time to absorb the solution.
We use an asterisk key on top, with the condition that it rests against the rotary lever and will not turn. We use a spanner from below, and the nut can be easily unscrewed after treatment with the solution.
We unscrew the nut completely, remove the rubber bushing and remember how it stood in order to reassemble everything correctly in the reverse order.
Then we knock out the bolt. You can just work with a hammer without a soft attachment, since we will use new bolts. If the bolt does not come out completely, it is convenient to use any sharp object, for example, a punch, to knock out the bolt.
I tried to remove the lever with a mounting tool, but it didn’t work, and I decided to knock out the bolt by hitting the bit with a hammer. Then we will need to pull out the bushing. Once again I tried to pull the bolt out, but it didn’t work and I had to use a second jack through the ball joint.
The bushing came free and was easily pulled out. Now you need to remember how it stood in the body of the lever in order to install the bracket in the same position. It can be seen that the bushing is badly worn and the knocking was probably their fault.
Next, install the new bushing, correctly oriented in the body of the lever with the notches on the body of the bushing facing down.
When installing, we help ourselves with a mounting spatula so that the bushing can fall into place.
Then we install a new fastening bolt, having previously centered the hole with a bit. We insert a new bolt and rest the star key against a nearby support so that it does not turn.
Then we install the lower bushing, orienting it correctly and you can screw on the nut. If the body of the bolt does not come out of the bushing, you need to lower the jack a little so that the threaded part appears and you can tighten the nut.
The new lower bushing has not yet been fitted, so we will use the old bushing to attach the nut and tighten the connection. We use the old nut for now to tighten the connection, and then install a new self-locking nut and tighten it completely.
Having pulled off the rubber of the new bracket, we try to unscrew the old nut and install a new bushing and nut. The bushing fits well and now part of the bolt thread is visible and the new nut should fit easily. The sleeve and nut are in place and you can tighten the connection, but do not overtighten, only up to a certain point.
We perform a similar operation on the other side, in the same order.
The two central rubber bushings on the stabilizer remain untouched, and if the knocking does not go away, we will do the work of replacing them.
Let me remind you once again not to overtighten the bracket connection during reassembly. Before reinstalling the wheels, we will clean and lubricate the edges of the hubs so that there are no problems with removal in the future.
Don't forget to finally tighten the wheel bolts during assembly.
I’ll finish here, leave comments, like and ask questions.
Goodbye, write.
Source: https://www.aauhadullin.ru/2018/03/kak-pomenyat-stojki-stabilizatora-logan/
How to change stabilizer bars on a car?
x
Check Also
How to remove rust and bugs from a car body? Means and methods of combating corrosion Hello everyone! In this article we will look at an interesting topic: how to remove rust...
Deflectors for car windows and hood: installation and removal instructions Deflectors for car windows and hood are used everywhere. Most vehicles traveling on the roads...
Power steering lubricant, like any other lubricant, deteriorates over time. Let's look at the service life of the technical fluid, and also tell you in detail how to change the oil...
There are many benefits to tinting your car. However, stylish and high-quality tinted glass is not a cheap pleasure, unless you do the tinting yourself. IN …
Replacing the fuel pump, also known as the fuel pump on a Priora Fuel pump - this unit, as you already understand, has a second name, but it sounds very...
Technical characteristics of Toyota Verso / Toyota Verso. Find out the dimensions, fuel consumption of Toyota Verso / Toyota Verso, features of engines, suspensions, bodies and other technical characteristics of cars...
Illuminating car rims - instructions for brightly tuning wheels Almost any car owner can independently illuminate car rims. This is easy to implement and affordable...
Replacing the handbrake cable yourself, at first glance, may seem like a simple plumbing task. But the location of fasteners in places exposed to moisture, dirt, road reagents often introduces...
Self-installation of spacers on the front and rear pillars of a car Why are spacers needed What is the use of them Self-installation Video on the topic When a car competes…
Engine hydraulic shock is the penetration of water into the above-piston space of the combustion chamber of a piston power unit, resulting in deformation or destruction of individual structural elements of the internal combustion engine. Water,...
Liquid rubber for cars, plastidip (from Plasti Dip TM), liquid vinyl, rubber paint - these are all the names of a special coating that is a kind of alternative...
Lada 2111 “1.6 atmospheric” › Logbook › Grinding the surfaces of the cylinder head and cylinder block with your own hands, the old-fashioned way! Today I will tell you how to budget, or more correctly...
Quite often you can hear the question: how to change shock absorbers, because there are many people who want to repair the suspension themselves, both among experienced car owners and among novice motorists. But …
Source: http://tbf.su/avtoremont-i-tyuning/kak-pomenyat-stojki-stabilizatora-na-avtomobile
What do stabilizer struts affect? Mechanics answer
Motion stabilization saves the driver from skidding and accidents and is a vital function for a car. The name “anti-roll bar” speaks for itself, but it is not the only one responsible for driving comfort.
Stabilizer links are an important element of this part and, as a rule, it constantly wears out and needs to be replaced. But what happens if you don’t change them and what the stabilizer struts affect in general - we’ll talk in this article.
Why are racks needed and why are they so important?
Before answering the question “what is affected”, you must first fully understand the purpose of this element and why it is so vital for the driver.
First of all, it should be noted that the struts themselves are a very simple element of the anti-roll bar.
It is with them that the driver bothers during repairs, since the racks take on the entire load when stabilizing the movement.
Stabilizer's pole
The suspension and stabilizer are responsible for the safety of the driver on the road, so they try to eliminate the roll by raising the body, or, on the contrary, lower it.
The only problem is that the suspension and stabilizer are not connected to each other in any way, but they work in tandem. At this moment, a stand appears that performs this function.
At the moment of movement, it feels every roll, so it wears out.
Suspension, rear stabilizer
A stabilizer link is needed for various reasons:
- connects the stabilizer and suspension arm;
- participates in stabilizing rolls in turns;
- makes movement confident and smooth.
Stabilizer and suspension arm
There are only three main reasons why a strut is so important for a car. It comes in both front and back.
The roll itself does not appear in a specific place, but affects the entire car during skids, therefore it is harmoniously distributed between the stabilizers in both parts.
Without a rack, it would be impossible to imagine the synchronous operation of two important elements that are responsible for smooth running. The stabilizer signals the suspension to raise and lower the body and passes all this action through the strut that connects them.
Bank
In addition to all this, the rack also survives all the problems that the driver creates for himself.
If you engage in extreme driving and don’t notice the bumps and humps on the roads, this element will always survive every hole, which is why it wears out so quickly.
If you reduce your speed significantly before turning, the life of the strut may increase. If it is almost worn out, the driver runs the risk of accidentally driving into a snowdrift, so he will need to hold the steering wheel more tightly.
Extreme driving
The smoothness of the ride is felt only when rolls appear. If the driver drives straight on a flat road, the element does not perform its functions, but simply waits in the wings. One has only to turn quickly, the new strut will easily survive this and the driver will hardly feel the skidding.
The influence of stabilizer struts on movement
From all of the above features, we can freely say what the stabilizer struts influence. The driver must first of all understand how to behave when cornering and generally drive correctly.
Car suspension
Stabilizer struts affect the following points:
- movement of the vehicle in general;
- without them it is impossible to operate the machine;
- there is a risk of getting into an accident;
- constant noise.
Signs of malfunctioning stabilizer struts
If the struts are worn out, the car will not be able to protect itself from skidding, since the hinges at the ends will not perform their functions. The driver gradually begins to feel a less smooth movement, there will be a feeling of riding on an ironing board.
It will subsequently seem so unstable that the car enthusiast will be afraid to get behind the wheel.
Quickly worn-out parts are a sign of careless driving, and when the struts are almost worn out, you need to hold the steering wheel with even more confidence than when the struts were still in good condition.
suspension arm
In addition to all this, do not forget that they also connect the anti-roll bar to the suspension arm, so it’s simply not possible to drive without struts.
They have a fairly low price on the market and, as a rule, one of these is enough for six months of driving.
In any case, there must be a component that allows you to do what the anti-roll bar does.
Drifting into a snowdrift
Do not forget about the risk borne by the driver. With worn elements both front and rear, you can drive, but not freely. At the same time, the driver is responsible for his own actions. The likelihood that a car will drive into a pole increases many times over, and in winter almost every driver will be able to visit at least one snowdrift.
When any element of the car dies, it lets you know by making a sound. When a driver is asked the question “what is the effect of the stabilizer struts,” everyone freely answers: “the struts make a rattling sound.”
Knock in the front suspension
How to check the wear of struts?
When you already know what the front and rear stabilizer struts affect and knowing that this spare part can make noise, the sound should be perceived as some kind of signal to action.
You can check wear in another way - simply by turning the steering wheel all the way and touching it with your hand. Only two comrades can do this. They also often unscrew the element and check the lubrication.
If dirt mixed with lubricant has collected under the boot, the element needs to be replaced.
Characteristic signs of strut wear
We told you everything we knew ourselves. If you have your own personal experience with racks, please share it by telling your story in the comments.
Source: https://tire1.ru/na-chto-vlijajut-stojki-stabilizatora/