How to paint a car yourself: expert advice
Is it worth paying for something you can do yourself? This almost philosophical question often arises before home craftsmen. Take painting a car, for example. This pleasure is not cheap at all. However, for some reason many people believe that it is impossible to cope with this task on their own.
Let’s take the risk of dispelling this myth and tell you how to paint a car with your own hands. The step-by-step guide below will allow you to carry out this process yourself and avoid all possible pitfalls. Of course, this is a labor-intensive task, quite long, but not that difficult.
What you need for work
Professional body painting is carried out in closed boxes. In our case, a spacious garage is suitable for this purpose. It must meet the following requirements:
- The working area around the entire perimeter of the car is at least two meters.
- Free flow of fresh air.
- It is possible to provide good lighting, preferably natural.
The garage is first tidied up, removing dust, cobwebs and other debris so that nothing sticks to the new paintwork. Before painting, the floor is moistened with water from a spray bottle. In case of insufficient lighting, floodlights with a power of 500 or 1000 kW are installed.
Painting a car consists of several successive stages:
- Body preparation (straightening, removal of old paintwork, dismantling);
- Leveling the surface with putty;
- Sanding;
- Primer;
- Application of new paintwork;
- Grinding and polishing.
Painting work can only be done on a clean body, so the first thing you need to do before painting your car is visit the nearest car wash.
As you can see, the main process is preceded by several preparatory stages. The aesthetics and technical characteristics of the finished coating ultimately depend on how carefully all the work is done. Simply put, you will have to work hard to ensure that you get a car with shiny new paint that won’t fall off in pieces anytime soon.
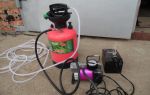
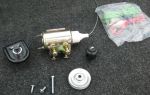
When carrying out painting work you will need the following tools and materials:
- Compressor;
- Spray gun;
- A set of keys and screwdrivers for dismantling attached parts;
- Spatulas;
- Sander;
- Sandpaper;
- Masking tape, rags;
- White Spirit;
- Putty, primer;
- Auto enamel.
Watch the video - a tool for painting a car with your own hands:
Watch the video - a review of grinding machines for preparing a car before painting:
Preparing the body for painting
If you plan to completely renew the color of your car yourself, before starting work you need to identify all the coating defects that need to be corrected. If there are dents on the body, first of all, they are straightened out. To do this, they hit the metal several times from the inside with a rubber hammer, straightening the bend.
Chips, dents, cracks, and scratches on the body are outlined with chalk so as not to miss anything, and they begin to be processed. Cleaning before painting is carried out close to the boundaries of the damage, making sure that the transitions are smooth and imperceptible. You can recognize unevenness and roughness by running your palm over the surface.
You need to strip down to exposed metal. In small areas, remove the paint layer using a flat screwdriver or narrow spatula.
After this, the paint is removed with a metal scraper and washed with water. If this seems too long to you, you can prepare a composition of xylene, paraffin and acetone to speed up the process. It softens old paint quite quickly.
Paraffin and xylene are taken in a ratio of 10 g per 45 ml, heated in a water bath, cooled to 50 degrees and slowly, with thorough stirring, 45 ml of acetone is introduced.
Watch the video - preparation for painting (masking for painting):
Dismantling and protection
Before you begin preparing the surface, remove everything from the car that cannot be painted:
- Headlights;
- Turn indicators;
- Bumpers;
- Radiator grille;
- Wipers;
- Door handles;
- Number plates;
- Antenna.
The impact protection in the wheel arches, if you have one, must also be removed. If dismantling it yourself is not part of your plans, you can coat all parts with a paste of glycerin (30%), chalk (40%), dextrin (20%) and water (10%). The mixture dries quickly and prevents paint from entering. But this is not the best option, although it is the fastest.
With pieces of parchment paper, using masking tape, cover all the windows in the car, also capturing the rubber seals; the wheels are wrapped in large pieces of plastic film. Once all parts that cannot be painted are covered, you can move on to the next step.
Working with putty
Leveling with putty is the next step in preparing the car body for painting. To do this, you need to mix two components, the putty itself and the hardener.
This is done as follows: two tablespoons of putty (without the top), combine with the hardener from the tube, squeezing out 3 - 4 cm, and mix thoroughly for 30 seconds. It is better not to use containers for this purpose.
A piece of plywood, a wide metal scraper or a plastic kitchen board will do.
Watch the video - putty, highlights:
The putty is applied to the previously degreased surface of the car, in a layer of no more than 0.3 mm, using short movements. You will have to work quickly, because after the start of the reaction of the two components, the mass hardens within five minutes.
Complete hardening occurs after 30-40 minutes at an air temperature of about +20* C. If it is necessary to apply the putty repeatedly, each layer is dried before applying the next.
Next, the surface is cleaned alternately with sandpaper No. 80, 120 and 180 so that “patches” do not stand out. The processing is completed by machine grinding using No. 180 and 280.
Remove dust from the body and wipe it again with white spirit.
Watch the video - do-it-yourself car putty:
Applying primer
Applying a layer of primer improves the adhesion of paint to the surface, thereby reducing its consumption and increasing the strength of the coating. In addition, the composition provides additional protection of the body from corrosion. It is better to apply the primer from a spray bottle, after diluting it with a solvent and filtering it.
Watch the video - preparing the car for painting:
Car body painting
Choosing auto enamel is a responsible process, because the final result largely depends on it. Today, store shelves are lined with all kinds of products, but not every one is suitable for painting a car with your own hands. Since the work is carried out in a normal room, there are no possibilities for thermal drying of the coating.
This means that the purchased paint should dry relatively quickly under natural conditions. Nitro paint and acrylic auto enamel correspond to these indicators. The first is used if you need to paint only a separate part of the car (fender, hood, door). The nitro enamel dries in just 30 minutes, this is a definite plus.
But if you want to cover the entire body with it, you will have to work hard, stripping off the old paint to the very base. After all, nitro enamel is incompatible with any modern paint and varnish coating; its use in production was stopped in the last century.
If you are going to update only one part: the hood or bumper, it is important that the paint shade matches the old coating perfectly. Coloring is one of the most delicate processes when painting a car and it cannot be done without the participation of a professional. To accurately “get the color”, you will have to experiment on several samples.
The final shade depends on many factors: spray speed, air pressure, distance at which the gun is positioned, brand of solvent used, paint viscosity. The color acquires the required depth when painted in 2-3 layers.
Painting work begins with the preparation of car enamel, which must be diluted with a solvent to the desired consistency. You can determine the correct dilution visually. Dip any metal rod into the paint. If the flow rate is 3-4 drops per second, the density is quite suitable for using paint in a spray bottle.
Strain the resulting paint through a fine sieve (regular women's tights with a density of 15 denier are also suitable). The enamel is poured into the tank of a spray gun with a 1.4 nozzle, and the pressure is set to about 3 atmospheres.
Painting the car is done from top to bottom, with uniform, smooth movements. The second layer is applied after 20 minutes, and the paint is diluted so that its viscosity is less than the first time.
Polishing the paintwork
It is difficult to achieve absolute cleanliness in an ordinary garage, so minor defects are eliminated by sanding the body after the coating has completely dried. In this way you can eliminate:
- Dust particles, dirt, small insects stuck to the drying paint;
- Orange peel effect resulting from insufficient air pressure when applying or improperly diluting the composition;
- Lack of shine, which appears a couple of days after dyeing. The reason is increased humidity or too high pressure when applying lacquer coating.
For final polishing of a painted car, polishing paste No. 290 is used, which is a mixture of abrasive materials. It is applied to a soft flannel or a piece of tea and rubbed in in a circular motion with light pressure.
Polishing water is used to add shine to the lacquer coating. It is an abrasive paste mixed with an emulsion. The liquid is applied manually using a piece of flannel. Polishing water removes stains left from abrasive compounds and grease marks.
Tips for working:
- The room in which painting work is carried out must be well ventilated.
- The compressor pumping air is located outside.
- Protect your respiratory tract with a respirator, your eyes with goggles, and your hands with gloves.
- To degrease the surface, do not use solvents or gasoline; only white spirit is suitable for this purpose.
- Dispose of used rags immediately; rags soaked in a flammable substance left in the garage can cause a fire.
- If possible, it is better to heat the diluted enamel to 50° in hot water, this will reduce the consumption of the solvent and the paint itself.
- The number of layers of paint depends solely on the desire of the owner, although experience suggests that it is better to stop at three, this is quite enough to provide a spectacular appearance to the car.
- The paintwork dries completely only after 24-36 hours.
During this time, specks and midges stick to the fresh paint. Remove them carefully using tweezers.
Now you know how to paint a car yourself. Agree, there is nothing impossible here. All you need is a little free time, quality materials and your enthusiasm.
Watch the video - painting, three-layer:
Share with your friends and rate the publication. It’s not difficult for you, but it’s nice for the author.
Thank you.
Source: https://manbe.ru/avto/kak-pokrasit-avtomobil-svoimi-rukami.html
Stages of painting a car with your own hands, step-by-step algorithm...
Hi all. I think the title of the article speaks for itself - “stages of painting a car with your own hands, step-by-step algorithm” therefore there will not be a short announcement of the article that is accepted on our website... Straight to the body...
The first stage of painting - choosing paint
If the car is partially painted, then there is no choice, we take the paint with which the rest of the body is painted, but if the car is painted completely, then you can change the color and type of paint, but we have a separate article on how to choose paint for a car on our website.
Stage two - washing and damage assessment
At this stage, we inspect a completely clean car, assess the corrosion damage to body elements, and decide on the need for welding work.
The third stage - disassembly
At this stage, we remove all components and assemblies that will interfere with us when painting the car. For example, when painting a wing, it is necessary to remove the locker, turn signal, headlight, and sometimes moldings.
When completely painting a car, it is necessary to remove handles, windows, door locks, mudguards and fender liners, moldings, antennas, headlights and similar elements. Disassembly is carried out individually each time, and what exactly is removed depends on whether the entire body is being painted or just part of it.
Stage four – welding and straightening (if necessary)
At this stage, using a grinder, all damaged body panels or parts of body panels (for example, arches) are cut out. Immediately after welding, the welding seams are ground using a grinding disc on a grinder and treated with seam sealant.
If body elements are damaged from impacts, sometimes they may require straightening (this will improve the quality of the repair and reduce the consumption of materials in the future).
The reverse side of the panel after welding and straightening is treated with Movil, bitumen mastic, or anti-gravel. These coatings are applied in accordance with the instructions for use; in some cases, the coatings are applied over a primer, such as anti-gravel.
Fifth stage – puttying and matting
At this stage, using automotive putties, sometimes using epoxy with fiberglass, the original shape of the car is obtained.
Usually, to restore the shape of the body, they start with epoxy with fiberglass (sometimes this stage is skipped, especially if the damage is minor), then fiberglass putty, then soft putty, and sometimes later liquid putty.
Before each application of putty, the surface is dried, matted with sandpaper, and degreased; however, we have a separate article about applying putty.
Puttying is considered complete when the surface of the putty follows the initial shape of the car and is treated with sandpaper number 240-360. When sanding putty between coats, I usually finish with 120-grit sandpaper.
At the same stage, the surfaces to be painted are matted. We usually matte with water, using sandpaper number 180-240 (this is enough for primer).
Stage six - first pasting
The fact is that during painting and priming, a lot of material flies past, therefore, when this material gets on parts of the body, or finishing elements that do not require painting, they are damaged. To prevent this from happening, pasting is used. Those. with the help of films, newspapers, and masking tape, everything that does not need to be painted is covered.
When gluing under the ground, I prefer film, as it is faster and easier to glue.
Seventh stage - priming
We have a separate article on our website about choosing the type of soil and its color.
At this stage, primer is applied to all painted surfaces. The primer is applied to a previously prepared surface.
By prepared surface I mean old paint, bare body metal, or putty that has no gloss and is matted with 240-360 sandpaper. When applied to a glossy surface, the primer will not stick and will fall off during the first wash.
Immediately before applying the primer, it is necessary to degrease the surface using silicone remover or gasoline (we also have a separate article about this).
The primer is applied in accordance with the specific manufacturer's instructions using a spray gun with a 1.4-1.6 mm nozzle.
After application, the primer is dried until completely dry.
Eighth stage - preparation for paint
At this stage, we apply the mat to the ground, sequentially treating it with sandpaper with numbers 240-480 (acrylic), and 240-800 (metallic). It is better to matte with water, as the speed of work increases, the consumption of sandpaper decreases and the amount of dust in the air decreases.
Stage nine - re-pasting
At this stage, we replace old films on glass and body parts that do not require painting. The fact is that when applying paint, the films will inevitably flutter and the primer that was previously applied to them will fly off ; as you understand, according to the law of meanness, it will fall in flakes on the fresh, not yet dried paint and ruin the coating.
It is better to re-glue the film with primer before painting! Personally, I prefer to cover the car with newspapers or wallpaper for painting (they don’t flutter as much as film and dried paint doesn’t fly off of them)
Tenth stage - coloring
At this stage, paint is applied to the prepared soil and the pasted car. Immediately before painting, it is necessary to degrease the surface using silicone remover.
The paint is applied in accordance with the manufacturer's recommendations using a spray gun with a 1.2-1.3 mm nozzle. Usually the paint is applied in 3-4 layers. If acrylic enamel is used as paint, usually the painting ends at stage 12 (drying). Although acrylic enamel can also be applied under varnish.
Eleventh stage - varnishing
After the base enamel has dried, in the case of metallic, it is necessary to remove dust from the surface. This is done using a so-called sticky napkin. antistatic.
Before varnishing, do not degrease the metallic surface, as removing the silicone will wash it off! Therefore, varnishing begins 20-30 minutes after applying the last metallic layer.
The varnish is applied in accordance with the manufacturer's instructions; usually when varnishing, a spray gun with a nozzle diameter of 1.4-1.5 mm is used
The varnish is applied in 2-3 layers, depending on the manufacturer and painting conditions.
Twelfth stage - drying
After applying the last layer of varnish or paint (in the case of acrylic), drying is necessary. The complete drying time for acrylic enamels under normal conditions is 24 hours. At elevated temperatures or when using ultra-fast hardeners, drying time is reduced to 2-6 hours.
During this time, the paint dries completely, but does not “stand up”, i.e. does not gain final strength. Complete polymerization of varnish/paint usually takes 1-2 weeks.
Thirteenth stage - assembly
After the paint has dried, we unstick the car and replace all previously removed elements (headlights, glass, repeaters, moldings, etc.). Care is important when assembling, as fresh paint scratches very easily.
Fourteenth stage - polishing and eliminating imperfections
Often, if you painted for the first time, there will be dust on the paint, smudges, and shagreen that hasn’t spread; all these troubles can be removed by polishing. Polishing can be carried out no earlier than 2 weeks after painting the car.
If there are smudges on the paint, they are sanded out using the technology described here.
The polishing technology is as follows: using sandpaper and water, the car is sanded sequentially with numbers 800-1000-1200-1500 and polished using a polishing wheel and a polishing machine with three numbers of paste. This is not a quick process, and we have a separate article on this on our website - polishing.
This completes the painting. If you still have questions about the stages of painting a car, or about how a specific stage of painting is carried out, ask them through the comments.
Sincerely, administrator http://life-with-cars.ru
Source: http://life-with-cars.ru/pokraska-avtomobilya/etapy-pokraski-avtomobilya-svoimi-rukami-poshagovyj-algoritm/
How to paint a car yourself - recommended technology for painting a car yourself + Video
Many car enthusiasts, having learned how much it costs to paint in a paint shop, wonder how to paint a car with their own hands without involving specialists? Although this task is not easy, almost any car owner can do it.
Preparatory operations before painting a car
Before painting the car, you need to do the preparatory work yourself. They usually spend 90% of the total required time, and only 10% goes directly to the painting itself.
The success of the entire event depends on the thoroughness and correctness of the preparatory work by the same 90%. The preparation procedure can be spot, partial or major.
It depends on the degree of damage to the body.
Sequence of preparatory operations:
- The car is washed - road dirt is removed using water and detergents. You also need to remove grease and bitumen stains from the body yourself using special products purchased at a car store or white spirit. The use of gasoline and other solvents is strictly prohibited.
- They dismantle the bumpers, remove the radiator decorative grille, sidelights and headlights, radio antenna, direction indicators and other external lighting equipment. It is also advisable to remove moldings, locks, as well as seals and parts that may interfere with painting.
- Clean all surfaces thoroughly.
Identification and elimination of defects on the surface of the body
Body parts in need of repair are restored independently or sent to a car repair shop. After repair, they are washed and installed in place.
Then you need to carefully examine the body coating yourself under good lighting (preferably outside) in order to identify all the flaws on it.
Relatively large damage (chips, dents, cracks, peeling paint or putty from previous repairs) should be marked with acrylic paint or colored chalk.
The cleaning area should be as close as possible to the size of the defect in order to avoid unnecessary waste of materials and time during subsequent work. It is worth paying special attention to the transition from a defective area to a serviceable one - it should be quite smooth.
Check this by running your hand over the surface of the body. If there is a very noticeable difference in levels, a little straightening may be necessary. Upon completion of this work, you must again thoroughly clean the body from dust, wipe the cleaned areas with a cotton rag moistened with white spirit.
Then the body is allowed to dry.
Next, they fill in the defects themselves. For this purpose, auto putty (synthetic polyester), metal and rubber spatulas are used. To fill defects, it is recommended to use finishing putty. It is prepared for use independently in accordance with the attached instructions.
Thoroughly mix its composition with the hardener for 30–40 seconds with a special metal spatula, after which it is immediately applied to the defective areas. This is done with cross energetic movements, ending with turning the spatula 90°, as shown in the video.
The result should be a smooth, even surface, slightly protruding above the body surface.
The putty will be usable within about 5 minutes of mixing, so you need to work fairly quickly without being too fussy.
If lumps appear in the mixture, puttying must be stopped, because the composition cannot be used further. The putty area is allowed to harden completely. Usually 30–45 minutes is enough.
The readiness of the surface is checked with dry sandpaper No. 80, rubbing it on the dried putty.
If the coating does not stick to the grains of the skin, but crumbles in the form of fine-grained dry powder, then this means that hardening is complete.
After this, the putty surface is sanded manually using sandpapers No. 120–600 until its geometry and roughness are brought to values identical to the serviceable plane in the adjacent area.
Cleaning is carried out in several stages, if necessary, additional lubrication with newly prepared putty.
It is better to carry out this work without moistening the surface with water, because when moisture gets into the putty, the quality of the putty deteriorates. The quality of processing is controlled by stroking the surface with the palm of your hand.
Before the final inspection, defective areas are thoroughly cleaned of dust, wiped with a rag moistened with white spirit, and then dried.
Apply a layer of primer to the prepared surfaces yourself (preferably from a light gray spray can).
Preparing for self-painting and applying paintwork
Before the final throw (painting), the body is again thoroughly cleaned of dust. Masking tape is used to seal those places and parts that cannot be painted, and to cover the wheels.
The height of the ledge along the line between the unpainted areas and the areas with paintwork should be somewhere around 0.02 mm. These boundaries must be located along the contours of the bend or the edges of the body parts.
Then the factory paintwork is sanded to a matte state with sandpaper No. 1200, the body is cleaned and wiped again, dried, and the cleanliness of the surface is checked.
Preparing the room for painting. It should be spacious enough, with a working area of 2 m or more. The room is thoroughly cleaned of dust and dirt, the floor is moistened with water, and the possibility of plaster, dirt, and other things falling off the ceiling is prevented.
It is better to select auto enamel without a tendency to bake. The brand can be any, at the discretion of the car owner.
The enamel is prepared for use according to the instructions, filtered through a special funnel with a mesh, and poured into a spray gun (you should use a gun with an air pressure of 2.5–3.0 atm, nozzle No. 1.4).
We start painting from the roof of the car. We apply the paint from a distance of 15–25 cm with smooth movements, as shown in the video, in 2–3 layers, allowing 15 minutes of drying before the next layer. We do everything without haste.
Apply the next layer only after the previous one has completely dried. Color and depth appear only when applying the second layer.
At a temperature of +20 °C, the car is completely dry after 24–36 hours.
Source: https://carnovato.ru/pokrasit-avtomobil-detal-svoimi-rukami-video/
Do-it-yourself car body painting
When car enthusiasts find out how much it will cost them to paint a car at special stations, many often decide to carry out this procedure themselves. However, the answer to the question of how to paint a car yourself is not so simple.
After all, it will not be enough to “drench” the car with paint and wait until it is completely dry. Special technologies should be used, training should be carried out, and special equipment should be used.
And there’s no need to talk about having any special skills!
Painting a car is not a simple process of pouring paint
Painting a car at home
First of all, if you don’t yet know how to paint a car at home, you should wash the car thoroughly, since a clean car will make it easier to see any existing defects.
In addition to the main corrosion processes, when moving, the body and its bottom are exposed to grains of sand, stones and other small abrasives.
Video on how to paint a car
Before painting the car, preparatory work should be carried out. This procedure can be partial, targeted or major. It all depends on the damage.
Partial body painting
It is worth remembering that the painting process itself takes approximately 10% of the time, while the remaining 90% is preparation. First, locks, moldings, and seals that could interfere with painting are removed.
If they are left and simply covered with masking tape, the moisture that accumulates under these elements can harm the car in the future. Next you need to clean, putty and prime the car body.
The old coating is removed and areas of corrosion are treated.
It is imperative to use materials from the same manufacturer. Often materials produced by different companies may be rejected. That is why such a coating will not last long enough.
Stages of car painting technology
Before answering the question of how to paint a car with your own hands, you should know that there are five main stages of painting.
- 1. Washing the car using shampoos, removing dirt, carrying out initial preparation.
- Degreasing the body surface, removing bitumen stains, lubricants.
- Elimination of corrosion pockets, removal of old paint using abrasive grinding. The abrasives used are aluminum dioxide and silicon carbide. Sanding paper should be used based on the fact that the difference in “number” should be no more than 100 units. The surface must be treated sequentially in five steps. If these provisions are violated and paper of a different “number” is used, the material will be subject to subsidence.
- Carrying out primary and secondary priming, which makes it possible to create an anti-corrosion coating on the body. Please note that the soil dries completely in 2-4 hours. Specialized boxes have infrared drying, which reduces the process of soil drying to 15 minutes.
- Application of enamel or varnish.
Tips and tricks for car painting
Preparing the car body for painting
When washing a car, road dirt is removed from the body using detergent and water. Bitumen and grease stains must be removed with special products that are sold in every car dealership, or with white spirit. However, the use of gasoline and other solvents is strictly prohibited.
Car washing is carried out using detergents and water
After the body is cleaned, you should dismantle the front and rear bumpers from the car, remove the decorative radiator grille, radio antenna, headlights with sidelights, direction indicators and external lighting equipment. If there is impact protection in the wheel arches, it must also be removed. Then all surfaces should be thoroughly cleaned. Everything that was removed from the car must also be thoroughly washed, rust removed and dried.
Cleaning up defects
The next tip on how to paint a car is that you need to put it in the light, preferably outside, to carefully examine the condition of the body coating. Relatively large defects (chips, cracks, dents) should be marked with colored chalk or acrylic paint. After this, it is necessary to examine the machine again in order to find any missed defects and mark them again.
Car body cleaning
Then, using a chisel or a sharpened screwdriver (blade width 3-5 mm) and sandpaper (No. 60, 80, 100), you should clean the defective areas down to the metal. Moreover, it is necessary to take into account that the cleaning area should be as close as possible to the area of the defect in order to avoid additional costs of time and material during subsequent processing.
It is also worth paying attention to the fact that the transition from a defective to a non-defective surface should be as smooth as possible.
This can be easily checked by touching the surface of the body with your hand.
After all this work has been carried out, you need to carefully clean the surface of the body from dust again and wipe the cleaned areas with a cotton rag. In this case, the rags need to be moistened with white spirit. Finally, you need to let the body dry.
During a major overhaul of a car, sometimes it is necessary to clean the body completely. This procedure may seem difficult for the first time, but if desired, anything is possible.
Alignment of defects
Next, you should start filling the defects, for which you use polyester synthetic auto putty, rubber and metal spatulas. To fill defective areas, it is recommended to use finishing putty, as it is fine-grained, so sanding work will be much easier.
The putty and hardener are mixed using a special metal spatula. The proportions for obtaining the mixture are indicated on the can, however, according to the practice of many motorists, you need to take 2 tablespoons of putty and a hardener 3-4 cm long.
The materials are thoroughly mixed for 30-40 seconds, after which the mixture must be immediately applied to the defective areas, using vigorous cross movements with a 90-degree turn. This way you can get a flat, smooth surface that will protrude slightly above the body surface.
It is important to know that a chemical reaction occurs in the putty and a certain amount of heat is released within 5 minutes after stirring it. That's why you need to work quite quickly, but without much fuss.
Car body putty
The putty should not be used if lumps begin to appear during application.
The putty area should be completely hardened. As a rule, this happens within 30-45 minutes. To check whether the surface of the body is ready, you need to rub the putty area using dry sandpaper (No. 80). If the putty does not stick to the grains of the paper, and the putty itself is showered with dry fine-grained powder, then hardening is complete.
The putty surface is cleaned manually using sandpaper
(No. 120-600) until the surface is brought to the same geometry and roughness as the body surface. Cleaning should be carried out in several stages, additionally applying prepared putty if necessary.
It is better to carry out cleaning without wetting the surface with water, since when water gets into the putty, its quality deteriorates.
Putty areas should be controlled by smoothing the treated areas with your palm. To finally check the putty surfaces, they should be thoroughly cleaned of dust, wiped with a rag moistened with white spirit and dried.
Then you need to apply a layer of primer from a can (preferably a light gray shade) to the surface, transferring to clean surfaces and monitoring the quality of the cleaned surfaces.
Preparing for DIY painting
The last preparatory step before learning how to properly paint a car is to thoroughly clean the body of dust.
In addition, using masking tape, you need to seal those parts of the body that cannot be painted (including the need to cover the wheels). The height of the ledge between the unpainted and painted parts should be approximately 0.02 mm. The boundaries of these parts need to be located along the boundaries of the bend or the boundaries of some body parts.
Next, you need to sand the paintwork with sandpaper No. 1200 to a matte state, clean the body again from dust and wipe with a rag moistened with white spirit, dry, and carefully check the cleanliness of the surface.
This is what the cleaned surface looks like
You should also say a little about the room where the painting will take place. If the process takes place in a garage, it should be quite large and have a working area of at least 2 m around the perimeter of the machine. Before you start painting the room, you should thoroughly clean it of dirt and dust, wet the floor with water, making sure that dirt, plaster, etc. do not fall from the ceiling.
Auto enamel should be purchased with the ability to dry without the ability to bake. The choice of paint coating brand is up to the car owner.
Before painting the body, it is necessary to cover those areas that cannot be painted.
Car painting
In accordance with the instructions for use, you need to dilute the enamel with solvent to the desired thickness.
Next, you need to strain the mixture through a special mesh funnel and pour the enamel into the paint gun. In this case, you should use a gun with a nozzle No. 1.4, with an air pressure of 2.5-3.0 Atm.
Painting should begin from the roof of the car. You should paint from a distance of 1.5-2.5 cm from the gun nozzle to the painting surface using smooth movements. It is necessary to apply 2-3 layers, observing 15 minutes of intermediate drying.
There is no need to rush.
The appearance of color and depth occurs only when painting with a second layer. The car dries completely within 24-36 hours at a temperature of +20 degrees.
You can apply a second coat of paint only after the first one has completely dried.
Precautions when painting a car
- You should only work in a respirator and a well-ventilated area.
- It is necessary to locate the source of air supply outside the room where painting is taking place.
- Smoking is strictly prohibited indoors.
Car painting option
After your first experience of painting a car, you can always comment on your first experience on our website, as well as give your advice.
Video on how to paint a car yourself at home
Source: http://AvtoMotoSpec.ru/remont-avtomobilya/kak-pokrasit-mashinu-samomu.html
How to paint a car yourself
Sometimes it happens that a purchased car is such an eyesore with its color that you want to sell it and buy a car in a different color. Of course, this is a drastic option that requires a lot of money, time and wasted nerves.
Another option when a car needs a complete repaint is that the paintwork is outdated or significantly damaged.
To repaint your own car, you can go in two ways: entrust this matter to professionals, or try to give your “iron horse” a new color yourself. Let’s assume that you have a catastrophic lack of money to have your car painted by specialists.
Then there is only one option left - to paint the car yourself. Today we will talk about how to do this efficiently, so that the new color of your vehicle will please not only you, but also those around you.
Before you begin the procedure of painting a car, you need to know that a radical change in the color of the vehicle will entail a change in the car’s registration certificate: after all, in the registration certificate your car is recorded, for example, as white, but after painting it will turn yellow. The new color must be included in the new document - which means a trip to the MREO for re-registration cannot be avoided.
In general, it is better to notify law enforcement officers in advance that you are going to change the “suit” of your “iron horse” and find out what will need to be done in order for all your art to be legalized. In principle, there is nothing complicated in this procedure.
Within five days after repainting the car, you must come to the MREO with documents (passport of a Russian citizen, driver's license, vehicle registration certificate, OSAGO policy, vehicle passport, power of attorney).
At the MREO, you fill out a special form (they will tell you which one), in which you state the essence (registration of a change in the color of the vehicle), then take a receipt and pay the state fee.
If your car is younger than three years (for domestic cars) or fifteen years (for foreign cars), you will have to visit the Vehicle Tracing Department and get a certificate there that the vehicle is not listed as stolen.
After passing the inspection at a special MREO site, where everyone usually undergoes a technical inspection, you need to submit all documents (including a certificate from an MREO employee about the inspection results) to receive a new registration certificate. After issuing this document, we go to the insurance company and reissue the MTPL and CASCO contracts (if any).
But all these operations will need to be done after you paint your car.
It is clear that painting the car body is not carried out using ordinary paint, so you will have to visit a car store, choose paint of the color you like (you need to take one that dries without baking), buy a spray bottle, a respirator, gloves, sandpaper (from No. 60 up to No. 1200), spatulas, auto putty, primer.
Car painting tools
Having collected all this stuff, we begin painting, which will take place in five stages. We drive the car into a bright, well-ventilated room with a constantly maintained temperature (no more than 20 degrees) - a hangar is best suited. Painting cannot be carried out outdoors; there are many factors that can interfere with the quality of paint application.
Stage No. 1. Body wash.
First, you need to thoroughly wash the surface of the car body with warm water and car shampoo, remove all bitumen and other contaminants (here you can use white spirit).
After washing the car, we begin to dismantle the front and rear bumpers, radiator grille, headlights and taillights, fog lights, direction indicators (we paint them separately).
We wash the flanges of the wheel openings from the dirt that has accumulated there during operation.
All parts removed from the car that will also be painted - bumpers, mudguards, radiator grille (if it is not chrome-plated), roof rails - are also thoroughly washed, removed from pockets of corrosion, dried and set aside for the time being.
Stage No. 2. Body cleaning.
When the car body is rid of “extra” parts, we carefully examine its surface and determine the places that were susceptible to “injuries” (for example, cracks, scratches, dents).
We mark these places with special acrylic paint or chalk. After this, we again carefully inspect the body for missing spots damaged by rust, and also mark them with paint.
We proceed to the next operation - we clean the marked areas using previously purchased sandpaper.
Defective areas need to be processed down to metal, so you have to work hard. To do this, we use sandpaper with different “grains” from No. 60 to No. 100. In this matter, delicacy is required, since sudden transitions from the affected area to a place where the paintwork is in good condition should not be allowed.
To prevent this, you need to check the treated areas with your hand from time to time - the skin of a person’s fingers is so sensitive that it can detect the smallest transitions on the surface.
Having cleaned the defective areas and checked the transition levels, we clean them of dust, rinse them with white spirit and let them dry thoroughly.
If the paintwork is so old or damaged that there is no point in leaving it, then you will have to completely remove it from the surface of the car body. For this purpose, a grinding machine or several types of chisels are suitable, with the help of which you can remove the entire layer of old paint down to the metal.
Stage No. 3. Leveling with putty.
This stage is one of the most difficult and important, since the quality of paint applied to the car body will depend on the correctly performed putty procedure.
We recommend using finishing automotive putty made on a synthetic base with a fine-grained substance, as well as special rubber spatulas (you will need several of them, with different widths of the working “blade”, since you will need to putty surfaces of different widths).
Before applying the putty to the surfaces to be treated, you need to bring it into working condition. To do this, we take the required amount of putty itself (depending on the surface area, the amount can be different - from one to several tablespoons) and a hardener (included with the putty).
Mix everything in the required proportions (they are marked on the putty packaging) thoroughly for half a minute and immediately begin applying the resulting mixture to the cleaned areas (if only treated areas are putty) or to certain surfaces of the body.
Apply the putty using quick but gentle movements in a criss-cross pattern with a 90-degree rotation in both directions. Speed when applying putty is necessary so that the prepared mixture does not harden.
You will know that hardening has begun if you notice lumps in the mixture - in this case, the process of applying the putty must be stopped and a new material must be prepared. After applying the material to a certain place, let it dry for half an hour.
You can find out whether the putty layer has hardened by running sandpaper over the treated area (no. 80 is best for this) - if the putty sticks to the paper and comes off in pieces, then you still need to wait.
After the putty has completely dried, carefully level the surface “cured” of the defect, bringing it to the same level as the entire paint coating. If we apply putty to a body with completely removed paintwork, then we constantly need to ensure that the material is laid down in an even layer without violating the geometric integrity of the body.
You need to check the evenness of the putty layer both with a special tool and by hand. It is recommended to use a set of sandpaper with a level of No. 120 and up to No. 600. Do not wet the treated areas with water under any circumstances - it can be absorbed into the putty and cause the layer to swell.
When the layer of putty has dried, you need to treat it with a rag, which has previously been moistened in white spirit. After drying the putty, we proceed to the primer, which must be applied in a thin layer with a slight coverage of untreated areas (if individual areas of the old paintwork were treated).
The primer has the good property of showing all the defects of the putty process, which helps correct these defects before the paint is applied.
Stage No. 4. Preparing for painting.
The preliminary stage has been completed, now it is necessary to prepare the car body for direct painting. To do this, you need to make sure that dust does not settle on the body treated with putty; if this happens, wipe the surface. Then you need to cover all surfaces on which paint will not be applied with tape, and also “wrap” the wheels with protective film.
After this, we take sandpaper No. 1200 and begin to process the surface prepared for painting until it becomes matte. Next, clean the body again from accumulated dust using a rag soaked in white spirit.
Stage No. 5. Body painting.
And now we come to the most important stage - applying paint to the prepared surface. It is necessary to dilute the paint purchased in advance with a solvent, observing its consistency.
Experienced car painters advise measuring the thickness of paint this way: take a nail and dip it into the paint, then take it out and count the time it takes for it to drain from the tip of the nail. The density at which 3-4 drops of paint fall from a nail per second is considered normal.
Having made the solution of the required thickness, pour it into the socket of the paint sprayer through a filter (you can use a lady's stocking). The sprayer should have a nozzle No. 1.4, and the pressure in the sprayer should be at 2.5 - 3 atmospheres.
You need to start painting the body from the roof, moving to the pillars, doors, and then the hood and trunk lids, and finally the wings. You need to apply paint by placing the spray nozzle at a distance of 15-25 cm from the surface to be painted, moving the nozzle up and down. The paint on the body needs to be applied in three layers.
Having applied the first, let the layer dry for 15-20 minutes, then proceed to apply the second, and then the third. Remember that it takes 24 to 36 hours for the paint on the body to dry completely. While the main part of the body dries, you can paint the bumpers and other parts in the same way.
After all the parts have been dried, we remove the protective films and install the lighting equipment, bumpers, radiator grille and other parts in place. Painting is finished!
Useful videos on how to paint a car yourself
Source: https://avtoexperts.ru/article/kak-pokrasit-avtomobil-svoimi-rukami/