How to make a bumper with your own hands
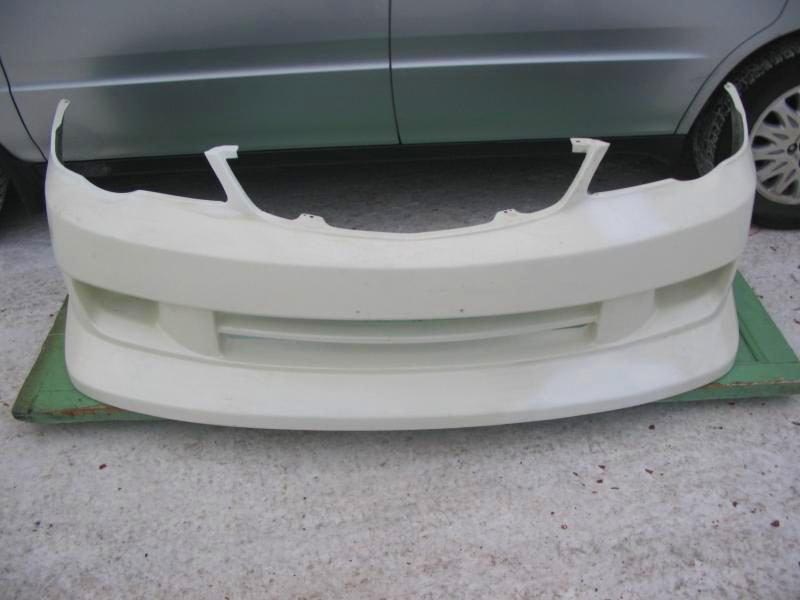
Most car enthusiasts sooner or later think about how to improve the appearance of their iron friend. Car tuning is very popular today, and it is used to modernize the technical characteristics of the engine or update the exterior of the car. Today we will make a bumper together with our own hands, since only a few can order such tuning from a studio.
Preparing the base
First of all, you need to choose a suitable frame. In most cases, the best option is to use a standard car bumper. Even a bumper from another car will do. Take a closer look at cheap bumpers with various damages, because they have a more affordable price. It is very rare for tuners to make a car bumper from scratch, as this is impractical.
Regardless of which bumper you choose, it should fit the car perfectly. At the initial stage, it is necessary to carry out basic repairs of the element (if necessary). Then various overlays are mounted on it, the choice and shape of which depend on your imagination.
Minor repairs and modernization of the standard bumper
As we mentioned above, in order to save money, you can buy a bumper that is not in perfect condition. Minor damage is not a serious problem. To repair the bumper, metal patches are used, which are mounted using small self-tapping screws. Installation of bumper elements must be done from the outside.
The next stage is the reinforcement of the bumper, for which a hardener and resin are used. The proportions depend on the air temperature, so carefully read the instructions for using the selected product.
The resulting mixture must be applied to previously prepared pieces of 450 grade glass mat. They are applied to the inside of the bumper. It is advisable to apply a couple of layers of this material.
Then you should wait a few hours for the form to become hard and process it using sandpaper. Only after this can the screws be removed.
After you have chosen the bumper yourself and restored it, you need to apply a small amount of putty. Then the bumper is tried on the car itself to make sure that the part fits in size.
Working on the bumper design
After fitting, you need to make various holes and grooves using a grinder. To create a variety of geometrically correct shapes, plywood elements, as well as wooden blocks, are often used. Holes for fog lights can be made using laminate.
To prevent all these auxiliary elements from sticking to the fiberglass, it is necessary to use a special lubricant (or spray) Mold Release. It must be applied in a minimal layer. The product dries in about an hour. After separating all the bumper parts, you need to apply the required amount of automotive putty to the future matrix and wait until it dries.
After obtaining the desired shape of the bumper, it is necessary to putty it and cover it with a 1.5 mm layer of gravity spray. To apply it, it is recommended to use a special primer gun.
After about two hours, we sand the surface of the bumper using P100 sandpaper. Then we use finer-grain sandpaper (P240, P400, P600, P1500), having previously moistened the paper with water.
Then the future bumper must be covered with paper, which must first be moistened with PVA glue. This will ensure that the styrene grains are isolated from the putty. Otherwise, a chemical reaction may occur. The next stage of making a car bumper with your own hands is creating a matrix.
Forming a matrix for a fiberglass bumper
To obtain a high-quality matrix, you need to think in advance about how you will remove the finished bumper, made by yourself, from the mold. The more complex it is, the more hassle it will be in the end.
To make planes that will become a support and to prevent cracks from appearing at the edges of the bumper, it is necessary to make special bends to allow the remaining fiberglass to escape. It is advisable to position these bends at right angles to the matrix mirror.
In order to avoid gluing the matrix to the bumper, it is necessary to use special separators. We apply this product, wait 20-30 minutes, and polish the model using a flannel rag. The procedure should be repeated three times.
Next, you need to make the base of the matrix, for which you use a matrix gel, which is applied with a brush or gun. Before using this product, it must be mixed with a hardener. In most cases, two layers are applied to achieve a coating thickness of 0.6-0.8 millimeters.
After this, several layers of fiberglass are applied, and you need to start with the coarser one. Experts note that the matrix should be twice as thick as a standard car bumper. This means that this figure should be approximately 6 mm.
Layers must be applied in the following order:
- 1 layer – fiberglass No. 100;
- 2 layer – No. 225;
- 3-4 layers – No. 450;
- 5-6 layers – No. 600.
It is advisable to roll every couple of layers with a roller to avoid the appearance of air pockets. After applying every two layers, you need to wait about a day so that they have time to dry. After this, the surface of the model is cleaned with P40 sandpaper.
After applying the last two layers, wait about a day and disassemble the mold. It is recommended to tap the joints with a rubber hammer to make it easier to pull out the matrix. You can remove the remaining fiberglass with a grinder. Acetone is used to remove any remaining sanding dust from the interior.
Next, you grind and polish the fiberglass bumper yourself, using sandpaper (P1000, P1500, P2000), which must be moistened with water in advance. At the final stage of processing, it is necessary to polish the sample using a felt wheel.
You can make sure that the bumper is made correctly by checking the matrix. There should be no damage, scratches or various irregularities on it.
To make the bumper itself, it is necessary to apply 5-7 layers of separator to the surface of the matrix. Then two layers of No. 450 fiberglass fabric and one layer of No. 600 material are applied.
After making the spatial model, we wait about a day for it to dry thoroughly. At the end, you need to try it on the car, apply a primer coat and paint the bumper after carefully selecting the shade. At the final stage, the bumper is installed on the car. To do this, you can make U-shaped metal fasteners.
Now you know how to make a bumper with your own hands. We advise you not to sit still, but to start tuning your car!
Source: http://avtopub.com/kak-sdelat-bamper-svoimi-rukami/
How to make a bumper with your own hands for your own car?
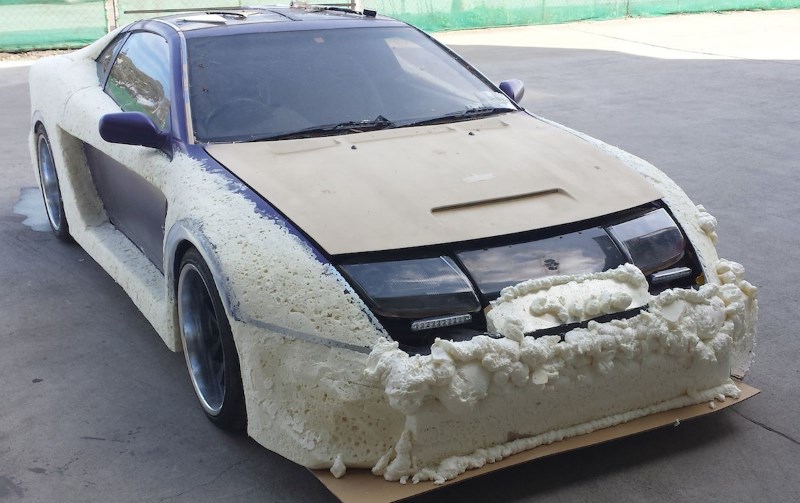
The desire to improve the surrounding space is inherent in any person. One of the ways to modernize a car is tuning. The services of professionals in specialized studios are available to the lucky few. Information on how to make a bumper with your own hands is provided in this article.
How to master the process of making a bumper yourself: description of the process
1. Preparing the source
1.1. Choosing a base.
When designing a frame sample, the method of superimposing on a factory structure is used. For this purpose, you can use your old damaged car bumper, or buy it on the market or secondhand.
The main requirement for the base is a perfect fit on the car.
First you need to take measures to repair the unit. Then the design is improved to the intended result by attaching different overlays.
1. 2. Modification of a used car bumper
Small cracks and potholes are not a problem. They are strengthened with the help of self-tapping screws and pre-cut rectangular metal patches, each of which has a size of 2x5 cm. At the ends of each side, 1 hole is drilled, through which the fragments of the car bumper are assembled into a single whole. The parts are installed from the outside of the bumper.
Now comes the turn of reinforcement. To do this, mix the resin with a hardener. Its quantity, depending on the ambient temperature, is calculated according to the table given in the instructions for use. Apply the prepared composition to pieces of glass mat No. 450, pre-cut with scissors. They cover the inner surface of the bumper.
It is recommended not to rush and make 2 rows . After 2 hours, the form hardens, after which it must be treated with sandpaper and the screws carefully removed.
Instead of glass mat, you can use fiberglass.
1.3. Work control.
A layer of auto putty, for example, Novol compound, is applied to the surface of a self-made car bumper. Afterwards, they try it on the car and again check the size compliance of the symmetrical sides of the product.
2. Model construction
2.1. Formation of spatial form.
After fitting, various grooves are cut out on it using a grinder and holes are drilled. If necessary, wooden blocks, pieces of plywood, and boxes are placed under certain geometric shapes. Laminate is well suited for designing rounded elements.
2.2. Rough finishing of the model.
In order to prevent various types of auxiliary overlays inserted for shaping from sticking to the fiberglass, a Mold Release separator is used in some places.
It is applied in a thin layer, the excess is immediately removed. You need to wait 1 hour for drying.
After work on separating the structural elements, the matrix prototype is generously covered with a layer of automotive putty and allowed to dry.
2.3. Model finishing.
As a rule, after two or three processing cycles, when the imaginary shape is finally achieved, the product is puttied again and covered with a 1.5 mm layer of gravity spray. The best option is to apply polyester primer using a gun.
No later than 1.5-2 hours after coating, the surface with polyester primer must be treated with sandpaper (P100).
After using P100, it’s time to work with sandpaper that has a smaller grain size: No. 240, No. 400, No. 600, No. 1500. They are pre-moistened with water.
After leveling, the model is covered with a layer of paper moistened with PVA glue. Its purpose is to isolate the expanded styrene grains from the car putty, which reacts chemically with it.
3. Matrix production
3.1. Fabrication of boards.
In order to form the matrix, it is necessary to imagine the process of removing the finished product from the container. The more complex the spatial form, the more difficult it is to obtain.
In order to create planes for support, as well as to preserve the edges of the product from chips and cracks, bends are provided for the release of excess fiberglass. It is more convenient if they are located at an angle of 90 degrees to the matrix mirror.
3.2. Applying a separator.
In order to prevent the model from sticking to the matrix, as well as to separate the layers, means called separators are used, for example, Yellow wax. It is carefully applied, allowed to dry for 20 minutes and polished with a flannel cloth. All actions are repeated 3 times.
3. 3. Coating the surface with matrix gel.
To form the base of the matrix, apply a layer of gelcoat, such as Cray Welly, using a gun or brush. Before use it is mixed with a hardener. As a rule, for the required thickness of 0.6-0.8 mm, it is enough to treat the surface with a spray gun 2 times.
3.4. Formation of matrix layers.
Consistently, starting from the coarser row and ending with the light one, layers of glass mat are applied one on top of the other. According to design calculations, the planned thickness of the matrix should exceed the standard bumper size of 3 mm by 2 times, that is, have a parameter of 6 mm.
The plan for laying rows is represented by the following diagram (the number of rows is indicated in parentheses): No. 100 (1), No. 225 (1), No. 450 (3 and 4), No. 600 (5 and 6).
It is recommended to roll with a roller every 2 layers to squeeze out any air pockets. After completing two layers, you need to let it dry for 24 hours, then clean the surface with sandpaper No. P40.
Then everything is repeated with 3 and 4 layers, and then with 5 and 6, that is: laying. holding and cleaning.
Leave for another 24 hours and disassemble the mold. To facilitate the process of removing the matrix, tap the connection with a rubber hammer and, if necessary, place wedges. Sharp edges and protruding pieces of fiberglass are removed using a grinder. The inner surface is cleaned of traces of sanding dust using acetone.
The sample is ground and polished with sandpaper (No. 1000, No. 1500, No. 2000) soaked in water. The end of sample processing is polishing with a felt wheel.
The criterion for a well-done job is the mirror surface of the matrix, with no scratches, abrasions, or unexpected depressions on it.
4. Making a car bumper yourself: the production process
To replicate the product, 6-7 layers of separator are applied to the surface of the matrix. After this, apply 1-2 layers of glass mat No. 450 and 1 row - No. 600.
The spatial model requires 24 hours to dry. Then it is tried on the car. The part is primed and painted, and then secured using end holes drilled at the ends of the U-shaped metal elements.
This concludes the presentation of the process of how to make a bumper with your own hands.
Source: http://NashiKolesa.ru/kuzov/bamper-svoimi-rukami
DIY bumper tuning, video on how to make a bumper
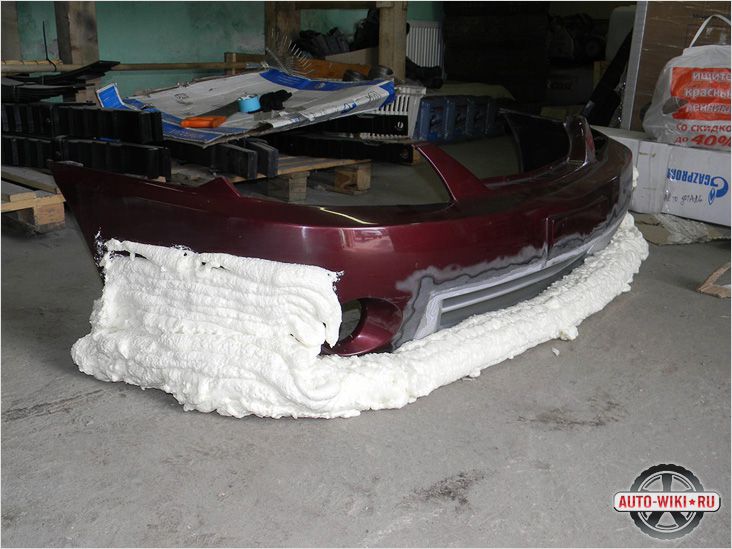
More and more car owners want to stand out on the road by having a unique design for their car. For example, you can make a unique bumper tuning yourself.
By creating your own bumper for a car, for example, from foam plastic and fiberglass, you can give your vehicle an exclusive style and attract admiring glances from friends and other car owners.
When turning to special showrooms to remodel your car, remember that tuning a car is an expensive pleasure. Many parts, such as bodies, are made to order. Hence the high price for decorative elements and the work involved in their production and installation. Do-it-yourself bumper tuning is a good opportunity to express yourself, create original body elements and at the same time save money.
How to make bumper tuning? There is nothing difficult about this task. All you need is the usual set of tools that you have at home or in the garage, as well as some skills and free time. Before you do the work yourself, determine the type of task: reworking a factory part or creating a new one.
Making a bumper yourself will require not only technical skills, but also patience.
The main difficulty in such work is the need to constantly check the part with the required dimensions and avoid deviations from the plan.
Do-it-yourself bumper tuning also requires you to constantly try on the product on the car body. This will allow you to adjust the bumper to the dimensions of the car as much as possible.
Before you start making a product from scratch from foam and fiberglass, it is advisable to make a few sketches of the design of your project. This way you can clearly determine which option you like, so that you can then implement it.
In order to turn your imagination into reality and create a design feature for a car, you need to purchase the materials necessary for the work. They are inexpensive and easy to find on sale. For your creativity you need to have:
- Styrofoam. It is advisable to stock up on this material so that, if necessary, you can make adjustments to the work.
- Polyurethane foam. This product can be purchased at any hardware store. Stock up on enough of it.
- Fiberglass fabric, polyester resin.
- Putty, primer mixture and paint of the color you need.
It is also advisable to buy special technical plasticine, which should be applied to the foam. This is necessary in order to protect the material from a chemical reaction with the resin. The foam dissolves upon contact with the resin, and then all your work will go down the drain.
Having purchased all the necessary materials and created a plan for your project, you can begin to implement it. First you need to decide on the dimensions of the future product and make a matrix.
The basis of the entire future design is the created copy of the bumper base. It is according to the dimensions and shapes of the matrix that a new bumper for the car will be created.
There are two ways to make a matrix copy: using a cast from a factory bumper or by making a matrix from construction foam.
- We remove and prepare the original bumper: cut off excess elements if they have become unusable. For example, holes for headlights or the bottom edge. This can be done using a grinder.
- The main material for creating a copy is technical plasticine. Apply plasticine to the bumper, which can be slightly heated for ease of use.
- Apply plasticine to the entire surface of the structure. Especially in those places where you have planned changes in the shape of the bumper.
- The next step is to give the shape and size of the future structure. Draw marking lines on the left side of the bumper, along which you can draw the right side of the structure. This technology of creating a copy of one side and transferring it to the other will achieve symmetry.
- After giving the basic shape, you need to check the sizes and shapes, check if the holes for the headlights match. The final stage will be sharpening sharp corners, giving the final shape to the product.
After completing these steps, the form must be removed from the bumper. It is advisable to make a matrix that will consist of several parts. This will allow it to be easily removed from the bumper without damage.
A more professional way to make a matrix is to create a copy from construction foam. The main task is to apply the composition to the bumper and remove excess mixture.
An important condition is that the matrix must be produced quickly in this way. Beginners will find it difficult to make a foam copy because the fast pace of work can cut off excess material that can no longer be added.
In this case, a plasticine copy is an excellent option for making a matrix.
After making the matrix, we level it and prepare the base of the bumper for subsequent finishing. The next step is to apply resin to the piece and apply fiberglass sheets.
It is necessary to mix the resin with the hardener that will be used to glue the fiberglass sheets. Choose material with a density of 150 grams per half meter. It will be enough to glue 3 layers of fiberglass.
Once the resin has hardened, the new bumper can be removed from the mold and further reinforced with fiberglass. This is necessary to give greater rigidity to the structure.
After creating the basis of the structure and working out its shape, you can begin the final finishing work. Putty your future bumper and give its final shape. After this, you can begin grinding, as well as the final leveling of the entire surface.
Be sure to place the bumper against the body of your car during all stages of work and make sure that the dimensions of your product match. After all the main work, you can begin finishing. Apply primer to the surface of the bumper, and then proceed to paint the structure in the paint tone of your choice.
Source: http://calypsocompany.ru/avto/tyuning-bampera-svoimi-rukami-video-kak-sdelat-bamper
How to make a homemade bumper
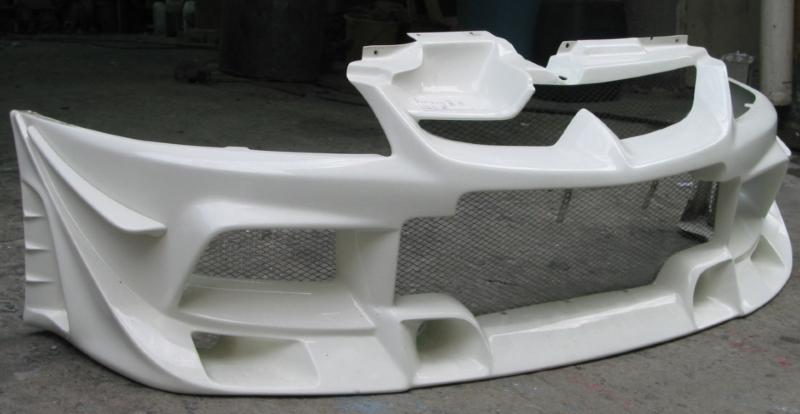
To make a bumper using polyurethane foam, you need to have skills in working with it and sculpting skills. After all, the part should turn out smooth and symmetrical. Sloppy flaws can ruin all your hard work.
1
When creating a bumper, we will need polystyrene foam and polyurethane foam. Therefore, we take into account their physical qualities. The foam dissolves upon contact with polyester resin, which we will apply to the bumper later, if we do not protect it with technical plasticine. And polyurethane foam is aggressive towards metal, so when working with it, we hide everything metal under penofol.
2
We remove the old bumper. Then we start designing a new one. From sheets of plywood or pieces of clapboard we install a kind of lower and upper side of the bumper. On paper we make sketches of what we want to get in the end: the shape of the bumper, the location of the air intakes, the side curves, the place for the foglights (if necessary).
3
Let's move on to design: we give our bumper a shape. Along the lower border marked earlier, we lay out a layer of foam plastic as the future “bottom” of the bumper.
Directly to it, using “liquid nails,” we glue vertically directed “jumpers”—the frames of the main air intake, the side ones, and the places for the foglights. Glue a horizontal foam panel on top and leave it to dry until the next day.
The exact proportions are not important here; we will adjust everything later. It is important to create a kind of frame for the future bumper. Using a marker and a knife, slowly and very carefully, we adjust our frame: with a marker we mark the necessary boundaries, and with a craft knife we cut off the excess foam.
It is better to devote several days in a row to this activity than to make mistakes in a hurry or completely ruin the entire workpiece.
4
We fill all the provided space with polyurethane foam. We apply the foam in a moderately thick layer on the surface of the foam and where there are no holes. We leave the workpiece to dry for a couple of days.
5
Using a sharp knife, cut off the excess foam and give the future bumper the desired shape. Perhaps we will cut off the excess somewhere, then we will have to apply an additional amount of foam to such areas, in which case the process will take another two days.
This stage is the most painstaking, because it is necessary to take into account symmetry and all the gaps. We cover the exposed areas of the foam with technical plasticine or putty (preferably in several layers). We treat all rough places with fine sandpaper.
6
We apply several layers of polyester resin and fiberglass to the bumper to add strength to the structure. Leave until completely dry. Then we prime and paint the bumper. We install meshes in the air holes.
The process of creating a bumper with your own hands is a complex and lengthy process. At the same time, the huge advantage of such a bumper over purchased ones is its cost.
A well-made bumper after painting does not reveal itself in any way, but it gives the car uniqueness and pride to its owner.
Source: http://SovetClub.ru/kak-sdelat-samodelnyj-bamper
How to make a bumper with your own hands, including foam, video
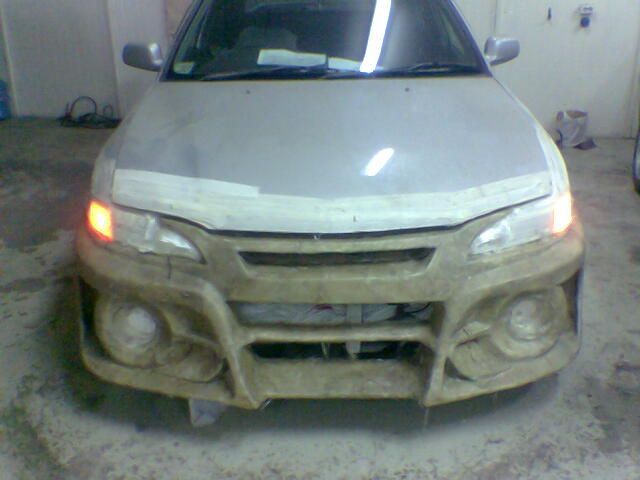
Any car owner has at least once thought about tuning his four-wheeled horse. The desire to stand out on the road pushes for modernization of body elements, changes to the interior, installation of additional electronic components and optics.
First of all, the appearance of the car is upgraded. It is he who immediately catches the eye of others. In this article we will try to cover the topic of bumper tuning with our own hands.
The availability of materials and a fairly simple manufacturing process allows almost anyone to transform the appearance of their car.
Possible tuning methods
The simplest thing you can do is order a new bumper from a specialized store that sells body kits and other tuning parts. In this case, you need to select a part for your car model; there are no universal solutions. Such tuning is not always justified.
Firstly, stores do not sell parts for all brands of cars. The shelves usually have bumpers for popular and top-end car models. Secondly, body kits are made of especially durable plastic or carbon fiber, which is reflected in their price. A factory bumper is not cheap.
Thirdly, the design of the finished bumper may not meet the buyer's requirements.
These three reasons push the car owner to make a body kit with his own hands according to an individual design. The bumper can be made from scratch or using an old one. In the second case, there are no problems with the subsequent attachment of the modernized bumper to the body, but you will most likely not be able to fully realize all your ideas.
Preparation and necessary tools
Work on the bumper should start with a piece of paper and a pencil. Sketch a rough sketch of the new body kit. If you don't know how to draw well, you can take the idea from the popular computer game Need for Speed. After looking through the photos of the fleet of proposed racing cars, you will definitely be able to find a suitable bumper for your car.
To make a foam bumper from scratch, you need frame material
To make a new bumper, you will need the following:
- polyurethane foam;
- structured foam;
- masking tape;
- knife with replaceable blades;
- technical plasticine;
- fiberglass grade 300;
- sandpaper;
- polyester or epoxy resin;
- putty;
- car paint.
To make a foam bumper from scratch, you need frame material. You can use OSB with a thickness of 8–10 millimeters. This material can be cut well with an electric jigsaw and is quite lightweight.
Making a new bumper from foam
- According to the sketch, we form the basis for the future body kit. We make the model from OSB board. We are thinking about mounting it to the body. You may have to weld on additional brackets.
- We seal the body and optics adjacent to the future bumper with masking tape.
- We fill the voids with polystyrene foam and polyurethane foam, and roughly form the future bumper. Do not apply a lot of foam at once! A thick layer will take a long time to dry, up to three days. It is better to gradually apply layers at intervals of 8-12 hours.
We fill the voids with polystyrene foam and polyurethane foam, and roughly form the future bumper
- After the foam has dried, take a knife with replaceable blades and cut off the excess polyurethane foam and polystyrene foam. We form the appearance according to the drawn sketch.
- We cut holes for additional optics and air ducts, if they are planned in your project. To maintain symmetry, we use cardboard patterns. We perform a more precise adjustment of the shape using sandpaper.
- We reinforce the surface with fiberglass and polyester resin.
- In total, you need to lay 5-6 layers, allowing each to dry a little. In places of bends and joints, it is recommended to lay 7–8 layers of fiberglass. Complete drying of the resin occurs after 24 hours at room temperature.
- Prepare the surface for applying putty: sand and degrease.
- We putty on the new bumper. Level the surface. We sand and degrease again.
- Apply primer. It will increase the adhesion of paint to the surface.
- Paint in 2-3 layers. The color can be chosen to match the body or another. It all depends on your desires and ideas. We protect the painted surface with autovarnish.
- We attach the bumper to the car.
Preparing the surface for applying putty: sand and degrease
New shapes of the old bumper
To create an original body kit, you can use an old bumper. This method is less complicated and has one big advantage. You won’t have to think about how to attach the new body kit to the car body. In this case, standard fasteners are used.
In this case, you should also start with a sketch of the future bumper. The technology of such tuning is not much different from creating a bumper from foam from scratch. Polyurethane foam is applied to the old bumper. Using polystyrene foam and foam, a new design is formed. The processing and reinforcement process is similar to the technology described above.
Creating a new unique exterior takes from 7 to 14 days. There is no need to rush: you need to let all the layers dry. If everything is done with perseverance and love, the result will be amazing.
We sincerely wish you good luck in upgrading your car!
Two-stage bumper production on video
Source: http://pol-z.ru/dva-sposoba-sozdaniya-bamper-iz-peny-svoimi-rukami/
Making a bumper yourself
Content
Materials for creating a bumper
Foam bumper
Foam bumper
Materials for work
Operating procedure
Preparation of the base and sketch
Shaping the part
Recommendations
If a car driver has an accident or wants to make the exterior of his car non-standard, a home-made bumper will be an excellent product. It is known that a car bumper is the most vulnerable point of the entire car body.
It is subject to a wide variety of tests, due to which it often becomes unusable or loses its appearance. There are many options for solving this problem. This part can be restored or replaced with a new one.
But this will require large financial investments.
The ideal option would be to make the bumper yourself. This will help solve the problem of aesthetic appearance, as well as distinguish your car from others. Producing the product yourself allows you to give the bumper any appearance the driver desires. You can use all your creative abilities in this process.
DIY bumper
This method is suitable only for those car enthusiasts who have an understanding and certain skills in mechanics. It requires a lot of hard work, patience and significant labor costs. If you are ready for this, then the end result will definitely please you.
There are several ways to make a bumper yourself. It can be made from polystyrene foam, construction foam, or combining both methods. Whatever method you choose, the result will be an absolutely unique part that will highlight and decorate your vehicle, while saving significant money.
Materials for creating a bumper
It doesn't matter what type of material you choose to make the bumper. In any case, you will need the following materials:
- welding machine and grinder;
- sandpaper, from coarse to fine grain;
- various cutting devices for cutting foam or polystyrene;
- putty;
- fiberglass;
- technical plasticine;
- paint for final painting of the part.
Welding machine for creating a bumper
The easiest way to make a bumper with your own hands is from foam or polystyrene foam. These materials are readily available and very inexpensive. It is these factors that car owners are guided by when choosing materials.
How to make a bumper:
- the intended shape of the part is created;
- the surface is prepared for the resinization process (applying a layer of resin);
- Resin and fiberglass are applied sequentially in layers;
- fiberglass is treated with putty;
- the surface is primed;
- The finished bumper is painted.
Creating the Bumper Shape
If you want to build an additional bumper cover, use a combined method, using both polystyrene foam and construction foam. During preparatory work, do not forget to prepare the necessary tools and brushes for applying putty, paint, primer and other materials. Personal protective equipment will help protect your hands and eyes while performing work.
Foam bumper
The material itself easily dissolves under the influence of resin, so before applying a layer of it, you should cover the foam with technical plasticine. According to experts, this type is the easiest material to use, it is easy to work with and will not be difficult to give the desired shape.
Using several sheets of this material and liquid nails, you should build a frame and let it dry. Next, according to the plan, cut out the bumper part according to the sketch, using a marker and a knife. Take your time, the work depends on precision and care.
After completing the stage of cutting out the part, we apply technical plasticine or putty to it. The latter needs several layers. The entire structure should dry well and it is ready for sanding. The next step is to apply resin and glass wool (you can use fiberglass).
If for some reason you do not want to use fiberglass, use ordinary newspapers and treat them with putty.
DIY foam bumper
Foam bumper
If you chose construction foam to create this part, you should take into account that it negatively affects the metal and can damage it. Before applying such a product to the car body, you need to remove the attachments and protect the remaining metal parts of the front part of the body with penofol.
Advantages of making a bumper based on foam:
- cheap material;
- the consistency of the foam allows you to exactly repeat the required shape, filling all the voids;
- quick drying;
- ease of processing.
DIY foam bumper
The method involves applying polyurethane foam to the body and letting it dry. We give the part the required shape using a sharp knife. To work, we use a sketch prepared in advance and strictly according to it we cut out the desired shape of the bumper. We apply layers of glass wool and resin to the finished body part. This completes the main process. All that remains is to do the painting work after puttying and priming.
Materials for work
Above, we learned what materials will be needed, depending on what we decided to make a bumper for our car from. Now let's look at each method separately in detail.
Materials required for the manufacture of body parts from polyurethane foam:
- masking tape;
- several cans of construction foam (usually 3–5 pieces are required);
- construction gun for squeezing foam;
- epoxy resin;
- metal foil;
- fiberglass or fiberglass (can be replaced with newspaper);
- knife (it is convenient to use a stationery knife, with replaceable blades);
- coarse and fine grain sandpaper;
- putty.
Putty for creating a bumper
Don't forget about proper workplace provision. It should be a fairly large, flat surface that can be accessed from different sides. A large table is quite suitable for these purposes. Make sure you have good lighting; it is advisable to have a mobile light source. This will make the process much easier.
Tools and supplies for making a foam bumper:
- several sheets of polystyrene foam (width 60–80 mm);
- "liquid Nails";
- technical plasticine;
- putty;
- sandpaper of different grain sizes;
- knife for shaping;
- polyester resin;
- fiberglass.
Foam plastic to create a bumper
For both methods, the final stage will require a primer and paintwork itself. You can use it either to match the color of the car, or based on your own preferences and taste.
Operating procedure
Let's take a closer look at how to make a bumper from polyurethane foam yourself:
- Prepare the surface. Foam has a negative effect on metal, so all parts must be protected. To do this, the removable parts should be dismantled, and the remaining surface should be protected with masking tape and penofol.
- Apply foam to the surface. The layer should be uniform and thick. You will need an average of 4 cans of foam, plus a couple of cans for subsequent work related to shaping. The foam should be allowed to dry thoroughly. Depending on the temperature and humidity of the environment, it takes from one to two days.
- Directly cutting out the shape of the future bumper using the created project. If voids appear during work, they should be filled with foam.
- Cover the finished bumper with layers of resin and glass wool. They are needed to provide stability. A total of four or five coats are required to ensure the strength of the outer layer.
Installing a foam bumper
We make a bumper with our own hands from foam plastic:
- Glue the foam pieces together using “liquid nails.” You will need approximately eight sheets.
- Make a sketch of the future part from paper and, after waiting for the workpiece to dry, begin cutting out the bumper. Use a marker to help you cut all the necessary holes correctly.
- Treat the designed surface with technical plasticine to protect the foam from resin. Instead of plasticine, you can use putty. After drying, sand it.
- Using the same method as with foam, apply layers of fiberglass and resin. Instead of glass wool, the surface of the part can be covered with newspapers and puttied again.
Both methods have the right to life and give a good final result if all processes are performed correctly and accurately.
The last step in both methods will be finishing the surface, priming and painting.
Preparation of the base and sketch
An old bumper will serve as an ideal base for a new part made from construction foam. The inside should be covered with masking tape. This is very convenient for marking.
In order to clearly understand in detail how the future bumper should turn out, on a sheet of paper you need to draw in detail the radiator grille, holes for light fixtures and other nuances. To make a new foam bumper, we don't need the old one.
We will only use a paper blank to draw small details.
Shaping the part
This stage is one of the most responsible and requires great concentration and a steady hand. Do not forget to maintain symmetry when following the sketch. Before picking up a knife, mark all the places that need to be cut in the part. Holes are needed for fog lights.
To give the workpiece a shape, you should arm yourself with a sharp knife. The stationery one is ideal because it has replaceable blades, which is very convenient and does not slow down the process by constantly sharpening the tool.
It is necessary to very carefully remove the manufactured part from the old bumper, which served as a template for us. It comes out quite easily, but keep in mind that the foam is fragile and can be damaged.
Giving the part a symmetrical shape
The process of shaping is long and painstaking, requiring maximum concentration. After the part is cut out, it is processed with sandpaper, changing the grain size from coarse to finer. When sanding is completed, you can begin to putty. The final step will be re-sanding using fine-grit sandpaper.
Shaping a future bumper from polystyrene foam is technologically no different from a part made from polyurethane foam. But cutting out the foam will be more difficult, especially in places where liquid nails come across.
Recommendations
Having looked at how to make a bumper with your own hands, we found out that it is not very difficult if you have endurance and patience. Manufacturing methods are similar and do not require significant material costs.
Everyone chooses the materials they like. For beginners, it will be easier to use construction foam, since it can be used to make a part using an old bumper as a blank. Cutting the required shape from the foam is also easier.
If you don’t yet know how to make bumper tuning with your own hands, use your imagination, because this is a creative process that helps make your car stand out from the crowd of its peers and attract admiring glances.
Source: https://1000sovetov.ru/article_izgotovlenie-bampera-svoimi-rukami
How to make a power bumper with your own hands from fiberglass?
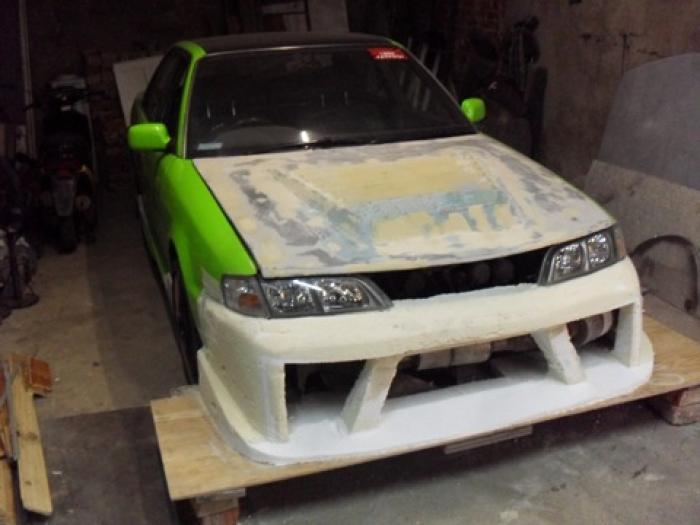
The bumper is one of the most visible parts of a car, determining its appearance.
Tuning enthusiasts can make or modify this design detail themselves, making their “swallow” individual and eye-catching.
Almost everyone can do such tuning; all you need is skillful hands, knowledge, time and great desire. Brief information on how to make a bumper with your own hands is given in this article.
Technology
Making a bumper from scratch requires skills in working with various materials, tools, and experience. It is difficult to achieve absolute symmetry, minimal uniform gaps with other parts, and compliance with dimensions. A stumbling block may be ensuring fastening to standard places: high precision and placement of fasteners are required.
We remove broken and unnecessary parts, add new parts and holes - everything is limited only by your desires and skills.
In factory conditions, the materials most often used are inexpensive, high-tech ABS plastic. Higher quality, but also more expensive, carbon and polyurethane are used on premium cars. You can make an excellent quality power bumper yourself at home using fiberglass.
The manufacturing technology of such a bumper is as follows:
- A sketch is drawn on paper.
- A mock-up of the bumper is being made.
- The model is covered with fiberglass.
- The workpiece is processed and installed on the car.
Materials for layout
Polystyrene foam and polyurethane foam, individually and together, are a simple, inexpensive material for making a model.
Thick sheets of foam plastic are glued together with “liquid nails” into a rectangular block slightly larger than the intended bumper. A sharp knife, a marker, skillful hands and several hours or days of work will lead to a life-size model of your future tuning.
Making a bumper
Polyurethane foam is convenient to use when modifying an existing bumper. Before applying it, it is necessary to protect metal surfaces with masking tape or penofol. 3-4 cylinders are needed for initial use, 2 more will be needed during operation.
After application, when cured, press the foam with gloved hands for greater density. To prevent the foam from dripping, use cardboard and tape. Work with the model can begin after gaining strength in two days.
We remove all excess with a knife, add foam if necessary, the work, as in the previous version, will last you for several days.
These two materials can be combined: limiting surfaces, vertical narrow ribs, small parts cut out of foam, and the volume filled with polyurethane foam.
After covering the model with fiberglass, you will get a finished bumper, but if it needs to be replicated, then you need to make a matrix - a mold for making any number of parts. For a matrix, it is optimal to make a model from technical plasticine: it is malleable, easily takes the most complex shape, it is more convenient and faster to work with it, volumes in the right places can be easily removed and simply added.
Covering with fiberglass
To give the product strength, it is necessary to cover it with fiberglass - fragments of fiberglass impregnated with polyester resin.
To protect against the destructive effect of resin on foam, the material must be carefully treated with technical plasticine.
It is recommended to glue models made of foam and polystyrene in several layers with masking tape and apply aluminum foil, so that later it is easy to separate the model and the fiberglass blank.
For gluing you need sheets of fiberglass (glass mat), resin, hardener, scissors and a brush. You can work at temperatures from plus 15 to plus 30 degrees in a well-ventilated area . For the first layer, thinner and more flexible glass mat No. 300 is used.
Gently moisten the surface with a brush, apply pieces of fiberglass cut into place, and additionally coat until completely saturated. In places of bends and joints, use thicker resin, prepare portions of 200–300 grams, do not allow air bubbles.
The next coat can be applied after partial curing after 1-4 hours, depending on the temperature and amount of hardener used.
A total of 3 to 5 layers are made, in the middle a thicker glass mat is used for strength (for example, No. 600), but this increases the weight.
DIY bumper
When making a matrix using a model, plasticine must be treated three times with Teflon polish, before applying the first layer of fiberglass, apply resin with aluminum powder, and additionally make technological bends of 5 centimeters along the edges. To avoid violation of the geometry during solidification, it is advisable to use a metal or wooden frame. After removing the matrix, the remaining plasticine is removed with a hairdryer and a rag.
To make the bumper itself, the matrix is lubricated with wax, the most important layer of polyester resin with aluminum powder is applied (necessarily without bubbles, this is the outer part of the future bumper, which determines the appearance), then a layer of fiberglass No. 300 and two layers No. 600.
Final processing
The edges of the workpiece are processed. Be careful not to get any fiberglass chips or dust on your skin or inhalation. If you modified the “original” bumper, then secure the workpiece to it with glue, screws, bolts, self-tapping screws, and additional fragments of fiberglass overlapped onto the base.
Making your own bumper, although it requires experience and time, is quite possible. This is a good way to spend time in the garage, increase your self-esteem, and give your car an original look.
Source: http://autodont.ru/body/bumper/svoimi-rukami


