Wires for lighting yourself - logbook Nissan Almera =>My Soul
It’s winter outside, in severe frosts I began to notice that the starter does not turn very vigorously, the battery has been installed from the factory, and after all, it’s already 10 years old - it’s a long-liver.
Yes, and they repeatedly turned to me with a request to light a cigarette, and since I myself found myself in situations where I needed the help of a fellow driver, I thought about purchasing wires for lighting, so that, as they say, both for myself and for people.
They will come in handy)
After a short shopping trip, I realized that it is almost impossible to buy normal wires at an adequate price. Often, wires consist of 80% insulation and a dozen thin wire strands - well, where is this good?
Well what is this?
I decided to make good quality wires with my own hands, with a power reserve (I plan to purchase an SUV, so I did it with that in mind).
So, let's go) I smoked the necessary literature and began to prepare material.
I honestly cut 4.5 meters of KG-25 welding wire from work, but unfortunately with poor insulation - it is soft and easy to cut, and is not held in high esteem by welders. But for my purposes it’s just the thing, and it behaves tolerably in cold weather, so it’ll do. Ideally, take CG with additional.
HL marking, but it’s a question of money.
Zoom
KG-25
Then the question arose in choosing clamps. I am convinced that 200-300 A welding crocodiles are the best choice, so I initially decided to take them.
I would put these for example
Getting them out of work in the same way as the wire didn’t work out—their conscience will torment them. I decided to look at the price in stores - 350 - 400 rubles per piece.
At this point the amphibian began to choke me, and for lack of anything better I had to take the garbage “ash clamps for 200A” as it is written on the price tag (40 rubles apiece, ahem.).
Although, by and large, God forbid, they are designed for 50 A, well, at least the spring is more or less... We will collective farm in general.
Zoom
you can't look without tears
I also stocked up on a dozen lugs for wires from 20 to 35. (20-50 rubles apiece) You can start making the main wire cut in half, the length of each turned out to be 2.25 m - that’s it, the golden mean. And they will fit under different conditions, and the resistance is not increased.
I drove it into the lugs this way: I tinned the wire and beat it annoyingly with a hammer - I’ll write later why. Someone will say that you can’t do this - but I decided so)
As a result, the wire is tinned and the contact is my respect. Now let’s start the collective farm with crocodiles. Pros of welding clamps: 1. Powerful spring, good contact2. AMG train is a copper braid from one lip of the clamp to the other.
As a result, contact is made throughout the area of contact with the crocodile.3. The quality of the metal is natural4. Copper inserts on the lips (contact patch)5.
Well, plus for their brutal appearance. So I wanted my cheap clamps to at least somehow correspond to their purpose.
I found a wire a la KG-16 in the bins of the garage, the insulation is also useless - but I don’t need super characteristics from it, and I decided to make an AMG cable to improve the contact. This is what happened
Next, I drill the crocodiles to connect them to the wire.
Cans have better metal, it’s just a disappointment, by God, what can you do? I decided to make everything look better by soldering the clamps with the wire. It may not be aesthetically pleasing, but there is no doubt about its reliability.
The final assembly was carried out at home.
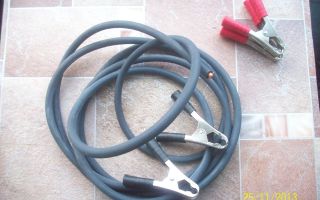
Actually, the finished look
length 2.25 m
I like it from the outside, I have no doubt about its reliability. So at any time now I’m ready to give you a light and light a cigarette myself if anything happens (pah-pah)) Good luck to everyone and good contact!
Criticism and wishes in the comments)
Source: https://www.drive2.com/l/8883433/
Wires for “lighting the battery” with your own hands
The car is only a year old and doesn’t seem to need wires for lighting. But nevertheless, it was decided to make normal wires for “lighting the battery.” From personal experience, KG-35 mm2 wire was chosen. 6 meters (1260 rubles) and wire KG-25 mm2 2 meters (300 rubles for terminal jumpers).
Ground clamps KZ-31 for 315 amperes 4 pieces. (1000 rub.) Tips 8-50mm2 -4 pieces and 8-25mm2 -4 pieces. (260 rub.) We will need: a crucible with solder, soldering acid, a jar of water, a gas burner or stove or cutter. Depending on what you have at hand) and a couple of rolls of electrical tape (blue - and red +)
Ingredients! We remove the insulation at a length of 30mm. Jumpers made of KG-25, about 30 cm long, 4 pieces and the main KG-35, one 2.8 meters long, the other 3.2 meters long.
A drop of soldering acid into the tip. You don't need much, otherwise you might get splashed in your face when immersed in molten solder!
The tips are dressed and prepared for soldering. Now the clamps
Here they are! 315 amps is what we need. (there are also ones for 510 but they are too big!)
Unscrew the nut, remove the washer and take out the M8 bolt. We see two sides at the edges. They need to be ground off with sandpaper or a file.
Like this on all four on both sides. After this, we smear them with soldering acid until the wire fastening area is cut.
Heat until melting. Whoever can do what we can, we use a gas cutter. How to find out the temperature and not overheat the solder? (If it overheats, there is a lot of sludge and the rubber can catch fire and become charred). As soon as the solder begins to be covered with a film, it must be removed (this is sludge, oxide). The color of the film is shiny and slightly discolored. The solder is heated to the desired temperature, you can start.
The terminals are put on and treated with soldering acid. Clamps too. And don’t forget to prepare a small piece of cotton cloth.
We dip, let it warm up and rinse. Let's get it.
After taking it out, take a cotton cloth and wipe off the excess solder. I hope about T.B. Don't you need to remind anyone? The temperature of the molten solder is +260 degrees. We work with gloves!
Now it’s the turn of the tips. After dipping and warming up, we also take them out and wipe them with a cloth to remove excess solder.
Then cool it in a jar of water. LOAD SLOWLY! Otherwise, melted solder will fly in your face!
Tinned and soldered! Now you need to rinse in a solution of baking soda and dry. (You don’t have to rinse, but over time, the remaining acid will form greens. The residue will be green, which will worsen the contact.
First we wrap the lugs and the end of the wire. By insulating the wire entry into the lug. Then we screw the wires to the clamps. Bolt-clamp-tip-nut. I don't use screw washers. Ideally, of course, you could take a soldering iron and solder the edge of the clamp and tip. To be honest, it was already a waste to do this.
Somehow like this! We wind the wires to the handles of the clamps.
Length of positive wire.
And now about the main thing. Why is one wire longer than the other? In particular, negative. When you light up another car, first of all you connect the + battery of your car to the + battery of someone else. Then - the battery of your car.
And lastly, you connect - to the ENGINE of the car you are lighting up.
NOT ON THE BATTERY, BUT ON THE ENGINE! Otherwise, a spark that jumps from the battery of the car being lit will blow it into the air! For this reason, I made the wire longer.
The finished product from Samodelkin! Why did you use electrical tape and not zip ties? Because they can peel off the paint of a car when pulling wires.
By the way, there was a handbag lying around from China that would come in very handy. Now let them lie in it and wait in the wings! Beaver to everyone and batteries charged to 1.29 kg/cm! )))))
And I also want to note one point, if you have serious equipment, such as a concrete pump or aerial platform, then there is an excellent company that supplies spare parts specifically for such equipment. So, come in, call and order, the prices will pleasantly surprise you.
Author; Andrey Kostylev, Ryazan
Source: http://xn—-7sbgjfsnhxbk7a.xn--p1ai/provoda-dlya-prikurivaniya-akb-svoimi-rukami
Do-it-yourself electrics: Making high-quality wires for lighting a car
Good afternoon, dear readers. In this article we will talk about how to make such wires for lighting yourself so that you can start a car with a completely dead battery. This can happen if you leave for a long time and forget to turn off the light. Or in severe frosts.
This is exactly what happened in central Russia a couple of weeks ago - when the temperature suddenly dropped to -27 and many were unable to start, including my neighbor. For this reason, at his request, I made him wires for lighting, which will be discussed in the article.
(Picture taken from liveinternet.ru)
For residents of Siberia and the northern regions of Russia, frosts are commonplace and, usually, their cars are well prepared for winter (see the last section of the article). But for residents of the middle zone, especially those living in large cities, unexpected frost can pose a serious problem.
Why not “buy ready-made wires”? The thing is that there are simply no quality ones on sale. Of all the ones I saw, there was something more or less decent in the review of the magazine “Behind the Wheel” and was called “advice from an auto electrician.”
But this product was specially made by the manufacturer for the test of this magazine - so there are doubts that standard products have the same workmanship.
Why isn't it on sale? The fact is that a high-quality cigarette lighter, taking into account the multiple market markups, will cost the buyer such an amount that simply no one will buy it. Therefore, the shelves of car dealerships are filled with expensive and at the same time low-quality junk, mainly Chinese (but also Russian) made.
The packages say currents of 500, 600 and even 1000 amperes, but these are all “Chinese” amperes and must be divided by at least 10. Of course, these cigarette lighters help, but only if the battery is only slightly discharged. Or if charging takes a long time (at least 6-10 hours).
But is anyone ready to light your car for such a long time? Usually, if the car does not start within 20-30 minutes, the owner locks the car and takes the bus. I previously wrote about Chinese and Russian cigarette lighters and wrote that, unfortunately, almost always, they are of poor quality.
Even the cigarette lighter from the famous American brand Snap-On, costing 12 thousand rubles (as of January 2017), according to the test results, turned out to be of poor quality (which is doubly offensive considering such a high price).
Here is a review from Za Rulem magazine based on the test results: What is a high-quality cigarette lighter? A high-quality cigarette lighter is a cigarette lighter that, due to its design, is capable of passing the rated current of the starter of the acceptor car with a minimum voltage drop (less than 1V) in a time sufficient to start the engine of the acceptor car (this time is considered equal to 30 seconds). Next I will write “donor” - the one who gives a light, “acceptor” - who is given a light. The quality of a cigarette lighter is determined by the following components:
- Wire, namely core and insulation.
- Alligator clips
- Connections
All three components are subject to strict requirements due to this? that the cigarette lighter must pass large starter currents, as well as maintain insulation flexibility at low temperatures. For example, PVC insulation hardens in the cold and cracks when the wire is bent. Therefore, rubber or silicone insulation is used for cigarette lighter wires. But many manufacturers, in order to save money, make PVC insulation with the addition of additional plasticizers. As a result, at -30, the insulation on the wires cracks and using such a cigarette lighter is simply dangerous (despite the low voltage of 12 volts, shorting the battery positive to the car body through a crack in the insulation will lead to dire consequences). A passenger car battery has a nominal voltage of 12 volts, and the starter motor in an average passenger car has a capacity comparable to that of a cooktop. For example, about 7 kilowatts (approximately this power is required to crank the crankshaft of a two-liter engine). From here, through simple calculations, we obtain the rated starter current equal to 7000/12 = 583 amperes. In fact, the voltage on a charged battery is more than 12V (usually 12.7), therefore, the current is less, but this is not so important - it is important to understand where such huge currents come from.
(Car starter diagram. Picture taken from the site)
This is the current the battery must produce in order for the engine to start. This current is indicated on the battery itself as cold cranking current.
And if the battery is severely discharged, then in order to start the engine, such current must be withstood not only by the cigarette lighter cable, but also by the alligator clips, all transit connections in the cigarette lighter, connections to car batteries, etc.
If there is a weak link somewhere, the voltage will drop due to its resistance, and the connection itself will get very hot. As a result, if the battery is dead, the acceptor engine will not be able to start.
It is also obvious that the cross-section of the wire must be copper, have a sufficiently large cross-section and at the same time be as short as possible (but so short that it is possible to reach from the battery terminals of one car to the terminals of another - therefore such wires are usually not made shorter than 2.5 meters).
Crocodiles must have powerful clamps with a large contact area, and the connections must be reliable and have low contact resistance. Let's look at a typical cigarette lighter costing from 500 to 1500 rubles with a stated rated current of 400-600-1000 amperes. They almost all look like this:
(Photo taken from dvizhok.su)
Such cigarette lighters consist of tin crocodiles with copper coating, as well as wires with a cross-section of 2.5 to 4 squares (it all depends on the generosity of both Uncle Liao and the Russian seller who ordered this wire from the Chinese).
At the same time, the wires have abnormally thick insulation - obviously, this is done with the aim of deceiving the buyer (an attempt to show that the cross-section is actually larger than it is). The insulation usually consists of PVC with a high content of plasticizers. The wires are attached to the crocodiles by pressing with brackets covered with insulated handles.
Naturally, there can be no talk of any current of 600 amperes (or even 100!). Such cigarette lighters are only suitable for lighting batteries that are not very low. Or it is necessary to charge the battery of the acceptor vehicle for a long time (for many hours) with low currents. Let's take a closer look: The crocodile design does not inspire confidence - everything hangs loose.
The “crocodiles” themselves are made of copper-plated sheet metal with a very small contact area (in fact, the “crocodile” is in contact with the battery terminal only with the thin side surface of one clamp). The copper strands of the wire are pressed against the surface of the “crocodile” in a bundle (as in the photo below). At the same time, the wire itself is protected from insulation.
they press the staples inside the crocodile handle (unfortunately, I didn’t take a photo of the fastening, but take my word for it - it’s just terrible). Due to poor-quality wire, the cores and insulation are easily frayed, as can be seen in the photo: Now let’s look at the negative wire in a section.
Nearby, for comparison, is a PuGV wire with a cross-section of only 10 mm2, which is used for assembling apartment panels with currents of up to 63 amperes. Absolutely most of the Chinese wire is occupied by hypertrophied insulation, and the cross-section of copper is approximately 2.5-3 square.
Is it worth throwing money at such junk? After all, it is obvious that such a design will not withstand even a current of 100 amperes (or even 50!). Such cigarette lighters are only suitable for “lighting up” slightly dead batteries. You should first start by understanding what current rating it should be rated for.
This information is written on the battery itself (cold start current). Let's take as an example the current of one starter - 530 amperes. Accordingly, all components are selected for a given current. Due to the very limited range of devices offered on the Russian market, it is sometimes necessary to take components designed for a slightly lower current.
But with a competent approach, there is nothing to worry about. Clamps produced by the Italian company AE with a rated current of 500 amperes were chosen as “crocodiles”. The crocodiles are made of solid brass and have a contact area corresponding to the current. Each of the handles has a hole for an M4 screw for attaching a wire; one of the holes comes with a thread. There is a red and black option.
These “crocodiles” were ordered from the online store. If you have a large black SUV or are the happy owner of a truck or truck, this store has several options for “crocodiles” with a rated current of up to 850 amperes.
Next you need to select the wire. There are several options, including with silicone insulation (operation at temperatures up to -60).
But such temperatures do not occur in the central part of Russia, so a cheaper (and most importantly - available at Elektromontazh for cutting) flexible cable for welding machines with rubber insulation was chosen - KG / KOG1 in the U production version, from my point of view, the best cable plant among Russian ones - Kolchugino.
Operating temperature is up to -40 degrees, which is more than enough for this region. For perfectionists or residents of Siberia/northern regions, it makes sense to choose a HL cable or a wire with silicone insulation. The cable cross-section is chosen to be 35 mm2.
It was also necessary to solve the following two problems - the 35 square cable is very thick, it cannot be attached directly to these “crocodiles”. In addition, a high-quality connection of the “crocodile” with the battery terminal can only be ensured if voltage is applied simultaneously to both sides of the clamp, and not to just one, as is done on all cigarette lighters I have seen.
For these purposes, the KOG1 1×16 cable, also produced by Kolchugino, was chosen. It is more flexible than the KG, and in addition it will allow you to connect the main wire to the crocodiles (16 squares of copper will fit to each half of one “crocodile”).
Total: 4 meters KG 1×35, 2 meters KOG 1×16, All cable was purchased at the store.
Additional parts were also purchased there for the manufacture of cigarette lighter wires - 4 GML sleeves for 35 mm2, 8 TML type tips for 16 squares for an M8 screw, as well as M8 screws with full threads as short as possible. I bought Italian tips of the TML type, manufactured by VM - since the KVT assortment does not have tips that would be short enough and would fit in width. If you buy tips, be sure to check that they will fit - these “crocodiles” have sides at the edges!
All the goodness in one photo. An adhesive heat shrink of two sections will also be used, but I did not buy it since I have it in stock. Unfortunately, if you have to buy it “from scratch”, it will be very expensive - this is especially true for heat shrinkage to protect GML, very little is required, and it is sold in at least a meter piece.
An option to save money is not to insulate the wire coming from the TML tips with heat shrink, but to insulate the GML sleeves with cotton insulating tape and fix it with glue. I had great doubts about the correctness of purchasing tinned parts (namely GML and TML). Since tin at low temperatures is at risk of “infection” with tin plague.
But on the other hand, on the Internet I found the operating temperature of TML up to -70, and in any car there are a lot of soldered parts and somehow it all doesn’t fall apart, and satellites fly into space with a bunch of soldered joints.
By the way, here are the sections of KOG1 1×16 and KG 1×35 for comparison with Chinese products: “Crocodiles” have factory holes for M4 screws, but this is no good! The holes are drilled out with a drill, then threads are cut into them using an M8 scriber. The hole, accordingly, must be drilled a millimeter narrower, that is, with a 7 mm drill.
Next, take the TML tip and screw it to the crocodile with an M8 screw, after which the excess screw is cut off with a hacksaw. This is necessary in order to accurately measure the length of the screw: As a result, all screws are shortened.
Unfortunately, I did not find such short screws on sale, so I had to collect: “Crocodiles” with handles removed and short screws installed: Next, the KOG1 cable is cut into 8 equal parts (each 25 cm long) and stripped.
The length of the “pigtail” should be such that it fits into the TML screwed to the hole with a screw, and the insulation begins immediately where the plastic of the handles ends. You cannot leave the insulation on - it is too thick, the cable will not fit into the gap of the crocodile handle, and in this case, the plastic insulation of the handles will not fit. Next, the TML tips are crimped onto the “pigtails”.
This is done using PK-35 press jaws from KVT.
Of course, it would be better to press not with a point, but with a hexagon using hydraulics, however, due to the nature of my work, I do not work with large sections and do not have hydraulic press tongs. However, crimping with a point also ensures excellent contact. Next, adhesive heat shrink is applied and shrinked with a hairdryer.
If you want to save money, you can skip this step, but it’s still better to do it: Next, it’s all secured in this way: And the insulation of the handles is put on. If everything is done correctly, there is no need to cut holes in the insulation: After that, the main connection is made using GML sleeves. In order for two 16-square cores to fit properly, on one side the sleeve is slightly clamped with pliers.
It is crimped with the same PK-35. I was even surprised at how easy it is to do this for such a cross-section: After which the sleeve and sections of wire on both sides are insulated with adhesive heat shrink. This is what happened (negative wire). Total length - 2.
5 meters (and if you count from the “nose” of the “crocodiles”, then even a little more):
The second wire (positive) is made in the same way: And this is what happened; The wires for the cigarette lighter turned out to be very heavy, but reliable. From periodic maintenance - only tightening the bolts.
I also decided to make additional protection against overcurrents (in case of an erroneous connection or short circuit) - unlike the Chinese, such a cable will not burn out in the event of a short circuit, but it’s better not to think about what will happen to the battery.
For these purposes, Polish fuses with a rating of 500 amperes were purchased, as well as TML tips with a cross-section of 35 squares: The fuses are inserted into the middle of each wire onto a bolted connection with an M8 screw and are insulated with heat shrink.
But there was no time to finish it yet, and besides, there are no manuals anywhere about what the time-current characteristic of these fuses is and what voltage drops across them at the rated current. I decided to wait for now.
In order for the car to start in the cold in the middle zone, you must follow three rules: have a not very old and charged battery (the higher the battery charge, the better it tolerates frost) with clean terminals and pads (oxidation leads to a strong voltage drop), into the engine “winter” less viscous oil must be filled in, the spark plugs must be “fresh” (if their service life is coming to an end, it is better to replace them). To do this, the battery should be recharged before winter from a 230-volt network using a special battery charger. The fact is that, given the realities of modern cars and cities, the generator current after subtracting the consumption of all consumers (headlights, air conditioning, fan, on-board electronics, etc.) may be insufficient to fully charge the battery during the trip. Naturally, for residents of, for example, Norilsk with their frosts, this will not be enough - as far as I know, there, or in winter in general, they take the battery into the heat at night or use a special alarm system that starts the engine several times during the night to warm up.
Important! If you make similar wires for yourself and use them, remember that when the “acceptor” engine starts, the “donor” engine must be turned off! And, before starting the “acceptor” car, you need to recharge its battery through the cigarette lighter wires for at least 15-20 minutes (the “donor” engine must be running).
I hope the article was interesting. Regards, Alexey. |/
Source: http://www.MasterGrad.com/blogs/post/11489/
We choose ready-made wires for lighting and learn how to make them yourself
Home » Rechargeable battery » Select ready-made wires for lighting and learn how to make them yourself
Some car owners are interested in the question of what the wires for lighting are called. That's what they're called - cigarette lighter wires. Today you can find many variations of car wires on sale, but in fact most of them cannot boast of high quality. In practice, cheap Chinese wires can fail after the first use.
Because of this, when purchasing, you should take into account certain parameters that will allow you to buy quality products:
- First, you must understand that the cost of high-quality and reliable cigarette lighter wires cannot be low. Good material, that is, the base from which the wires are made, is not cheap, and the crocodiles themselves are characterized by a rather complex design.
- Even if you choose expensive wires, this does not mean that the high price will guarantee the same quality. When choosing expensive products, carefully inspect the product when purchasing.
- When purchasing a finished product, pay attention first of all to the cable cross-section.
- If you see that there are inscriptions on the wires or clamps, but they are not legible and of poor quality, then most likely they were made in China. It is better to avoid purchasing such wires.
These are the basic rules that it is advisable to follow when purchasing, but not all consumers take them into account. If you want to purchase ready-made wires, then you need their technical characteristics to be slightly higher, this will ensure that you get the required product.
Before choosing a cable for lighting a car, read the list of requirements that such products must have:
- First, look at the length of the product you are purchasing. It should be at least one and a half meters, because if they are smaller, this will lead to the fact that the sides of the cars may touch during smoking. If the wire is too long, then there is a possibility that when lighting it, a loss of voltage will be observed. It is advisable that the wires be no shorter than two and no longer than four meters.
- As for the diameter of the purchased product, this parameter must be at least 0.6 cm. It is important that the cross-section for the wires varies around 0.9-1.2 cm. Despite the fact that the cost of such goods is higher, it is not recommended to save on their purchase. The cross section directly affects the strength of the transmitted current. So the thicker the cross-section, the stronger the current that passes through the cables.
- It is best that the crocodiles for the wires are made of copper; this option is considered the most optimal. There is no need to give preference to clamps made from cheaper materials. You can accurately understand that the cables are made of copper by their weight - copper crocodiles will be heavier.
- Pay attention to the starting current parameter - it needs to be at least 200 amperes. You also need to find out about other technical characteristics. According to experts, during lighting it will not be possible to avoid voltage leakage in any case. Therefore, it is advisable to select wires in which the voltage leakage will be no more than 2.3 volts with a wire length of 1.5 meters. In this case, the output voltage parameter must be at least 9 volts.
- Before purchasing, look at the connections, since they are considered one of the most vulnerable points; in this case, we are talking about the places where clamps and cables meet. The best option is for the wire to be securely soldered to the crocodile itself.
- As for the clamps themselves, they should have large areas, this will allow you to achieve the most optimal and high-quality contact. Also evaluate the strength of the alligator clip - it is important that the grip is not weak, since this way the clip will not be able to fix the terminal. It may seem that this point is not particularly important, but it is not. If the clamp comes off when lighting, it can lead to a short circuit and equipment failure.
- One of the most important points is the quality of cable insulation. In practice, most often the need to use wires for lighting occurs in the cold season, and at low temperatures, low-quality insulation can crack. Accordingly, this may cause current leakage and damage to the cable as a whole. The best option is for the insulation to be made of silicone rubber; this material is not afraid of low temperatures (video filmed by the Battery Manager channel).
Step-by-step manufacturing instructions
Despite the wide variety of cables for lighting, it can often be difficult to find more or less high-quality products. Therefore, as a last resort, you can always build such wires with your own hands, and the procedure itself will not take much time and effort.
To make the cable yourself, you will need the wire itself, its length should be from 4 to 8 meters, and the cable cross-section should be at least 9 mm. This is exactly the length you need, since the cable itself will have to be cut.
If you take a cable with a cross-section of 10 mm or higher, it will be able to withstand even heavy loads.
It is also necessary that the cable you purchase has good insulation. As we said above, it is best that it is made of silicone frost-resistant rubber. An equally important point is the manufacture of connection clamps (alternatively, they can be removed from the car compressor).
If you buy crocodiles, it is advisable that they be welding - such devices have a strong body; in practice, welding clamps do not deform even after years of use.
Also, such devices use a powerful spring, as a result of which the voltage drop, although there will be a minimum, is minimal.
The welding clamps will need to be slightly modified, since they have a small contact area compared to the size of the battery terminals (video author - Evgeny Semenov).
The shape of the battery terminal is round and slightly elongated, so it is important that it matches the shape on the clamp. Otherwise, the crocodile will not be able to fully adhere to the terminal, and this will cause a loss of voltage; therefore, there will be no point in using a thick wire.
When soldering, the ends of the wires should be slightly flattened, this way you can increase the contact area and reduce the likelihood of voltage loss. Alternatively, you can purchase ready-made clamps and improve them by installing copper plates on the crocodile, the thickness of which should be about 1.5-2 mm.
These plates can be bent using pliers.
When the plates take the required shape, they will need to be fixed on clamps; rivets or stable bolts can be used for fastening. In order for the clamping efficiency to be as high as possible, the clamping components will need to be connected using AMG wire.
At the final stage, the clamps are soldered to the cables; before performing this task, you need to apply tin to the soldered part.
Then, using the soldering iron itself, the two components are connected - for better soldering, it is advisable to use a neutral flux, as well as refractory solder.
Photo gallery
Price issue
The cost of cigarette lighter wires depends on the manufacturer of the products, as well as their quality.
Average prices are:
- AIRLINE SA-400-01 cigarette lighter wires today cost about 950 rubles per set;
- a cheaper option - SKYWAY S03701005 - will cost approximately 550-600 rubles;
- powerful cigarette lighter wires CONTACT 600 Ah will cost the buyer approximately 1,300 rubles;
- AIRLINE EXPERT SA-1000-06E wires today cost at least 2,700 rubles.
Loading …
Video “How to light a car yourself?”
How to light the battery of your car yourself from another car and avoid making mistakes - visual instructions are presented in the video below (the video was shot by Roman Kamaleev).
Do you have any questions? Specialists and readers of the AVTOKLEMA website will help you ask a question
Source: https://avtoklema.com/akkymylyator/provoda-dlya-prikurivaniya-3742/
Homemade wires for lighting a car
Not so long ago, just a few years ago, a law was passed in Russia that motorists must drive cars with their headlights on both day and night.
For countries where this law has been passed for a long time, the headlights in the car turn on when the engine is started and turn off when the key is removed from the ignition. This is not relevant for us. A very small proportion of such cars drive on our roads and drivers have to turn their headlights on and off manually the old fashioned way.
If you forget to turn off your headlights at dusk, when the light from the headlights can be seen, you can turn them off in time.
But what if it’s daytime outside and the sun is shining brightly, and your head is busy with other work problems?
As a result, you will forget to turn them off. As a result, by the evening your battery will run out and you will not be able to start the car without assistance for your usual trip home.
You can drain the battery in different ways, for example, forgetting to turn off the lights in the car or if your alarm siren constantly went off, this will also lead to a complete discharge of the battery. Perhaps anyone can buy a new Exide car battery or any other, but still the majority of motorists in this situation will try to “light up” and recharge the old one.
In winter, finding wires for lighting a car is not difficult; almost every driver carries them in the trunk of his car, but doing this in the summer is quite an adventure.
If you have a car with an automatic transmission, starting it with a pushrod is also not an option.
What to do if you find yourself in a similar situation and you have no one to help you?
For these purposes, copper wire or aluminum wires may be suitable for you. And also if a towing steel cable accidentally ended up in the trunk of your car. If it's wrapped in plastic, that's even better.
With its exposed parts, it will not be able to make a short circuit with the metal parts of your car and not shock you when you hold on to it.
First you need to divide it into two parts. This can be done using any available items, wire cutters, pliers, a hacksaw and sometimes even a metal nail file and a stone.
Depending on exactly what tools you have, you will be able to do this either quickly, or you will have to tinker. After you manage to get two wires from the cable, connect one end of the cable wire to the positive terminal of the battery of the dead car, and the other end to the positive terminal of the charged battery of the car that helps you start.
When connecting the wire to the battery, it is very important to maintain the correct polarity on both batteries. Otherwise, it may cause the car's electronics to burn out.
When attaching the wire to the terminal with a minus sign, things are somewhat different. We attach one end of a homemade wire for lighting a car to the minus terminal of a car with a charged battery, and the other end of the wire to the body of a dead car.
The negative terminals of the batteries cannot be connected, this will lead to a very rapid discharge of the charged battery. Then we start the car with a charged battery; it is necessary for the dead battery to be recharged a little.
After this, the car with the charged battery should be turned off so that this does not lead to voltage surges and combustion of the electronics, after which we start our car. When you manage to start your car, remove the wires in the reverse order of your mounting. First, remove the wires from the negative terminals, and then from the positive terminals of the battery.
It would also be a good idea to remember about the electrical conductivity of the material from which the car's cigarette lighter wires are made. It doesn't matter whether they are homemade or not. The diameter of the steel cable must be at least five millimeters. For aluminum the diameter should be slightly less than just four millimeters and for copper just three millimeters.
Many things happen in life and one day this advice may help save you time and nerves.
Source: https://signsign.ru/blog/2012/08/08/samodelnye-provoda-dlya-prikurivaniya-avtomobilya.html
Cigarette wire test
Imagine the situation: winter, frost, you go outside in the hope of getting to your destination in a warm car, get into it... but the starter does not respond to turning the ignition key or pressing a button - the battery is dead.
And then you remember that you forgot to turn off the lights or, when getting out of the car, you sang along to your favorite song on the car radio, or the capacity of your battery has decreased over time to such an extent that the starter simply does not have enough strength in the cold.
What to do in this case? Pushing a car? Looking for a tug? Should I remove the battery and run to the nearest store in search of a charger? The easiest way is to find a luckier neighbor in the yard who has started his car and ask him to light a cigarette. But not a cigarette, of course...
And use his car as a source of energy in order to start your car. Starter cables, or, more simply put, cigarette lighter cables, are best suited for this purpose. Currently, there are a huge variety of types of cigarette lighter wires on the market with different current strengths and different price categories.
We decided to test the cigarette lighter wires and took some of the most inexpensive ones, with the ability to transmit a current of 200 A.
So, let's look at the wires.
Tiikeri
Cost - 300 rubles
Production - China
The name evokes thoughts of cold, snowy Finland, but our northern neighbors have nothing to do with the production of these wires. Packed in a round bag with a zipper, there are additionally thin fabric gloves inside.
The packaging indicates that frost-resistant materials down to -40 ° C are used. The declared wire length of 2.5 meters corresponds to the actual one.
The packaging also states that the wires are suitable for gasoline engines up to 1.6 liters and diesel engines up to 1.4 liters.
The positive and negative wires are connected together - the wire is two-core. The wire is connected to the crocodile by mechanical crimping. The handles of the “crocodiles” have insulating pads.
“Crocodiles” are steel, copper-plated.
The wire has 70 cores with a diameter of 0.3 mm, the cross-section of each core is 0.0706 square meters. mm. We multiply this value by the number of cores and get the total cross-section of each wire - 4.94 square meters. mm.
AVS
Cost - 380 rubles
Production - China
The wires are packed in a round bag with a zipper. There is a symbol on the packaging indicating that frost-resistant materials down to -40 °C are used. The declared wire length of 2.5 meters corresponds to the actual one. The packaging indicates that the wires are suitable for 2.5-liter gasoline engines and 2.2-liter diesel engines.
The positive and negative wires are separated. The wire is connected to the crocodile by double mechanical crimping. The wire braid has the AVS branding on it.
The “crocodiles” are made of steel, coated with copper; when the “jaws” are closed, they move laterally relative to each other - as a result, the “crocodile” does not get tooth on tooth when closing. The crocodile handles have insulating pads.
The packaging says that the wire uses 120 cores with a total cross-section of 9.6 square meters. mm, which was confirmed when they were counted. The diameter of the cores is 0.3 mm, the cross-section of one core is 0.0706 sq. m. mm, the total cross-section of all cores is only 8.5 square meters. mm.
Nova Bright
Cost - 300 rubles
Designed in the USA, Made in China
The wires are packed in a round bag with a zipper. The length of the wire is not indicated; when measuring, it turned out that these wires are only 2.2 meters long.
The positive and negative wires are separated, the wire winding is transparent. The wire is connected to the crocodile by double mechanical crimping.
“Crocodiles” are steel, copper-plated. The handles of the “crocodiles” have insulating pads.
Having opened the wire insulation, we counted only 60 cores with a diameter of 0.3 mm, each of them has a cross-section of 0.0706 square meters. mm. Thus, the total cross-section of all cores is 4.2 square meters. mm (the smallest wire cross-section of all those participating in the test).
ALCA
Cost - 570 rubles
Production - Germany
The wires are packed in a round bag with a zipper. The packaging contains a detailed instruction manual and step-by-step instructions for use. The actual wire length of 2.5 meters corresponds to that indicated on the packaging.
The positive and negative wires are separated. The wire is connected to the crocodile by double mechanical crimping. The wire braid bears the ALCA manufacturer's marking.
The “crocodiles” are plastic, with steel contacts coated with copper; the contacts are attached to the “crocodile” using rivets. The wire has 120 cores with a diameter of 0.3 mm, the cross-section of one core is 0.0706 square meters. mm. The total cross-section of all cores in the wire is 8.5 square meters. mm.
Heyner
Cost - 4000 rubles
Production - Germany
The wires are packed in a rectangular fabric bag with a zipper. The packaging states that the wires are frost-resistant down to -30 °C. The length is not specified, but measurements showed that the length of the wires with “crocodiles” is 3.5 meters - this is the longest of all those presented.
The positive and negative wires are made separately, but in the middle they are connected by a plastic box in which there is a surge suppressor. The wire is connected to the crocodile using a threaded connection. The wire braid is marked DIN 72553 25 mm2.
“Crocodiles” are massive cast brass, with a plastic coating; the “crocodiles” use double contact technology - a wire stretches from one “jaw” of the “crocodile” to the other, with its help both sides of the “crocodile” pass electric current - this increases the contact area and , accordingly, the ability to transmit more current through the “crocodiles”.
Each wire has 320 cores with a diameter of 0.3 mm, the cross-section of one core is 0.0706 square meters. mm, the total cross-section of all cores is 22.6 sq. mm (the largest wire cross-section of all presented).
AIRLINE
Cost - 400 rubles
Developed in St. Petersburg, manufactured in China
The wires are packed in plastic packaging with a top. The set comes with a fabric bag with a drawstring closure at the top.
The packaging indicates that double contact technology is used, that is, current flows to both “jaws” of the “crocodile”, and there is also a sign indicating frost resistance at a temperature of -40 °C.
When taking measurements, the actual length of the wire was 2 meters, which corresponds to the declared length. These are the shortest wires presented in the test.
https://www.youtube.com/watch?v=A35_M-Fz4Ts
The positive and negative wires are structurally made together. The wire is connected to the crocodile by mechanical crimping. The wire braid is marked AIRLINE SA-200-02 200A.
The “crocodiles” are plastic, with steel contacts coated with copper; the contacts are attached to the “crocodile” using rivets. The “crocodiles” - upon examination we were really convinced of this - use double contact technology, just like Heyner wires.
Each wire contains 120 cores with a diameter of 0.3 mm, the cross-section of one core is 0.0706 square meters. mm, the total cross-section of all cores is 8.5 sq. mm (ALCA and AVS have exactly the same wire cross-section).
Let's start testing.
First, we froze the wires for 24 hours at a temperature of -40 oC, then took them out and checked the insulation for fragility. To be honest, the results surprised us: in half of the cigarette lighter wires, the insulation loses its elasticity in the cold - and this is for something that is mainly used in winter!
When testing for frost resistance, the worst results were shown by wires under the American brand Nova Bright - the transparent insulation of these wires, when trying to straighten them out of the coil, began to crack and fly off in pieces. Perhaps the insulation of such wires is intended for hot California, but not for cold winter Russia.
Alca and Heyner wires also could not withstand freezing down to -40 °C - their insulation became brittle and cracked at the bends. However, it is worth noting that the manufacturer of Heyner wires warns in advance on the packaging that frost resistance is provided only down to -30 °C. When frozen to the specified temperature, the Heyner wires did not cause any complaints, and the external insulation retained its properties.
Tiikeri, AIRLINE and AVS wires can be safely bent - their insulation remains soft and flexible, despite the severe frost. However, these wires were indicated on the packaging that their insulation was made of frost-resistant material.
The next test was to test the wires while trying to create a 200 A load. In fact, the results of the second test are very predictable for those who know Ohm's law. After all, the larger the cross-section of the wire, the more it can pass through itself.
During load tests, the Nova Bright wires, due to their small cross-section, could not pass more than 100 A through themselves, while the voltage drop at the output was 6.2 V, that is, even if the voltage in the network of the “donor” car was 14.5 V, the discharged battery of the “recipient” car will receive only 8.3 V, which is clearly not enough for starting. In this case, the wires become very hot both themselves and at the points of connection with the “crocodiles”.
The Tiikeri wires, which performed so well in the cold, were also unable to pass the necessary current through themselves due to their small cross-section. The maximum that the ammeter showed was 120 A, while the voltage drop was 5 V, which also will not allow the car to start. The wires get very hot.
Due to their cross-section, the Heyner wires had a voltage drop of only 1 V - you can safely start the car without waiting for the battery of the “recipient” car to be recharged. The wires remain cold.
The ALCA and AVS wires showed the same result - the voltage drop was 3.6 V, which is on the verge of the starter starting to operate. In this case, the wires heat up at the junction with the “crocodiles”, and after a couple of seconds this place becomes hot. And on the ALCA wires, this connection even began to smoke.
The voltage drop on the AIRLINE wires under a load of 200 A was 3 V, while the wires remain cold, and the places where they connect to the “crocodiles” heat up a little - the additional wire has its effect on the second “jaw” of the “crocodiles”. You can start the car without waiting for the battery to recharge.
Result:
AVS and AIRLINE
Good frost resistance of the wires - even in severe frost, their insulation remains soft and flexible, although AIRLINE has a slightly lower voltage drop due to the double contact on the “crocodiles”. But they are also the shortest in the test, which can sometimes cause some inconvenience. Both wires will allow you to start the car without agonizing waiting in the cold.
Heyner
We really wanted to put Heyner wires first among all presented. They coped with their task of conducting current best of all thanks to the largest cross-section of the wire.
Electrical contact is provided by both “jaws” of massive cast “crocodiles”, but the insulation has a frost resistance limit, which limits the use of wires in particularly cold regions.
But they also offer to pay more for such wires than others.
ALCA
The insulation loses its elasticity in cold weather - with further use it can cause a short circuit. In addition, although they can pass a current of 200 A through themselves, at the same time strong heating occurs in the connection of the wire with the crocodile. The wires we tested emitted smoke from this connection.
Tiikeri
At least the manufacturer of these wires did not skimp on the wire insulation - it does not burst due to frost. But you won’t be able to start the car without agonizingly waiting in the cold.
Nova Bright
They absolutely cannot perform their function as wires for lighting - in cold weather the insulation cracks and crumbles, not to mention the fact that the wires are not able to pass a current of slightly more than 100 A through themselves.
How to “light” a car correctly
The positive terminal of the wire for lighting is red and is indicated by a “+” sign; accordingly, it must be connected to the “plus” on a discharged battery, and the other end of the wire must be connected to the positive terminal of a charged battery.
The black wire is first connected to the negative terminal of the charged battery, which is indicated by the “-” sign, and it is recommended to connect the second end of the black wire to any unpainted part of the engine of the “recipient” car, otherwise the battery of the “donor” car may quickly discharge.
Then we start the car with a charged battery and wait a few minutes (ideally 10-15). We turn off the engine, turn off the ignition and try to start the engine of the “lighted” car.
If the battery is not charged enough, then it is better to pause for at least a minute and a half, and then let the engine of the “donor” car run for a few more minutes.
If the “lighting up” was successful, then we warm up the engine for several minutes without pressing the gas pedal, since due to an increase in the generator speed, a voltage surge may occur and the electronics may fail. Then we disconnect the wires for lighting in the reverse order, that is, first of all we remove the black wire from the engine.
Next, we remove the “crocodiles” from the charged battery. There is also the option of “lighting” the car while the starting car’s engine is running, but in this case there may be undesirable consequences. It is possible that the generator may be overloaded or the electronics may fail.
Therefore, the best option is to “light up” with the engine of the “donor” car turned off.
PS Frosts will soon begin in the main part of Russia, so prepare your car for winter in advance, check the condition of the battery, remember whether you poured (or added) water into the cooling system instead of antifreeze, and also replace the washer fluid in the washer reservoir with winter fluid.
And one more thing: for a more confident start of the engine in cold winters, before starting, let the battery warm up a little - flash the high beams several times or give it a small load in another way.
Source: https://dvizhok.su/accessories/test-provodov-prikurivaniya