Replacing the Toyota Corolla cabin filter yourself
26.06.2018
Toyota Corolla is a unique model in many respects. The first generation of this car was released back in 1966 - it was one of the first-born of the brand.
In 2000, Corolla became the owner of a Guinness record - by that time over 25 million cars had been sold worldwide.
In subsequent years, this figure was surpassed: during 2001-2006, about 10 million more cars were sold, which is also an absolute record, which is currently impossible to surpass.
How to replace the Toyota Corolla cabin filter yourself.
In Russia, this model can also be considered one of the most popular foreign cars in the segment - at the moment, many cars in the 120 body (produced during 2000-20007) are traveling on domestic roads, as well as Corolla in the 150 body, rolling off the assembly line in the next five years .
Such high popularity is due to both the quite affordable price in the secondary market segment and decent configuration and equipment.
The ease of maintenance of the model also plays an important role - in particular, to independently replace the Toyota Corolla cabin filter you will need literally a few minutes, and the operation is performed without the use of any tools.
The importance of having a cabin filter
Drivers with decent experience are often very conservative. In their understanding, a cabin air purification filter is an overkill that also requires additional costs and maintenance efforts.
Indeed, being the same consumable as a standard air filter, the cabin equivalent requires periodic replacement, but concern for the health of the people inside the car is not comparable to the efforts spent on replacing it.
The fact is that about 100 cubic meters of air (that’s about 100 thousand liters) passes through an average passenger car over the course of an hour, and even if we assume that the dust concentration does not exceed the maximum permissible concentration (0.5 mg/cub.
m), then in 120 minutes approximately a gram of suspended particles with a size of 2.5 micrometers settles on the filter. The greatest danger to humans is microscopic dust (fraction up to 10 microns in size.
easily penetrates into the respiratory tract, and even smaller particles into the lungs).
Considering that on country dirt roads, and even on busy city highways, the concentration of pollutants many times exceeds the maximum permissible dosages, the presence of a cabin filter becomes a prerequisite for creating the most comfortable and safe microclimate for health.
Conventional dust filter elements successfully cope with the task of retaining up to 90% of suspended particles of various sizes, usually invisible to the naked eye. Carbon cabin filters can also adsorb many volatile substances, preventing unpleasant odors and carbon monoxide from entering the cabin.
Discounts on new cars! Advantageous loan from 9.9%
Installment plan 0%
Why do most car owners prefer carbon filters?
Structurally, the cabin filter can consist of several layers, but in the case of the carbon version, it includes activated carbon, which is capable of absorbing chemical compounds at the molecular level.
Thus, you protect yourself from any harmful substances present in exhaust gases, which is important in many cases (when driving in traffic jams, in tunnels, near polluted industrial zones, livestock farms and other similar places).
Advantages of using carbon filter elements:
- when driving in congested conditions, you can use a fan or car air conditioner without any problems (there is no need to turn on the recirculation mode);
- an uncontaminated carbon filter helps reduce glass fogging;
- the level of air purification increases to 95-98%;
- the interior is completely protected from the penetration of external odors and volatile chemicals harmful to health.
Although the cost of a product with a layer of activated carbon is approximately twice as high as its conventional anti-dust counterpart (in some cases the difference can be significantly greater), when replacing a Toyota Corolla cabin filter, many car enthusiasts prefer a more expensive but effective option.
The problem of choosing a cabin filter
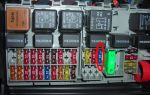
The standard SF installed on the Toyota Corolla is a regular anti-dust product with catalog number 87139-YZZ07, the cost of which is around 400 rubles.
Analogs of comparable quality can be found at half the price, so even if the presence of foreign odors is not a problem for you, using a non-original filter element may be financially preferable.
The original coal product (catalog number 88568-52010) costs much more - 1000 rubles, but here you can also find analogues with a significantly lower price tag. We invite you to familiarize yourself with the list of dust cabin filters suitable in size for installation on Toyota Corolla cars in both bodies (120/150):
- Asam (catalog number 70345, price from 210 rubles);
- Agautoparts (catalog number AG5099, price from 220 rubles);
- Ashiika (catalog number 21TY-TY2, price from 220 rubles);
- BIGFilter (catalog number GB9859, price from 220 rubles);
- Denckerman (catalog number M110060, price from 220 rubles);
- AMCFilters (catalog number TC1006, price from 310 rubles);
- Amd (catalog number AMD-JFC111, price from 310 rubles);
- BluePrint (catalog number ADT32505, price from 310 rubles);
- Champion (catalog number CCF0123, price from 320 rubles);
- Jakoparts (catalog number J1342001, price from 320 rubles);
- JapanParts (catalog number FAA-TY2, price from 320 rubles);
- JcPremium (catalog number B42002CPR, price from 330 rubles);
- Asakashi (catalog number AC101J, price from 330 rubles);
- Meyle (catalog number 30-12-3190001, price from 330 rubles);
- Nipparts (catalog number J1342001, price from 340 rubles);
- Quattro (catalog number QF20Q00002, price from 340 rubles);
- SCT (catalog number SA1209, cost from 350 rubles);
- Starline (catalog number SF/KF9198, price from 350 rubles);
- Tamoka (catalog number F406101, price from 350 rubles).
We also provide a list of coal SFs:
- Alco (catalog number MS6188, price from 400 rubles);
- Delphi (catalog number TSP0325173, price from 400 rubles);
- Denso (catalog number DCF357P, price from 400 rubles);
- Filtron (catalog number AP142/1, price from 400 rubles);
- Fortech (catalog number FS-070, cost from 400 rubles);
- Fram (catalog number CF9466, cost from 400 rubles);
- Goodwill (catalog number AG162CFC, cost from 450 rubles);
- InterpartsFilter (catalog number IPCA107, price from 400 rubles);
- Kolbenschmidt (catalog number 50013944, price from 400 rubles);
- Kortex (catalog number KC0014S, cost from 400 rubles);
- Patron (catalog number PF2095, price from 400 rubles);
- Profit (catalog number 1521/2144, price from 400 rubles);
- Bosch (catalog number 1987 432084, price from 500 rubles);
- LYNXAuto (catalog number LAC-105, price from 500 rubles);
- Knecht (catalog number LA 109, price from 500 rubles);
- Mapco (catalog number 65550, price from 500 rubles);
- Mann (catalog number CU1828, price from 550 rubles);
- Nac (catalog number 77190CH, price from 550 rubles);
- Febi (catalog number 24433, price from 700 rubles);
- Micro (catalog number RCF1801B, price from 700 rubles);
- Avantech (catalog number CFC0108, price from 1000 rubles);
- Corteco (catalog number 80000419, price from 1000 rubles).
When replacing the cabin filter of a Toyota Corolla 2008 and other years of production, we advise you to pay attention to its dimensions - they may vary depending on the year of production, the number of the power unit and its displacement. In total, filters of the following dimensions (length/width/thickness) are suitable for Corolla, starting from the eighth generation:
- 0x219.5x20.5;
- 0x215.0x19.0;
- 0x221.0x20.0;
- 0x217.0x16.0.
You can find out the dimensions of your SF by referring to the user manual or by measuring it after dismantling.
Timing for replacing the cabin filter Corolla 150/120
The importance of timely replacement of the filter element is not always obvious. Meanwhile, as it becomes polluted, the amount of fresh air entering the cabin decreases sharply.
Since the car's climate system cannot operate without an influx of air mass, it begins to use internal air, as if operating in recirculation mode.
At the same time, the amount of dust in the cabin gradually begins to accumulate, and the increased humidity contributes to the rapid fogging of the glass and creates favorable conditions for the proliferation of pathogenic microflora.
Due to a lack of air flow, the efficiency of airflow decreases sharply; the air conditioner, fan and heater are forced to operate at maximum power, which reduces their service life and leads to increased fuel consumption.
Typically, it is recommended to replace the cabin filter of Toyota Corolla 2012 and other years of production as each maintenance is completed, but this is a very rough recommendation, which also does not take into account the quality of domestic roads.
More realistic signs indicating the need to install a new cabin filter include the following symptoms:
- the appearance of persistent foreign odors, which intensify when the fan is turned on;
- a noticeable drop in the power of the air flow blowing from the deflectors;
- rapid dusting of the interior, despite frequent wet cleaning;
- Frequent fogging of windows for no reason.
Note that the most favorable conditions, approximately corresponding to the calculated indicators, are observed in the northern regions of the country, where the cold season lasts much longer. Accordingly, the dust level is much lower, so the Toyota Corolla 2007 cabin filter can be replaced here approximately every 20,000 kilometers.
The worst operating conditions are observed in the southern regions, especially in non-chernozem regions, where, starting in spring, the cabin filter is actively contaminated with poplar fluff, plant pollen, road dust, microparticles of soot from exhaust and rubber as a result of abrasion of tire treads, to which foliage is added in the fall - source of rotting processes and the appearance of unpleasant odors.
How to change the cabin filter yourself
As already noted, the Toyota Corolla is one of the easiest cars to maintain in this regard. To remove the glove compartment, where the cabin filter is located on the Toyota Corolla of both modifications popular in our country, you do not need to use any tools - “straight” hands are enough. So, the sequence of actions is as follows:
- empty the glove box of its contents;
- if replacing the cabin filter of a Toyota Corolla 2008 is carried out in the winter season, it is advisable to warm up the car before starting work - cold plastic is more fragile and can easily break;
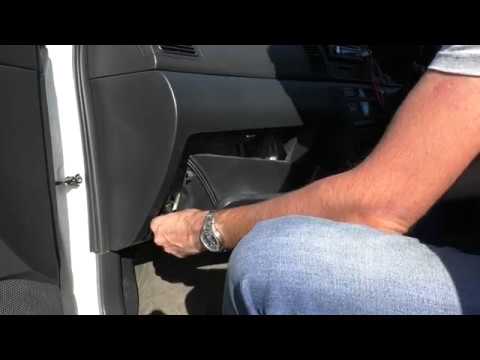
- to dismantle the glove box, you need to carefully move the side plates of the glove box in the rear part (in the depths) - this will disengage the latches holding the moving part of the glove box;
- to remove the glove box, now it is enough to remove it from the hooks located in its lower part;
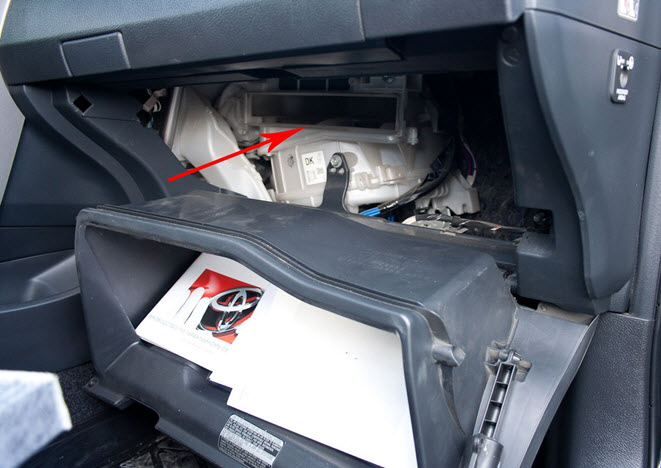
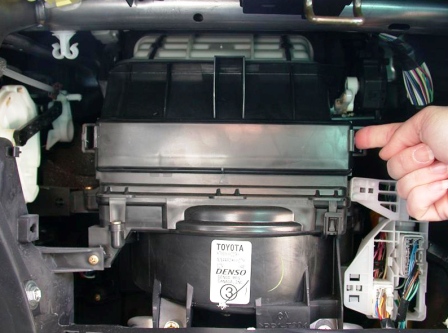
- access will open to the lid under which the SF is hidden. To remove it, press on the plastic latches on both sides of the plate, disengaging them from the torpedo body;
- Now you can remove the cabin filter itself by simply pulling its housing towards you. To prevent accumulated debris from getting into the air ducts and heater fan (it will be quite difficult to remove them from there), you should remove the filter very carefully and slowly, without sudden jerks;
- After installing a new filter, perform the entire sequence of actions in reverse order.
Many owners combine replacing the Toyota Corolla AE104 cabin filter with preventative cleaning of the evaporator of the air conditioning system, since this unit is located directly behind the cabin filter element. However, it is much easier to do this through a drainage tube, which should be removed from under the carpet on the passenger side before starting work.
https://www.youtube.com/watch?v=b8zURierQfI
The procedure itself is extremely simple if you use an aerosol: just spray it through the drain or directly into the evaporator - the remaining liquid will flow down through the same drainage hole.
After 8-120 minutes, you can turn on the car air conditioner, starting with the recirculation mode at the lowest fan speed, while the foot blowing mode should be activated - in this case, the evaporator will be purged as thoroughly as possible.
Source: https://remam.ru/vozdsys/zamena-salonnogo-filtra-toyota-corolla.html
How to replace the cabin filter on a Toyota Corolla with your own hands?
The air barrier is a replaceable item, and replacement time may depend on a number of factors:
- duration of trips;
- time of year of travel;
- climatic conditions;
- dustiness and air pollution;
- road condition.
New salon barrier
If the filter material has not been replaced for a long time, it may begin to deteriorate. This can result in dirty, unfiltered air entering the cabin. To avoid this, you need to replace the cabin filter on time and then during your trip you will enjoy clean and fresh air.
Dirty cleaning element
The process of changing the filter on a Toyota Corolla with a 150 body is extremely simple. Any car owner can handle it on his own, even a beginner who has neither the skills of a locksmith nor the skills of an auto mechanic.
But, like any service work, this operation requires minimal knowledge about the design of the Toyota Corolla with a 150 body and the location of the filter elements. All that is required from the car owner is accuracy and 20 minutes of time.
And also, read this article and watch the video we offer.
Where is?
The developers placed the cabin filter on a Toyota Corolla with a 150 body in a fairly accessible place, in the cabin behind the glove compartment. And to change it, you won’t need to remove complex components or dismantle bulky systems.
Replacement instructions
Before changing the filter, you need to purchase it, and here it would be useful to follow some recommendations. In this case, saving money by purchasing a cheap cleaner is not worth it. If possible, it is better to buy an original filter element or from a well-established manufacturer.
Do not forget that not only you, but also your passengers will have to breathe this air. This is doubly important if you frequently transport children. And of course you shouldn’t try to make it yourself, since the filter is made from a special material using a special technology.
Tools
- salon barrier;
- rags;
- gloves;
- vacuum cleaner.Car vacuum cleaner
First of all, in order to choose the right filter, you need to accurately determine the year of manufacture and body number of the car. In our case it is 150.
Stages
- Open the glove compartment and take out all the things from it.
- Remove the glove compartment mount.
- We fold it down.
- Remove the cabin air barrier cover.
- We remove the old air cleaner.
- Wipe the installation area with a rag or vacuum cleaner.
- We install a new cleaner.
Photo 1.
Open the glove compartmentPhoto 2. Squeeze the walls of the glove compartmentPhoto 3. Remove the cover from the air purifierPhoto 4. New filter elementPhoto 5. Install a new purifierPhoto 6. Insert the glove compartment into place
As you can see, everything is simple and it took no more than 20 minutes. And the result: good heater performance and clean air in the cabin.
If you have any questions, watch the video.
Loading …
Video “Replacing the cabin air-cleaning element”
In this video, an experienced car owner will show you where the cabin filter on a Toyota Corolla is located and how to change it correctly and quickly.
Source: http://AvtoZam.com/toyota/corolla/salonnyiy-filtr/
Replacing the Toyota Corolla cabin filter
Replacing the cabin filter on a Toyota Corolla: step-by-step instructions
Every car has at least several air filters. The filter is needed to ensure the flow of purified air into the engine and interior of the car. Today we will look into such a topic as: “Replacing the cabin filter on a Toyota Corolla.”
The replacement process itself is quite simple, however, inexperienced mechanics will have to spend a considerable amount of time finding it and replacing it. But before moving on to the step-by-step replacement instructions, let's decide how often this needs to be done.
Toyota filter: how often to change?
First of all, I would like to note that the frequency of its replacement directly depends on the environment in which the car is operated. Thus, if the car is driven in a dry, dusty area, the filter will have to be changed much more often than prescribed in the technical operating conditions of the car.
Many people write that it needs to be changed after a certain number of kilometers traveled by the car - however, it is worth noting that this opinion is erroneous. This rule applies primarily to oil and fuel filters. but not to airborne ones.
It must be changed as needed. This need arises when the air filter becomes sufficiently dirty and is no longer able to perform its function.
Having figured out how often a car needs to be replaced, we can move on to the main issue of our topic.
Step-by-step instructions for a Toyota Corolla car
Replacing the cabin filter on a Toyota Corolla is a simple process and in order to carry it out we will need a new air purifying element purchased in a store and our hands.
The container that prevents dirty air from entering the cabin in this car is located under the glove compartment on the side of the front passenger seat. At the first stage, it is best for us to prepare the workplace.
You need to open the front passenger door and lay a blanket in front of the car. It will allow you to get the job done without getting too dirty.
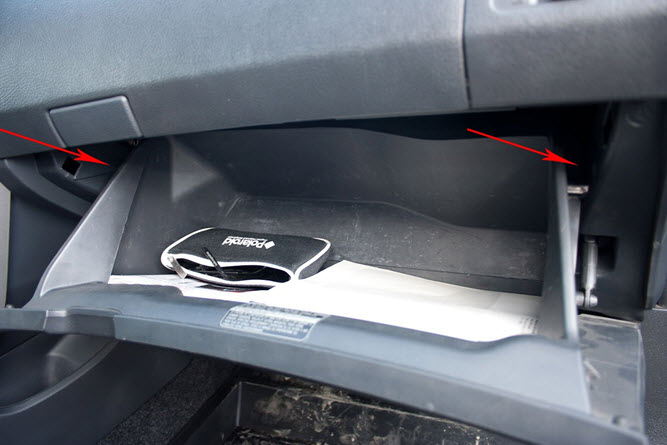
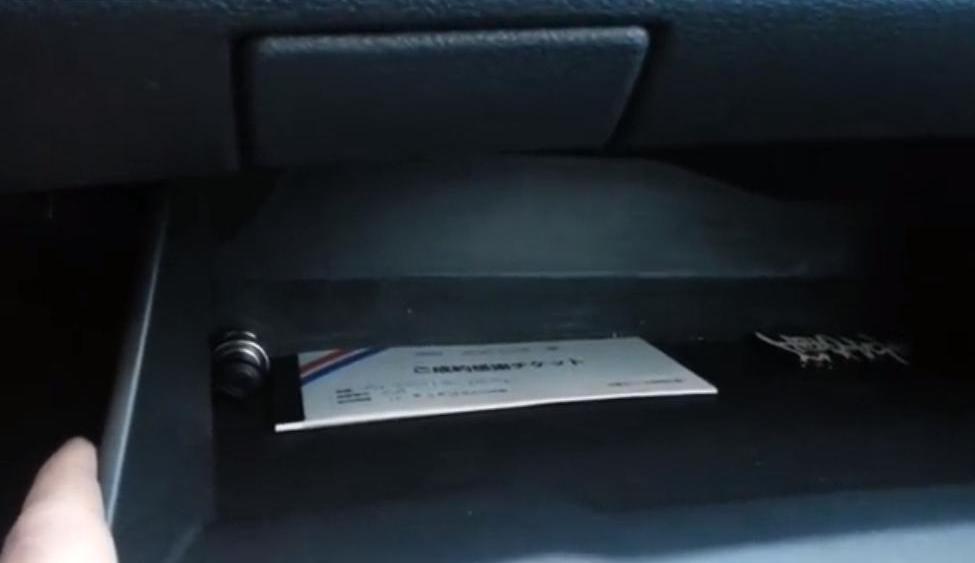
At the second stage, we kneel down and open the glove compartment. Along its edges, on the left and right, there are special latches that hold the glove compartment lid. By pressing them, the lid will fall down - thus, we get direct access to the container that contains the cabin filter itself. The location of the latches is indicated by red arrows in the photo.
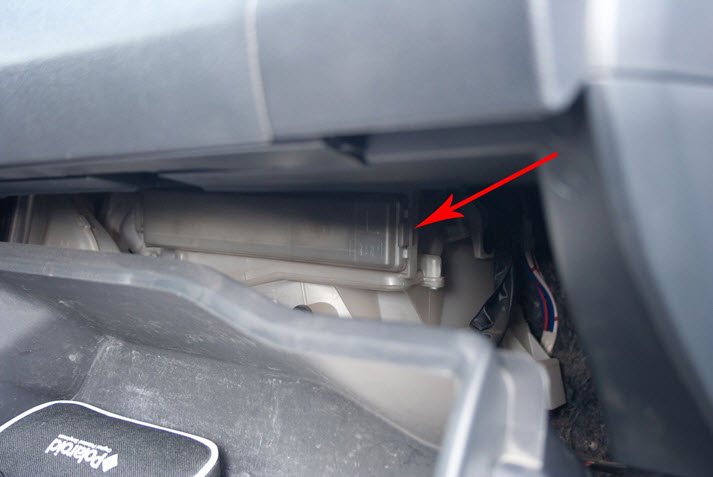
In the third step, we should open the container. This is necessary in order to gain direct access to the filter material. This is very easy to do - press the latch on the container and move its lid to the side. The red arrow indicates the location of the latch on the container.
Stage four. We take out the used air purifying element and if it is already dirty enough, we throw it away; we will no longer need it. After we pulled it out, it is important to prepare a place for the new filter. To do this, you just need to wipe the container with a damp cloth and wait until it dries.
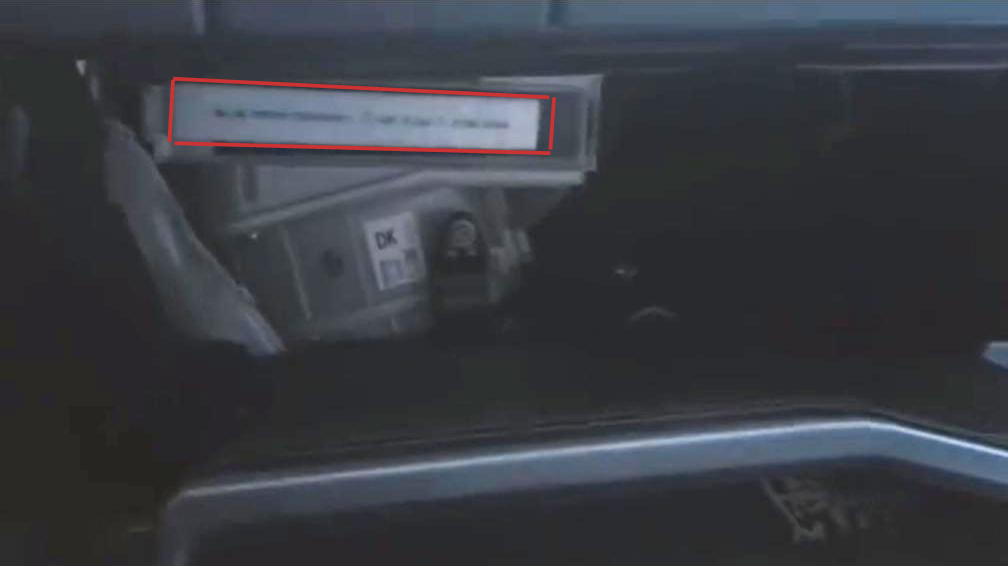
When the wiped surface has dried, we move on to the next stage - insert the filter. It is worth paying attention to the inscriptions on the packaging of the purchased filter product or on it itself.
In order for it to work fully, it must be inserted correctly into the container. Usually the correct position is very easy to determine by the arrows on the filter itself.
In the photo, this moment is again highlighted with a red arrow.
After inserting the cabin filter, you must tightly close the container with it. After closing it, everything needs to be checked again. The container lid should snap on easily and without force.
After checking everything, you can put the glove compartment itself in place. This is done by simply lifting it up. It should automatically click into place and stay in place until the next time it is replaced.
We are cleaning our workplace. This completes the replacement process. As we have seen, replacing the air purifying element is not difficult - everything is done simply and without any effort.
Source: http://legkoe-delo.ru/remont-avtomobilya/automobile/95324-zamena-salonnogo-filtra-tojota-korolla
Replacing the Toyota Corolla cabin filter
The operation of modern vehicle engines requires clean air without dust particles, since very precise precision mechanisms with injector and jet diameters of tenths of a millimeter are used to form a fuel-air mixture of the correct proportions.
It is no secret that the composition of the atmosphere of most cities in the world is far from ideal.
It contains both dust particles and gaseous substances - fumes from industrial waste that are harmful to humans and, of course, exhaust gases. The greatest harm to the human body is caused by:
- carbon monoxide;
- sulfur dioxide and trioxide;
- hydrocarbons, primarily methane;
- coal soot and dust, the composition of which depends on the type of soil and type of building;
- specific aerosols and gaseous substances from hazardous industries (for example, cement factories, copper smelters, oil refineries).
The average car enthusiast spends at least 2-3 hours behind the wheel every day. And many drivers and passengers are forced to use this type of transport for 5-6 hours a day. In such conditions, the issue of maintaining health becomes paramount.
How does the largest automotive manufacturer Toyota solve the difficult task of improving the atmosphere in the cabin? The vast majority of leading automobile manufacturing companies use the filtration method.
Every car, regardless of brand, has a fresh air ventilation system installed. Such a system ensures the intake of atmospheric air, its cleaning, conditioning and supply to the driver and passengers.
Let's look at the design and principle of operation of the filter element using the example of Toyota products. The most popular middle-class vehicle produced by the company in Russia is the Corolla model. This model uses a filter that allows you to clean the interior volume not only of dust and soot visible to the naked eye, but also of harmful gaseous impurities.
Firstly, it has a plastic body. The case allows you to place the remaining elements and serves for easy installation of the cartridge itself. Secondly, cleaning is carried out in three stages, which is ensured by three different layers and fillers placed in the housing sequentially along the air path.
The first layer consists of a fiber porous synthetic material. It filters out large dust particles. The second layer is a finely porous electrified fiber that does not allow microscopic particles up to 500 nanometers in size to pass through. These include, for example, pollen from allergenic plants. This layer is located immediately after the first.
And finally, the third layer is a filler of activated carbon applied to a polyurethane base. Treated in a special way, activated carbon adsorbs harmful aerosols, volatile and gaseous impurities contained in the air.
The effectiveness of using this material is such that it is successfully used in military gas masks designed to work in conditions where chemical warfare agents are used. The cleaning cartridges of the Corolla model use carbon obtained from coconut husks. This is an environmentally friendly and common material.
Filter installation locations are selected by designers based on the characteristics of ventilation systems. In the Corolla, the filter cartridge is located inside the cabin, behind the compartment for storing small items (the so-called glove compartment).
The manufacturer recommends changing the filter cartridge during each seasonal vehicle maintenance. But, if you operate your vehicle in a highly polluted atmosphere, then you can make a replacement more often - once every 3-4 months.
Remember that your health depends on timely replacement!
Source: http://CorollaCar.ru/ekspluataciya/salonnyj-filtr-tojota-korolla.html
Replacing the cabin filter in a Toyota Corolla, replacing the engine air filter

Replacing filters in a Toyota Corolla must be carried out in accordance with the technical regulations prescribed by the manufacturer. Replacing filters in a Toyota Corolla can usually be done on your own. However, it is worth considering that different modifications have different filter elements and may differ, both significantly and not so much.
We have already published some step-by-step instructions for replacing filters. We will leave relevant links to them below.
Perhaps the most difficult filter replacement is the work of changing the fine fuel filter. In many versions of the Toyota Corolla it is located in the gas tank, in the fuel module. This procedure requires care and attention.
Find out how to replace the fuel filter in a Toyota Corolla here.
Replacing the filter in an automatic transmission is required when completely replacing the transmission fluid. Since Corolla has different automatic transmissions in different versions, the following instructions for replacing the filter in an automatic transmission are for informational purposes only. But the replacement principle is similar for almost all Corolla automatic machines.
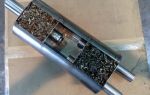
Replacing the oil filter may not be difficult at first glance. However, after 2008, the Toyota Corolla abandoned the traditional filter in a metal housing.
In later modifications of the gasoline engine, replacement began to take place according to a new principle, due to a completely different design. Now they do not change the entire filter, but only its internal part, the filter element.
See the process of replacing the oil filter here.
Next, we will take a closer look at the procedure for replacing the cabin and engine air filters.
Replacing the cabin filter in a Toyota Corolla To replace it, you do not need tools, everything is done with your bare hands.
Open the glove compartment, press on the edges and bend it back to the maximum to make room for work. Let's look at the photo about where to press.
Remove the cover of the casing where the cabin filter is located.
We place a rectangular filter element in this space.
If you are in doubt about the correct installation, keep in mind that if the filter says “UP”, it means it’s up. If the arrow indicates the direction of air flow, then turn on the fan without a filter and insert a piece of paper inside. This way you will know exactly the direction of air in your car and install the filter correctly according to the arrow and the inscription AIR FLOW (direction of air flow).
A fairly simple procedure that will allow you to enjoy relatively clean air and not swallow dust from other people’s cars.
Replacing the engine air filter in a Toyota Corolla
For example, let's look at the process of replacing the engine air filter on a Toyota Corolla in the E 150 body with a gasoline engine. You won't need any tools. We do everything with our own hands.
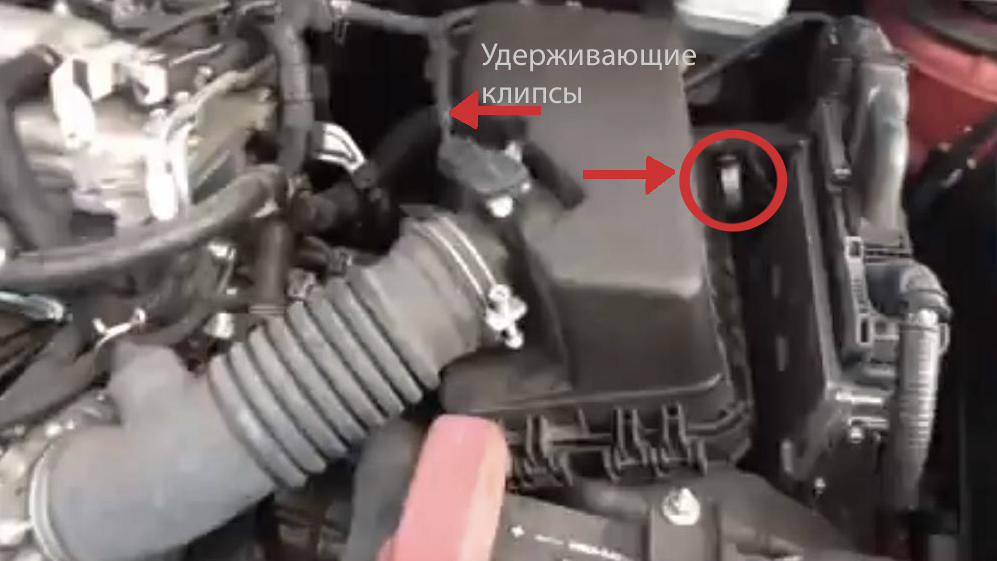
Open the hood and remove the spring latches from the air filter housing housing. In the photo they are indicated by arrows.
Next, remove the corrugated bundle with a bundle of wires from the latches. See the photo below.
But that is not all. Now we slightly move the cover of the Corolla engine air filter housing in the direction of the bold arrow in the photo.
Now you can lift the cover and remove the old filter element and insert a new one. However, when installing, please note that all the corners of the filter are rounded, and one is in the form of a right angle. This serves as a guide for correct installation if you suddenly forget how the filter element was installed before. The right angle is indicated in the next photo by an arrow.
Actually, this process takes only a few minutes and does not require you to have knowledge of a car mechanic or extra costs for service.
Source: http://ruauto99.ru/2017/05/zamena-salonnogo-filtra-v-tojote-korolla-zamena-vozdushnogo-filtra-dvigatelya/
Change the cabin filter in Toyota Corolla
The cabin filter has recently appeared in cars and has become a safety attribute of modern vehicles. This may seem too pompous for some, but protecting the upper respiratory tract for drivers who drive for a long time has become a necessity.
Cars with an antediluvian exhaust gas purification system continue to be used on the roads. A large amount of dust and heavy metal compounds enter the cabin, especially in the warm season.
That is why replacing the cabin filter in a Toyota Corolla is a must. Not many people know that a modern filter helps prevent the entry of allergenic pollen.
It also cleans the car interior of foreign odors and neutralizes some types of bacteria.
What is the cabin filter made of?
In a Toyota Corolla, as well as in most other vehicles, the filter is a rectangle about 30 mm thick. It is made from a hypoallergenic cellulose-based composition with a small amount of synthetic material. The structure of the cabin filter has a lower density than that of the filter installed under the hood.
Currently, manufacturers offer to choose a cabin filter based on paper and using carbon components. The latter has a multilayer structure and consists of:
- a layer designed to trap large-sized debris;
- microfibers that absorb the smallest particles;
- an absorbent layer filled with activated carbon, which neutralizes phenolic and benzene-type compounds.
The synthetic material found in the cabin filter attracts small electrified particles.
Many car enthusiasts turn to official dealers to change the cabin filter on a Toyota Corolla. This happens especially often to owners of new cars who are faced with a similar need. However, such an event does not require special skills. Therefore, replacing it yourself will not be difficult. To implement it, perform simple operations.
- Open the glove compartment.
- Pressing the plastic clips located on the side of the glove compartment towards each other, pull out the glove compartment box towards you.
- Open the plug of the box in which the cabin filter is located.
- Take out the old filter and install a new one in its place.
- Close the cap and replace the glove compartment.
Replacing the Corolla cabin filter is carried out with the passenger door open.
When installing a new filter element, be careful as it must be installed in accordance with the direction of air flow. The Air Flow inscription indicates the direction of the air flow.
Knowing how to replace the cabin filter on a Toyota Corolla, it is important to select this element according to the catalog number. When purchasing, give preference to brand names such as MANN, TOKO, FEBI and Delphi. The article number may vary depending on the manufacturer. So, for Sakura the carbon filter will have the following name - CA-1114, and for Champion - CCF00051.
No less relevant is the question of how often replacement should be made. It is difficult to recommend an exact date. It all depends on operating conditions and time of year. In dry weather, more frequent replacement may be required than, for example, in winter. One of the signs of the need for this operation may be fogging of windows.
It wouldn’t hurt to focus on a period of 3-4 months. This is exactly the time required for activated carbon to lose its absorbent properties. In the case of a simple paper filter, you should be guided only by its external condition.
If the material was interesting or useful for you, publish it on your social network page:
Source: http://jrepair.ru/to-toyota/pomenyat-salonnyj-filtr-v-toyota-corolla
How to change the air filter on Toyota Corolla models released after 2008
The air around you is usually polluted, containing particles of dust, dirt and other elements. If they end up in the engine, this will significantly reduce its service life and negatively affect the operation of the vehicle. It is for its cleaning that the cleaning barrier is designed. It traps third-party elements and cleans the air completely.
New cleansing barrier
Gradually, air purifiers become dirty and there is a need to replace them. There may also be abrasions and defects that can have a detrimental effect on the operation of engine systems. All of them may have differences in their design, but they work according to the same scheme. The air flow is directed towards the filter and, passing through it, enters the engine already completely cleaned.
Where is it located?
Plastic housing with cleaning element
The first Toyota Corolla models rolled off the assembly line back in 1966, and to date there have been ten generations of them. Cars produced in the nineties can still often be found on our roads.
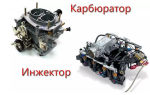
The design and location of the air cleaning element has constantly changed. On the first modifications with a carburetor, it is round in shape and is located on the carburetor. In models released since 2008, the cleaning barrier is rectangular in shape and is located on the right side of the motor.
Replacement instructions
The filter is an extremely important part in any car. Its timely replacement will save you from wasting money on repair and restoration work on engine components and will extend its life.
This, among other things, will make it possible to significantly save on fuel, because its consumption depends on the condition of the filter material. According to the instructions, the barrier on a Toyota Corolla needs to be changed every 20,000-30,000 km.
But if you often drive on dusty dirt roads, then this period should be reduced by at least half.
Replacing the air cleaning element on a Toyota Corolla is a very simple process and even a novice car enthusiast can do it. When choosing, it is best to spend money on original consumables specifically for your Toyota Corolla. But if for some reason this is not possible, then you can install a Chinese-made barrier, which also copes well with its responsibilities.
Required Tools
The process of replacing the air barrier on a Toyota Corolla, due to its simplicity, does not require special tools, you just need:
Filter replacement steps
- First of all, open the hood of the car.
- Find where the air filter is located. In models since 2008 it is in a plastic case.
- Unclip the latches and remove the cover. In the picture they are numbered 1 and 2.
Housing latches
- Disconnect and move the corrugated tube to the side.
- We take out the old consumable.
- We wipe the place where it is located with a rag or vacuum cleaner.
- We install a new one.
New air cleaner installed
- We put the cover in place.
- We install and secure the corrugated tube.
- We snap the latches. We check whether the cover is securely fastened and whether there are any shifts or distortions.
All! The replacement of the purifier can be considered completed and only purified air will flow into the power unit of your car!
Sorry, there are no surveys available at this time.
Video “Changing an air purifier”
In this video, an experienced auto mechanic will clearly demonstrate in every detail the process of replacing the filter on a Toyota Corolla car.
Source: https://labavto.com/toyota/corolla/kak-pomenyat-vozdushnyj-filtr/
Replacing the cabin filter on a Toyota Corolla with your own hands
The air filter installed in the car interior plays a very important role in ensuring a healthy microclimate. After all, while inside the car, both the driver and passengers will breathe exactly the air that is formed when passing through the air filter.
In urban operating conditions, for a car such as a Toyota Corolla, the filter should be replaced at least once every few months (up to six months).
But those who like to travel across rough terrain, that is, on country roads with a significant content of dust in the air, will have to fork out money almost every month.
Replacing the Toyota Corolla cabin filter - sequence
First of all, we need a new Toyota Corolla air filter. Naturally, it is necessary to purchase an original factory product, without giving in to calls to save money. The option of making your own air filter is also not very good - after all, we are talking about your health.
In addition to providing people in the car with fresh air, a high-quality, clean air filter will help reduce fuel consumption - due to the fact that a better fuel mixture will be formed.
All this together improves vehicle performance and reduces gasoline costs.
A new air filter can be easily purchased at almost any auto parts store. As a rule, such purchases are made through catalogs. In order not to make a mistake in the selection process, you need to know exactly the year of manufacture of your car, body number and engine make.
Finding this information is easy - it is indicated on the vehicle registration certificate. By the way, you can somewhat extend the life of your air filter.
So, if upon removal it turns out that all parts of the filter are intact and there are no oil stains on its surface, then you can blow it well on both sides using compressed air. This procedure won't last long, but will make your filter cleaner.
So, replacing the Corolla cabin filter is carried out in the following sequence:
- First of all, you need to empty the glove compartment of its contents and leave it open,
- next you need to unscrew the mounting screws (when the glove compartment is open, the upper screws are unscrewed, and when you start unscrewing the lower screws, the glove compartment will need to be closed),
- unscrew the bolt - to do this you will have to close the glove compartment and remove part of the trim from the threshold (you can simply bend it),
- after all these manipulations, the glove compartment is in your hands,
- Next, you should cut out the false plug of the filter itself. To do this, you will need to fold the front seats all the way down (if you are concerned about the cleanliness of the car, they should be covered with newspapers). All work will be carried out in the place where the glove compartment was installed. The plastic on the plug is very thin, but cutting it can be awkward since you will be limited in space. At the end of the work, you can run a needle file along the cut surface. It is also advisable to remove all debris accumulated in the cavity,
- Next, the filter itself is inserted - it needs to be folded into three folds and inserted in this way, with the thin part at the top. Make sure that the filter folds towards the driver. It is also very important that the guides in the hole and on the filter match,
- the filter is closed with a plug so that the rubber fits tightly to the hole. To fasten the filter, you can use special pistons, or you can use short M6 bolts and corresponding nuts.
Next, the glove compartment is mounted in the reverse order. The operation of replacing the filter, like replacing antifreeze, is not a technically complex operation and can easily be carried out by the driver himself.
Replacing the cabin filter on a Toyota - video
Source: http://autoremka.ru/raznoe/zamena-salonnogo-filtra-tojota-korolla-svoimi-rukami.html
Replacing the Toyota Corolla cabin filter (video): step-by-step instructions
In this article we will touch upon such an important issue as replacing the cabin filter of a Toyota Corolla with a 150 body. After all, it is responsible for cleaning the air entering the cabin from dust and dirt. This is one of the fundamental points in ensuring comfort in a car.
The air barrier is a replaceable item, and replacement time may depend on a number of factors:
- duration of trips;
- time of year of travel;
- climatic conditions;
- dustiness and air pollution;
- road condition.
New salon barrier
When the air-cleaning element becomes dirty, its ability to filter dust and dirt particles is reduced, and it almost completely stops passing air.
If the filter material has not been replaced for a long time, it may begin to deteriorate. This can result in dirty, unfiltered air entering the cabin. To avoid this, you need to replace the cabin filter on time and then during your trip you will enjoy clean and fresh air.
Dirty cleaning element
The process of changing the filter on a Toyota Corolla with a 150 body is extremely simple. Any car owner can handle it on his own, even a beginner who has neither the skills of a locksmith nor the skills of an auto mechanic.
But, like any service work, this operation requires minimal knowledge about the design of the Toyota Corolla with a 150 body and the location of the filter elements. All that is required from the car owner is accuracy and 20 minutes of time.
And also, read this article and watch the video we offer.
Where is?
The developers placed the cabin filter on a Toyota Corolla with a 150 body in a fairly accessible place, in the cabin behind the glove compartment. And to change it, you won’t need to remove complex components or dismantle bulky systems.
Replacement instructions
Before changing the filter, you need to purchase it, and here it would be useful to follow some recommendations. In this case, saving money by purchasing a cheap cleaner is not worth it. If possible, it is better to buy an original filter element or from a well-established manufacturer.
Do not forget that not only you, but also your passengers will have to breathe this air. This is doubly important if you frequently transport children. And of course you shouldn’t try to make it yourself, since the filter is made from a special material using a special technology.
If a visual inspection shows that the filter element is in good condition and can still serve, then it will be enough to shake it out and blow it with compressed air.
Tools
- salon barrier;
- rags;
- gloves;
- vacuum cleaner.
Car vacuum cleaner
First of all, in order to choose the right filter, you need to accurately determine the year of manufacture and body number of the car. In our case it is 150.
Stages
- Open the glove compartment and take out all the things from it.
- Remove the glove compartment mount.
- We fold it down.
- Remove the cabin air barrier cover.
- We remove the old air cleaner.
- Wipe the installation area with a rag or vacuum cleaner.
- We install a new cleaner.
As you can see, everything is simple and it took no more than 20 minutes. And the result: good heater performance and clean air in the cabin.
If you have any questions, watch the video.
Video “Replacing the cabin air-cleaning element”
In this video, an experienced car owner will show you where the cabin filter on a Toyota Corolla is located and how to change it correctly and quickly.
Source: http://car-hz.ru/ustrojstvo-avto/remont-i-zamena/5471-zamena-salonnogo-filtra-toyota-corolla-video-poshagovaya-instruktsiya