How to repair a bumper yourself
Home » Car repair »
The bumpers of modern cars are made mainly of plastic; they are damaged in a minor accident and are not hit by an obstacle.
Various car services repair body parts, some of them specialize in this type of restoration work. In order to save money, some car owners repair plastic bumpers with their own hands.
What features there are when independently restoring these body elements will be discussed in the article.
Bumper repair cost
As you know, there are front and rear bumpers, and the front bumper (PB) is damaged much more often than the rear bumper (RB). The PB needs repair if:
- the paintwork is damaged;
- there are scratches on the plastic element;
- Cracks have formed in the bumper due to a collision with an obstacle or a minor accident.
If the front or rear of the car was hit hard, the bumper most likely cannot be repaired. But specialized car repair shops often take on the task of repairing a badly damaged plastic bumper. The whole question is whether restoration is worth the money; in some cases it is easier and cheaper to buy a new part.
The cost of repairing a PB or SB can be different; it depends on the level of car service, the degree of damage to the part, and the complexity of restoration.
For example, in Moscow, restoration of a bumper can cost from 2,500 rubles, and painting one element will also cost from 5,000 rubles. There are auto repair centers that promise to repair a bumper for 500 rubles and complete the repair within one or two hours.
There is no point in relying on advertising; most likely, car owners are being deceived, or the repairs are performed here poorly.
Restoring a plastic bumper
Repair of the front or rear bumper varies in complexity; there are main types of work that are carried out on body elements:
- sealing cracks;
- recovery of plastic fragments;
- dent repair;
- preparation for painting (cleaning, sanding);
- primer;
- painting;
- restoration, repair of fasteners.
Restoring a plastic bumper requires care and precision, sufficient experience, and only a qualified craftsman can perform the job efficiently.
Repairing the bumper becomes profitable if the bumper itself is rare, installed on an expensive car, on which the car owner does not want to install a cheap “non-original”. There are also tuning bumpers - they are expensive, and the industry does not produce non-original spare parts of this kind.
Do-it-yourself front bumper repair (crack repair)
If the car is budget, and the owner of the car is “hands-on,” you can try to repair the PB yourself.
Much depends on the degree of damage; you can restore a slightly damaged body part with your own hands.
Repairing a front bumper (with a crack) is carried out by removing the body part from the car, and to seal the crack you need to connect the edges of the damaged area - make a reliable lock.
There are special repair kits on sale, for example, from 3M. The FPRM kit includes:
- two components of epoxy material (glue);
- reinforcing mesh;
- special tape.
Prepare the bumper for gluing as follows:
- Wash the damaged area to be repaired thoroughly with soapy water and allow the plastic time to dry thoroughly;
- We sand the area to be repaired and remove the paint coating from it. We clean the paint so that the area freed from it can be pasted with tape;
- We grind the edges of the crack at an angle of 45 degrees; they should be in the form of wedges. We process the surface first from the inside and then from the outside; for this we use a grinder with a cleaning disk;
- clean the treated surface with 3M 08985, wait for the degreaser to completely evaporate;
- stick the tape on the outside of the area to be glued;
- We fix the reinforcing mesh on the inside;
- mix the epoxy components in a one to one ratio;
- Apply the prepared composition to the reinforcing mesh with a spatula, push it inward, it should seal the crack;
- heat the crack with infrared drying (6-8 minutes). If there is no special drying device, let the glue dry at room temperature for approximately 30 minutes;
- remove the tape, degrease, treat the front part with an adhesion activator;
- prepare the composition for the front side;
- apply glue to the outside of the crack;
- Let the parts dry again;
- We treat the dried surface with abrasive wheels, first with a coarser abrasive (180), then with fine sandpaper (240, at the end of processing - 400);
- we blow the repaired area with compressed air, clean it with the composition from the 3M 08985 kit, and wipe it with a dry cloth. Now the bumper is ready for painting.
Sealing the bumper
Damage to the bumper can be different - in one case it is just a crack, in another, pieces of plastic fly off upon impact. To seal a plastic element, you will need:
- construction hair dryer;
- angle grinder;
- pliers;
- screwdriver;
- soldering iron;
- sandpaper;
- spatulas.
The soldering iron must be powerful enough, preferably at least 100 watts.
If pieces of the bumper break off and are lost, we first modify the damaged areas and give them a rectangular or triangular shape.
We carry out the work in the following order:
- from the inside and outside around the damage, we treat the entire surface with a cleaning wheel - we remove the paint;
- we remove all cracks in the paint to the base (to the plastic);
- We prepare a nozzle for the hair dryer; it is needed so that hot air can be directed to the damaged area;
- We join the torn seam, melt it with a soldering iron and solder the pieces. We use a soldering iron to grab the plastic in several places - it is also necessary for the plastic to become homogeneous;
- We put the nozzle on the hair dryer, using the hair dryer we heat the plastic evenly on both sides. It is important to monitor the hairdryer; with a narrow nozzle, it can overheat,
- after warming up, align the edges of the plastic;
- Solder the seam thoroughly with a soldering iron.
If you need to solder pieces of missing plastic to the bumper, it is advisable to take plastic of the same type; the markings are usually indicated on the inside of the plastic parts.
To solder the missing pieces into the bumper, proceed as follows:
- take the paper, apply it to the bumper, trace the damaged outline;
- transfer the design from paper to plastic, cut out the required piece;
- install the cut piece flush in the bumper, solder it along the edges with a soldering iron;
- To prevent the soldered piece from moving, first grab it from all sides with a soldering iron.
If you cannot cut the required piece exactly to size, you can cut off the plastic with a margin and solder it on the inside of the bumper. But this option is worse, since when soldering from the front part, a hole is formed around the patch.
The surface can be leveled in two ways:
- melt everything on the outside with plastic;
- Apply a layer of putty to the surface, then treat it.
After soldering and applying putty, we treat the surface, prime the bumper and paint.
DIY plastic bumper repair: video
(2
Source: https://avtobrands.ru/kak-otremontirovat-bamper-svoimi-rukami/
Second life: repairing a bumper with your own hands in a garage
Often in traffic you can find a car with a cracked or deformed buffer. What can you do, no one is immune from unsuccessful parking or a minor accident. However, this is not a reason to continue driving a car that has lost its “brilliant” appearance - there is practical experience in restoring this element to its original condition.
General information about the subject
External plastic structural elements are mainly made of thermoplastic plastics. The technology for restoring such products is based on welding, which allows you to get rid of through cracks and even recreate broken fasteners. Actually, the procedure is not much more complicated than preparing and spray painting a damaged area of a car body.
Some car enthusiasts claim that we simply repair the bumper with our own hands using metal brackets. But an experienced car owner knows that like can be treated with like, that is, repair plastic rods are used for soldering. Their composition, color and profile are different; the required rod is selected according to the markings on the buffer.
You need to know the material!
Making the right choice means guaranteeing quality repairs, because inappropriate materials can significantly shorten the life of the automotive element. To find out what a cracked bumper is made of, just carefully examine the inside of the part. Depending on the labeling, the following conclusions are drawn:
- PP – polypropylene base.
- ABS (GF, PAG 6) – hard plastics.
- PUR – polyurethane.
Welding plastic requires high temperatures, for example, 400-450°C is suitable for propylene, and 500°C is necessary to restore an ABS structure. Many car owners learn how to repair a bumper with their own hands in a video where craftsmen use an ordinary 100 W soldering iron.
You can also restore a damaged part using pieces from a bumper with similar markings. They are cut into strips 8 mm wide for PUR, and 4-5 mm wide for polypropylene.
Almost any breakdown can be treated by welding, even broken parts can be reanimated. However, no one has canceled the economic feasibility of such work, since the restoration of numerous defects can hardly be called justified. The cost of a complete restoration and painting will be more expensive than a new buffer.
To perform the repair you will need certain tools. These can be both ordinary household appliances and professional tools. The ideal kit includes the following items:
- Orbital sander or sanding block.
- Grinding wheels of various grain sizes.
- Mini drill like Dremel or drill.
- Clamps and rubber spatula.
- Soldering iron and hair dryer.
- Metal tape.
Materials for restoring a cracked buffer may include:
- Putty and primer.
- Brass mesh for crack reinforcement.
- A can of paint or a can of spray paint.
- Plastic repair rods of the required configuration and composition.
Preparatory activities
The damaged part must be dismantled to eliminate, firstly, excess stress in the crack area. Those who have already done such work will say that now we clean the bumper and only then repair it with our own hands.
The cracked parts fit together. For reliability, they are fixed with metal tape on the outside of the part. If the gaps are quite significant, then you will need clamps to clamp the edges of the cracks. Their number depends on the complexity of the repair.
Restoring a polypropylene bumper
When restoring PP-based parts, reinforcing mesh is not used. The process begins with installing a nozzle with a nozzle with a diameter of 5-7 mm on the hair dryer. Further work is carried out according to the following points:
- On the inside of the buffer at the junction of the cracks, use a Dremel-type mini-drill to make a groove for the plastic rod.
- Using a hair dryer, melt and place the repair rod in the prepared groove.
- Clean the front part of the bumper with an orbital sander with a P240 attachment and repeat the welding procedure in the same way as on the inside.
- Grind the cooled seam from the outside using a nozzle with the same grit P240, and then remove dust from the surface.
Puttying and painting
- Use a special putty for plastic to smooth out the unevenness, trying to keep the layer to a minimum.
- Dilute the primer with solvent 3:1 and apply two coats to a degreased surface. Drying time for the first layer is 15 minutes.
- Apply a developing layer of a contrasting color, followed by sanding with a wheel or sandpaper with grit P800 and P1000.
- Eliminate detected defects using nitro putty followed by sanding with P1000 sandpaper.
- Remove dust with a damp cloth and degrease the part, then paint the plastic with decorative paint with an overlap of 50-100 mm. Apply the paint in 3-4 layers with intermediate drying cycles.
Anyone who is interested in how to properly repair a bumper with their own hands in the video should take into account an important detail.
30-40 minutes after applying the last layer of paint, the part should be varnished. Thus, we obtain a flawless appearance of the repaired part. Don't forget to follow a few simple rules:
- You should try to apply a minimum layer of putty.
- Allow a temporary pause for the putty layer to completely harden.
- Treat the putty area with a sanding wheel or sandpaper with a grit of P800, and then with a grit of P1000.
- It is advisable to apply a developing layer of primer.
Option PUR: how to repair a polyurethane bumper with your own hands and video of technological processes
In the case of a polyurethane buffer, the preparatory stage in the form of work on installing grooves is eliminated.
A reinforcing mesh made of brass is applied to the crack; steel is not recommended for use because it is susceptible to corrosion. As an alternative, it is possible to use staples every 10-20 mm.
They are recessed into the body of the part across the seam; you must ensure that the bracket does not pass right through the part.
Further, the repair technology does not differ from the restoration of a polypropylene part. Metal mesh or staplers should be embedded in a layer of plastic. Only after this is the seam filled with repair plastic and soldered on the opposite side. Some important technology points should be taken into account:
- You need to solder the mesh or staples carefully so as not to overheat the plastic, otherwise it may become deformed on the opposite side.
- For a complete do-it-yourself repair of a polyurethane bumper, the width of the reinforcing mesh should be 15-20 mm.
- It is better to press the mesh or staples with a flat object.
- If the legs of the staples pierce through the plastic, they should be shortened using side cutters.
- To make it easier to work with metal elements, you can use tweezers.
- To prevent the new enamel from peeling off, it is necessary to sand the paint over the entire surface of the part.
The puttying stage and painting are carried out in the same way as described above - according to the traditional scheme.
Repair work to restore the buffer can be combined with painting the car , so the consumption of materials will be more rational.
It is important to determine in advance the feasibility of carrying out restoration work. If significant costs are visible in the future, then it is better to buy a new part.
Source: http://autobann.su/kak-remontirovat-bamper-svoimi-rukami.html
How to repair a plastic bumper yourself
The bumper is a car safety element that also has aesthetic functions, improving the appearance. In accidents or collisions, the part absorbs the force of the impact, protecting the body and passengers. Damage also occurs in other situations - when parking, maneuvering.
The cost of subsequent restoration is determined by the extent of the damage. But knowing how to repair a plastic bumper yourself, it’s easy to cut costs and not leave your car for service.
Common damage and methods for fixing it
The work begins with inspecting the damaged bumper, assessing the defects and the feasibility of restoration. If the damage is accompanied by the loss of pieces, the procedure becomes more complicated - you need to select the same material to repair the hole or order a new bumper.
The repair technology is determined by the existing defects:
- Scratches and chips that do not affect the plastic can be removed by sanding, puttying and subsequent painting.
- Deformations are common damages, often accompanied by cracks. To restore the geometry, the part is heated with a hairdryer, or a torch will do. Heating the plastic makes it soft and pliable. Then it is easy to give the element the desired shape. The result is fixed until it cools completely. Do not overheat the fragment. This is accompanied by thermal deformation.
- Cracks are common damage that requires soldering. Depending on the size of the crack and its location, strengthening, reinforcement, or tightening may be required to prevent further divergence.
- Holes are defects that occur when hitting an obstacle or as a result of a collision with the rear of another car. Occurs as a result of exposure to a muffler. Self-repair involves soldering and reinforcement. The procedure is possible if there is a missing element. If selection of material is required, the markings on the inside of the bumper are first examined.
With the right approach, it is easy to eliminate damage; the main thing is to follow the sequence of steps, technology, and prepare the place for work.
Options for soldering a plastic bumper
Soldering is an effective method for repairing cracks and holes in a plastic bumper. When thinking about how to solder the bumper yourself, it is better to carry out manipulations from the front side. It is important to solder to the desired depth. When working from the inside, it is easy to make mistakes. Then the putty and paint layer will soon crack.
Preparatory steps:
- The bumper is dismantled or undamaged elements of the car are protected.
- The table and workplace are being prepared. If the part is turned over to the front side, the surface is covered with a soft cloth.
- The paint is removed at a distance of 1 cm from the edges of the defect.
Bumper soldering options:
- The soldering iron heats up, after which notches are made on each edge of the crack. The tool is recessed to half the thickness of the element and held at an angle of 45 degrees. A comb appears at the edges. Next, the soldering iron tip is drawn along the crack, smoothing it out. The edges are securely connected.
- Using staples from a stapler allows you to get a reliable connection if the material is thin. The staples, in increments of 3–5 mm, are fused into the plastic, the ends are bent from the inside. They shouldn't stick out.
- Copper and ordinary wire, as solder, allows you to reliably fasten the elements. This requires skills and experience. Small holes are needed to thread the wire through. The further scheme of work does not differ from the use of staples. For minor damage, no holes are made.
- Plastic solder helps create a strong plane. It is supposed to be restored by adding plastic at the damage site. It is important to choose the right solder.
Strengthening the structure
Soldering is the most effective method. But to prevent the crack from appearing again, the damage site is reinforced. In further processing, fiberglass, epoxy, and rubber glue are used. Over time, materials move away without compromising the integrity of the structure. Therefore, they are applied from the inside.
In the area of damage:
-
- paint is cleaned;
- the plane is degreased;
- glue is applied;
- mesh and wire are applied;
- A layer of fiberglass and glue alternates, which will be the final one.
Regardless of the choice of soldering and reinforcement method, the process is completed by grinding the cooled surface and puttingty until a smooth plane is obtained.
Important points in preparation for painting
Eliminating defects is only part of the job. For a complete restoration, you need to know how to properly paint a car bumper. The process begins with preparation. If the part has been soldered, the work area must be thoroughly sanded, as in the case of scratches.
Putty is carried out in several stages:
- a special putty is applied to work on the plastic plane;
- the height is gained so that the putty protrudes slightly;
- the area is sanded until all irregularities are eliminated, which can be checked by touch;
The procedures are repeated until an ideal plane is obtained. When doing the preparation yourself, it is better to choose fine sandpaper. The next step is degreasing. The primer is applied twice, ensuring each layer dries.
The moment of preparation involves not only processing the surface of the element.
Premises:
- the place where the work will be carried out must be cleaned, wet cleaned, and dust removed;
- The walls, ceiling and flooring are cleaned.
Automobile:
- it is better to dismantle the bumper, which will ensure a high-quality application of the paint layer;
- If dismantling is excluded, the car is covered with film.
Selection of paint:
- the best option is by VIN code, then the color match is guaranteed;
- computer selection is also effective, but some differences cannot be excluded.
Application of paint, preparation of materials:
- the amount of paint, its composition, method of application determines the quality of coloring, the final shade, consumption;
- The spray gun needs to be set up correctly and make sure that the pigment is supplied normally (if an aerosol is not used).
Secrets of painting technology
Properly painting a bumper is a simple procedure, provided proper preparation is done. You must use a mask while working. The amount of materials and time required for painting is determined by the scope of work.
Types of painting:
- Local painting is suitable for inconspicuous areas, lower elements, when the damage is minor or scratches on the bumper need to be painted. It is assumed that paint will be applied to a specific area.
- Full bumper painting is used for damage in noticeable places.
The painting process includes the following steps:
- Blowing, degreasing.
- Testing paint on parts, applying a small amount.
- The first layer is made thin - this is the base. Dries in 5 – 10 minutes.
- Apply 2 layers of paint with drying intervals of 15–20 minutes.
- If dust gets on the part between layers, special interlayer wipes are used to remove contaminants.
- The final stage is applying 2 layers of varnish and drying.
With unhurried preparation, careful application of pigment and varnish, there are no unevenness or drips. But if defects appear, you need to wait until the element has completely dried, and then sand and polish these places.
Source: http://auto-sovets.ru/svoimi-rukami/kak-samomu-otremontirovat-plastikovyj-bamper-pravilno.html
How to repair a plastic bumper with your own hands?
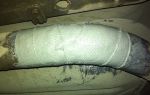
Damaged plastic bumper
The bumper of a car serves not only to give the entire silhouette a certain completeness, but also to protect its main components and assemblies from minor mechanical influences. In minor accidents, the bumper, both front and rear, suffers first. In this case, repairing a plastic bumper with your own hands is possible, and it is done quite simply.
The most common cases when bumper repair is required are the following:
- Scratches, chipped paint, peeling paint;
- Dents and similar defects that were formed as a result of any chemical reactions;
- Cracks;
- Bumper penetration, that is, the moment when a hole appears in it due to the breakage of a separate part of it.
Repairs to remove scratches from paintwork can be called the simplest and least expensive in terms of time and money.
Recovery stages
So, no matter what the damage caused to the bumper, do-it-yourself restoration work will consist of the following steps:
- Preparing the bumper for work;
- Working with the inner surface;
- Alignment of the front part;
- Priming the leveled surface
- Identification of defects after leveling;
- Grinding the putty surface;
- Repeated filling (if necessary);
- Bumper painting.
Preparing the bumper for work
Preparation consists of dismantling the body element, washing it and cleaning it from dust, dirt, and other contaminants.
In addition, before direct repair, you should choose a method, which is influenced by the material of the body element.
If there is no such information, then you can find it out by looking at the inside of the bumper itself. There may be the following designations:
- PPTV or PP – polypropylene;
- PUR – polyurethane;
- GF15, GF30, PAG6, ABS - hard types of plastic.
It must be said that if the element is made of fiberglass, then there will be no markings at all.
After determining the material of the element, the old paintwork is removed from the damaged area.
Working with the inner surface
If there are cracks or broken pieces of plastic or fiberglass, do-it-yourself repairs begin from the inside. You can do this in two simple ways:
- Using a regular soldering iron;
- Using special electrodes.
The soldering iron heats up to the desired temperature and soldering begins. The sting is drawn along the seam, along the crack. In this case, you need to ensure that the molten plastic moves into the groove.
It is necessary to solder the entire seam, and not in its individual places.
After the preliminary do-it-yourself soldering is completed, the seam is additionally fastened with metal staples using a construction stapler.
To give such a seam even more strength, soldering is carried out through a metal mesh, which is “soldered” into the surface of the bumper, connecting the two halves to each other on opposite sides of the crack. It must be said that it is best to repair only polyurethane body elements with a soldering iron and mesh.
Today, you can increasingly find so-called electrodes, which are designed for plastic and have a rectangular cross-section.
Do-it-yourself work with them is carried out using a hair dryer. It should have a special nozzle measuring from 2 to 10 mm.
If you are working on a bumper made of fiberglass or hard plastic, then soldering it simply will not work. In this case, do-it-yourself repairs should involve the process of gluing individual elements.
The step-by-step instructions look like this:
- Working with edges, that is, removing protruding fibers. This can be done with a grinder;
- Combination of parts. They need to be recorded. To do this, regular tape is glued to the front side along the seams, which will hold the individual parts in place;
- After this, it is necessary to prepare a mixture of epoxy resin, that is, add a hardener to the resin itself in the required proportion and stir;
- From the inside, the entire seam is lubricated with the prepared compound. In addition, it is necessary to lubricate an area 5 cm on each side of the crack;
- A thin fiberglass “patch” is impregnated with the same composition and applied over the crack;
- You need to lay several of these fiberglass “patches” until their total thickness becomes equal to the thickness of the bumper itself;
- We wait some time until the “patch” is completely dry;
- Using a grinder, we make grooves on the front side along the entire length of the crack;
- Next, we fill them with fiberglass, which is pre-impregnated with an adhesive;
- We wait time for drying and sand the surface.
Aligning the front surface
Glued and puttied bumper
After completing work on the inside, it is necessary to completely level the front side.
To do this, remove the tape, if it was there, and grind it using a special power tool or sandpaper. In this case, it is better to choose P240 or even P200 grain size.
Further work
It must be said that the front side can also be soldered, as is the case with a fiberglass bumper.
A groove is also made on the plastic, which is filled with a repair mixture.
Then the entire surface is sanded. In addition, you need to remove all hairs. This can be done using a hair dryer.
After this, a layer of putty is applied to the seam with your own hands. Naturally, you only need to use special putty for plastic bumpers.
After the putty layer has dried, it is carefully sanded, achieving a perfectly smooth surface.
At the end of this work, a layer of primer is applied to the sanded surface.
Any paint that will not match the color of the bumper itself is applied to the dried primer. It will show all the unevenness of the putty.
If there are such irregularities, then the paint is cleaned off, and the area is puttied and sanded again.
If there are no flaws, then the paint is simply sanded off with sandpaper and a layer of primer is applied.
Only after this is the bumper polished, that is, its shape is revealed. The puttyed and primed area is covered with a layer of a special solvent - the base.
Paint of the desired color is applied to the base, and then varnish. At this point, do-it-yourself bumper repair can be considered complete.
Source: http://KrasimTachky.ru/texnologiya-pokraski/remont-plastikovogo-bampera-svoimi-rukami.html
DIY plastic bumper repair
Even the most experienced driver cannot be insured against damage to the bumper of your car. If not you, then you. If it can be resolved through the insurance company, good. If the insurance doesn’t work, then there are two options: trust the professionals (here, too, things often get messed up) and shell out a considerable amount of money, or repair the bumper yourself.
It all starts with assessing the damage. Usually a bumper is not very expensive, especially if you buy a Chinese analogue. If the bumper is damaged quite seriously, then restoring it is out of the question - it will cost more.
It is advisable to carry out repair work to restore a plastic bumper if there is a small crack or cracks, scratches, chips, dents, or if a replacement cannot be found at all.
Before repairs, it is advisable to remove the bumper for convenience. The entire restoration process, right down to painting, can be conveniently performed on a separate stand.
Procedure
– Remove the damaged bumper;
- Wash it well;
– Remove the paintwork from the damaged area;
– Clean the outer and inner surfaces with a coverage of 10-15 mm on the sides from damage. The paint layer removed during cleaning must be at least 0.2 mm, since the top layer of the surface often changes its properties during operation, which can affect the quality of our repair seam;
– Drill the ends of the cracks (this will prevent their further growth). This is the same as when repairing cracks and chips on the windshield with your own hands;
– Carry out the actual repairs – we’ll look at the methods below;
– Primer and painting – will be required in most cases.
To repair a bumper with your own hands, you will need a minimum set of tools:
– Car hair dryer . This is a special device, in appearance and principle of operation no different from a regular hair dryer. The only difference is that the flow of hot air from such a hair dryer has a higher temperature and can soften or melt the plastic.
– Soldering iron . You can use any soldering iron, preferably a more powerful one. Rosin and tin are not required, this is not the case.
– Metal mesh. These are sold in specialized stores. The mesh will allow you to hold pieces of plastic together. You can use an old air filter.
- Soil. A regular can of automotive primer will do just fine. If you have a compressor and a spray gun, then that's even better. Choose for yourself - it doesn’t matter.
– Putty . No matter how perfect you are at sealing the cracks, you will still need putty. The exception is if this place is not visible.
- Sandpaper. For rubbing putty numbers 40 and 80, and for rubbing primer already 800.
- Any rag. It will be needed when washing the bumper and when working with a hairdryer, because straightening hot plastic with bare hands is not always comfortable. It is also good to use gloves.
– A piece of an old bumper. It will be needed in exceptional cases when there is not enough plastic.
It may be advisable to buy a repair kit, which includes such items as sandpaper, various touch-up paints, and fillers. Such kits are not that expensive and may turn out to be cheaper than taking everything separately, since the kits use small packaging - why do you need a whole bottle of primer for a small crack? Also putty, etc.
Bumper repair
First, a high-quality inspection is carried out in good lighting. Determine how many cracks, scratches, chips and dents there are on your bumper. We immediately calculate the amount of mesh, putty and other consumables. It is best to do this before purchasing consumables and missing tools.
Now let's carefully examine the inside of the bumper. There you need to find extruded (in some cases melted) information about the material of the product. Depending on the type of marking, the following conclusions can be drawn: PP type designations (PPTV20 and analogues) - the bumper is made of propylene; PUR mark - the bumper is polyurethane;
PAG 6 (GF, ABS) – designation of hard plastics.
But this is not a complete list of materials from which car bumpers are made.
You can also find parts made of fiberglass and similar carbon fibers, but markings are applied to them very rarely and the most that can be found is information about the manufacturer.
But if your bumper is made of hard (thermoset) plastic or carbon fiber, then repairing plastic bumpers of this type is different from repairing products made from other materials.
Cracks.
If there is a crack on the bumper, then we will need a soldering iron and a mesh. Turn the bumper over so the wrong side is facing you and cut the mesh. It is worth making oblong pieces 2-3 centimeters wide and the cracks long in size.
Bring the edges of the crack together and solder one end of the mesh. We need to drown it in plastic, but don’t get too carried away, you can just make a hole. After this, the end of the mesh should be covered with molten plastic.
Next, in this way, we solder the entire crack.
Let's evaluate the outer side of the bumper. If everything is ideal there, then there is no need to do anything. Otherwise, we go through the net and along the outside. The main thing is to hide the ends of the mesh so that nothing sticks out. When you sharpen the putty with sandpaper, you will regret the protruding mesh hairs.
Small cracks, instead of mesh, can be reinforced with staples from a furniture stapler. The size of the paper clips should be chosen so that their legs do not pierce the body. If there are no suitable staples, then you can take others and shorten them to the desired length. Use tweezers when soldering fittings, this way you will protect yourself from burns.
We place the staples perpendicular to the seam at a distance of 1-2 cm along the entire length of the fracture. We also fuse barely visible cracks and branches. Otherwise, in the future, due to vibration, they will develop into splits.
To protect the staples from corrosion, completely cover them with heated plastic, pulling it from adjacent areas.
After you fuse the bumper along the inside, the front surface should return to its original shape.
If the cracks on the bumper are large or there are fasteners nearby (places where the bumper is attached to the body), since the nearby surface of the bumper often breaks, it is advisable to tighten the crack with screws before soldering. A fairly simple but very effective method is proposed.
We take a hanger - it’s exactly called a “metal hanger for attaching guides,” these are available in any hardware store. We need it to tighten the crack with screws.
We cut it with a hacksaw or a grinder as shown in the photo, depending on the type of crack in the bumper. Usually parts 1 or 2 are used - the holes used are painted blue. Although it happens that when two cracks come together, piece of iron No. 3 is used. Below is an example of the location of the plates on a bumper crack.
In the figure, the working holes for the bolts are shown in blue. We drill holes in the bumper for the screws, put a plate on the back side, insert a screw into the holes and secure the entire structure with nuts.
If you are repairing a bumper for the first time, then be sure to carry out this procedure from the inside (and it’s better not the first time either). Place a plate on the crack. Through the holes in the plate, drill holes in the bumper with a drill with a diameter of 3.6 to 3.8 mm. Drill so that the drill bit is closer to the outer edge of the plate hole.
the drilled hole in the bumper must be countersinked so that the screw head “sinks” into the bumper. If there is no countersink, you can use a drill instead, with a diameter slightly larger than the diameter of the screw head.
When countersinking, do not overdo it, do not countersink right through! But you also don’t need to make the hole too small.
And one more thing - you can countersink by hand, just with your hand, make a couple of turns with a large drill in the hole drilled for the screw - and the desired angle for the head is ready.
We check the quality of the soldering. Stagger around the crack after it dries. If everything is flimsy, you will have to resolder it. However, this cannot be allowed; everything must be done for sure. After healing the crack, the surface of the bumper should also be degreased and covered with fiberglass and then putty.
Dents
If the dent turns out without a scratch, that is, the paintwork remains intact, you are very lucky. You can straighten it in minutes. This will complete the restoration of the bumper.
All you need to do is wet a regular rag, turn on the hairdryer and heat the dent on the back side. They usually warm up for no more than thirty seconds. Then we wrap a damp rag around the fist and begin to bend the plastic back. We do everything carefully and without using much force.
The main thing is not to push everything out. You can do several approaches with a break of ten minutes, allowing the plastic to cool.
In the case where, in addition to the dent, there is also a crack, we perform the same actions, but with the expectation of further puttying and painting the surface.
Chips and scratches
You can fight them with sandpaper. We take the largest one (number 40) and start rubbing. It is necessary to sharpen the pits, turning everything into a more or less flat surface. The hole, in fact, increases in diameter, but loses in depth. Then we will fill this depth with putty. It is advisable to use body bars if available, but you can also rub with the palm of your hand.
Detailed instructions for removing chips and scratches on a car - for those who need it.
A good result is obtained by using liquid plastic that matches your type of plastic on the bumper.
Be sure to consult with the seller, first writing down the type of material of your bumper. Apply masking tape (preferably self-adhesive fiberglass tape) to the front surface of the bumper.
Mix the adhesive and thickener on the cardboard. Apply the resulting mixture onto the masking tape. This is done to level the surface of the bumper. Next, the masking tape is removed, and the surface is cleaned and sanded again. Liquid plastic is applied to this place. After the plastic has hardened, you need to sand the surface.
Putty
Let's prepare the putty by adding a hardener to it. After this, we will immediately apply to the place of dents (if the paintwork is damaged), cracks, scratches or chips. This is done naturally after the above-mentioned measures to eliminate breakdowns.
You should wait ten minutes before starting work. We take sandpaper number 80. Using movements directed towards the left and right edges of the bumper, we begin to rub in the putty.
Sooner or later you will come to the desired result. Of course, you should respect the geometry of the body if the breakdown appears in some not very convenient place.
You can apply several additional layers of putty to make the surface more even.
We prime
Let's take a rubber rag, wash the bumper and let it dry. Let's check the result one last time. If you are happy with everything, then you can start priming. We take the cans or turn on the compressor. You need to apply the primer with movements directed, again, towards the left and right edges of the bumper. Basically, you need to draw a horizontal line when spraying.
Let the soil dry completely. After this, you will need to take eight-hundredth sandpaper and wash it thoroughly. This is done with a bottle of water. No matter how local the damage is, the entire bumper is completely washed out. It should become matte after drying.
And the first layer of primer will be completely washed away, leaving only gray dots in the marks and pores on the putty.
Let's apply another layer of primer, which we will also wash off. Check the evenness of the surface under the lamp. There should be no small pores or marks left.
The surface at this stage should be perfectly flat.
Now the bumper is completely ready for painting. We advise you to paint everything as soon as possible.
Repair of plastic bumpers made of thermosetting plastics and fiberglass
On the one hand, this method does not require great skills and abilities from you, but on the other hand, you must strictly follow all the instructions. Only in this case can you achieve a good result.
Procedure for carrying out repairs:
-
we combine the cracked parts, fix them with any quick-drying glue;
-
prepare the epoxy resin for further use;
-
take a brush and coat the area of the crack ranging from 5 cm wide from the inside of the bumper;
-
We impregnate the fiberglass mat with epoxy resin and lay it on the prepared area. If such material is not available, the mesh used to seal plasterboard joints may be suitable. In the latter case, you will have to apply another layer of epoxy.
It should be noted that during this procedure it is necessary to repeatedly apply fiberglass layer by layer so that the approximate thickness of the glued patch corresponds to the thickness of the bumper in this area. The front side of the product remains unglued.
The putty used to hide solder marks and other imperfections must be designed specifically for plastic in any case. Next, you should paint the finished bumper and screw it into place.
If you believe the statistics and try the method in practice, then in subsequent operation, if cracks appear on it, then in some other place, but definitely not in the place of the seam we sealed.
In any case, you should not forget that the bumper is, first of all, the face of the car and requires proper care and timely repairs. Whether it’s self-repair or bumper repair at a car service center is up to you to decide.
Source: http://bazila.net/avto-moto/samostoyatelnyj-remont-plastikovogo-bampera.html