The backlight of the instrument panel on the VAZ-2114 has disappeared: it does not light up

The dashboard is the driver’s first indicator of the car’s health, as well as a way to control various on-board systems.
During the day, by and large, the instrument lighting is not needed, but at night it is a necessary component for safe driving.
Thus, a malfunction of the backlight can even lead to an accident, so if a malfunction occurs, it must be eliminated as soon as possible.
The instrument panel backlight has disappeared, what should I do?
Ice-illumination of tidy
Therefore, it is worth understanding that if the instrument panel does not light up, then this problem must be eliminated immediately , but not all car enthusiasts are capable of this.
It is worth understanding that if the backlight disappears, then the problem lies somewhere in the electrical circuits. This is where you need to look for the problem.
This will require design knowledge of the vehicle's on-board circuit, a tester and related tools, such as electrical tape, a soldering iron or more.
Of course, it is not always possible to eliminate the problem locally, and faulty products have to be replaced completely.
Causes of malfunction
Where does the problem lie? As mentioned earlier, it is worth looking for problems in electrical circuits. Let's look at the main locations where problems may be hiding:
- Fuse.
- Backlight bulbs and their electrical circuit.
- Wiring.
- There is a fault in the fuse box.
- Damage to the board.
Solutions
So, when all the main reasons are, so to speak, “in the face,” you can try to determine the exact location of the breakdown, and also fix it yourself. As always, it is worth noting that if a motorist does not know the design of the car or is not confident in his abilities, then it is recommended to contact a specialist car service center.
Fuse
General view of a blown fuse
This is where you should start troubleshooting.
To find out which fuse is responsible for the instrument lighting, as well as its location in the mounting block, you should refer to the technical documentation.
Also, on the fuse cover it is written which element should be checked. If the fuse is found and replaced, but the problem does not go away, then you should look for the source in another place.
Light bulbs
Recently, it has become fashionable to install LED lighting for the VAZ dashboard with your own hands. However, not all car enthusiasts correctly connect it to the on-board network. This can cause the light to go out at the most inopportune moment. So, it’s worth checking the contacts of the entire backlight circuit.
The same applies to standard incandescent light bulbs that come with the car from the factory. Thus, a break or burnout of one of the light elements can lead to the fact that the entire backlight stops working. If you run the tester through the entire circuit, you can easily find an open circuit.
Wiring
Button for turning on the backlight and low beam. Pinout of the button for turning on the backlight.
So, a broken wire can cause the dashboard lights to stop receiving power and therefore not light up.
In order to eliminate the malfunction, you need to use a multimeter to test all the wires that are responsible for the car’s instrument panel lighting. So, any, even insignificant, wire that breaks can cause the light in the dashboard to go out.
Oxidized contacts in the mounting block.
Accordingly, there will be no contact, and not only will the light in the instrument panel not light up, but the other indicators located here may also not work. To fix the problem, you will have to disconnect the wire block on the fuse block and the parting panel itself. After this, clean the contact group and connect everything back. If everything worked, then the reason was found.
Safety block
Mounting block
Thus, burnout can occur directly in the branches of the block itself or in the mounting socket. To eliminate the malfunction, you will have to remove the part from the car and check it sequentially using a tester.
Many auto mechanics do diagnostics directly without removing the safety block . But only professionals can do this, but the average car enthusiast will have to remove the product. If, after all, the mounting block “died”, then the element will have to be replaced, since it is almost impossible to repair it.
Check the contact group of fuses for malfunction.
The board is damaged
Repair and diagnostic operations of the dashboard board.
There is only one way out - replacement, but many car enthusiasts manage to resurrect such elements using a soldering iron. Although, as practice shows, in 50% of cases it does not last long.
The main reason for board burning is a short circuit. In this case, often the place where the wiring is connected and the most vulnerable point – the backlight – is on fire. If incandescent lamps are installed, they will be dark or black, but the LED backlight burns out in the places where the solder is connected to the board.
conclusions
If the light in the dashboard goes out, it is recommended to contact a car service center, where everything will be fixed or replaced quickly and efficiently. The main reason can rightfully be considered a short circuit , and if the fuse fails, or the impulse passes before it burns out, then the consequences can be very diverse.
Source: http://carfrance.ru/propala-podsvetka-paneli-priborov-vaz-2114/
Why does the backlight in the VAZ 2114 dashboard not light up?
The instrument panel of the VAZ 2114 car helps the driver to timely monitor all the necessary data on the state of the power unit, the availability of fuel, the time period of the journey, and the speed of the vehicle.
It is important to keep the panel in good condition so that the driver can easily see the readings of all indicators located on it.
If the panel malfunctions, emergency situations may arise, since the driver will not be able to monitor the condition of all vehicle systems, including car alarm equipment, the operation of the brake system, will not be able to take into account engine speed, determine the speed of the vehicle, etc.
The panel also shows time, temperature, and indicates the operation of signal and light lamps. That is why you should always monitor the serviceability of this device.
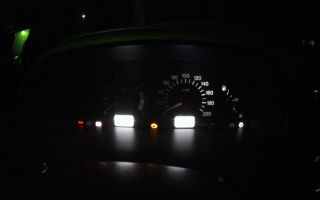
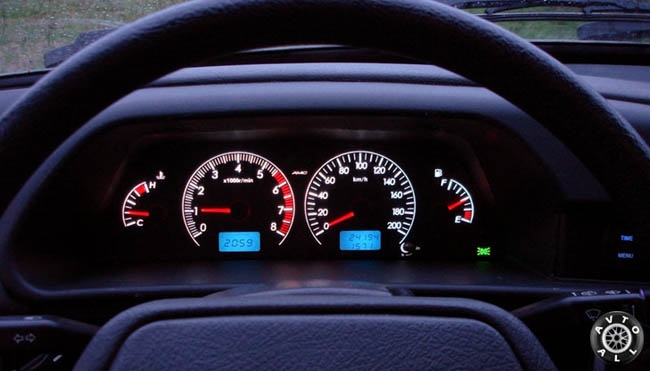
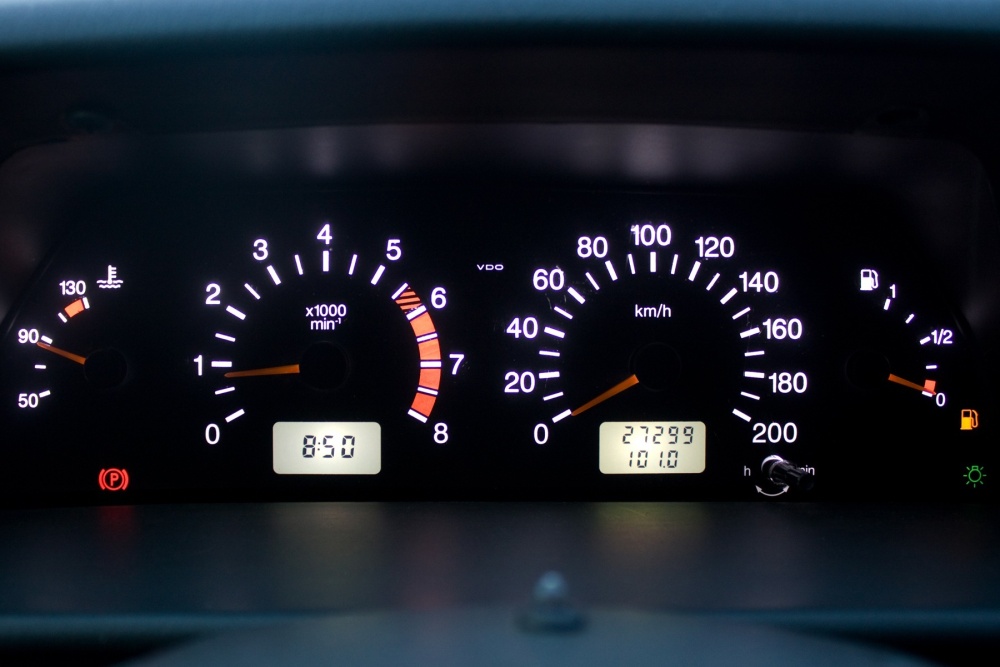
Instrument panel lighting VAZ 2114
Causes of malfunctioning dashboard lighting
To the question why the instrument lighting on the VAZ 2114 does not work, many answers can be given. The most common:
- burnout of incandescent lamps or failure of the LED group;
- oxidation of connectors;
- electrical wiring fault;
- failure of the fuse box;
- damage to the common contact board;
- no weight on the body (minus) or damage to the dimensions system.
To find a fault, you must use diagnostic equipment, a tester or a voltmeter. If a breakdown is found, you can begin repairs.
Troubleshooting steps
When the instrument panel on a VAZ2114 does not work, you need to determine the reasons for its failure, and, if necessary, remove the unit in order to check or replace light bulbs, fuses, or clean the contact board.
To perform this procedure, you will need screwdrivers, figured and regular, two keys 8 and 21. Next, perform the following steps:
- 3 self-tapping screws are unscrewed, the trim is removed, the protrusion that is located at the bottom, which is removed from the body bracket.
- Now the 5 screws in the right panel of the console are unscrewed and the screen is removed.
- After this, the negative terminal is removed from the battery, the wiring harness block is disconnected from the cigarette lighter.
- The handle is removed from the lever. The mounting of the electric fan of the heating unit is disconnected.
- Now we move on to unscrewing the bolts that secure the steering wheel block brackets. The light guide, lamp sockets, and the decorative panel insert are removed.
- You can remove the hydraulic corrector illumination lamp using a 21 cm wrench.
- At the last stage, the screws of the lower and upper rows are unscrewed and the instrument panel is completely removed.
If necessary, the light bulbs in the VAZ 2114 dashboard are replaced, and the failed ones are replaced with new ones.
The presence of oxidized areas, which are rubbed with WD-40 liquid, is also checked, and the contacts are treated.
If, for example, the battery charging lamp is dimly lit, then the reason for the poor connection of the lamp contacts with the board is the condition of the cartridges for carbon deposits; damaged ones are replaced with new ones.
Replacing light bulbs in the dashboard of a VAZ 2114
If the instrument panel is faulty, and all the parts, lighting, radio, show high performance, then the reason is in the fuse box, which needs to be checked and, if necessary, replaced.
You cannot replace the fuse box with home-made products, or with other units of increased current, as this may damage the electrical system, cause serious malfunctions in the system, and lead to a vehicle fire. To remove this unit, you need to use special plastic tweezers.
Replacing the panel backlight
In order to improve the state of light radiation and reduce the wide color variety, you need to place new LEDs in the panel that meet the wishes of the car owner and create optimal conditions for improving the lighting of the device. You can read the designation of the icons on the instrument panel of the VAZ 2114 in our other article.
Before changing the instrument panel lighting on a VAZ 2114, you need to buy a new set of LED lamps and calculate the correct number of diodes for each sensor, for example, for the brake sensor - you need 3 pieces. etc.
After removing the block, the resistor and light bulbs are attached to the VAZ 2114 dashboard in pre-designated places, sockets, according to the strict polarity of the location of the LED heads, which are carefully ground off. After completing the work, power is supplied and the functionality and quality of the backlight is checked.
Next, complete assembly is carried out, all the wiring from the diodes is brought out to the board and carefully attached so that they do not interfere with the installation of the panel.
It is important to carefully monitor the location of the instrument needles so that the drives do not bend or become deformed. The entire structure, lighting of the VAZ 2114 dashboard is fixed with screws. The power supply of the LEDs is connected to the lamp one, the arrows are put on, and the zero indicator is set.
Now you can monitor all sensors and instruments using the on-board computer. If all control identifiers are normal, the panel returns safely to its normal place.
Main conclusions
When the dashboard on a VAZ 2114 does not light up, it is important to correctly remove the unit, conduct a detailed inspection of the instruments, examine them under a magnifying glass, check the condition of the fuse, and then check the correct power supply to the panel. Then ring the backlight lamp tester and if the fuses or LED lamps are faulty, replace the faulty unit according to the sample and technical specifications of the equipment.
Before replacing the light bulbs in the instrument panel of the VAZ 2114, it is necessary to remove the battery terminals, disassemble the decorative trim of the instrument panel and remove the shield. After troubleshooting work has been completed, it is necessary to check the contacts of the devices.
To do this, you need to press the reset button and hold it for a few seconds, turning on the ignition before this action.
When all the indicator arrows have checked from zero to maximum values, the VAZ 2114 instrument panel is assembled correctly and is ready for installation in its original place.
Every car owner must follow safety rules when working with vehicle mechanisms and correctly adjust the operation of all units to avoid breakage and damage to parts. Conduct equipment diagnostics in a timely manner, eliminating faulty elements accompanied by qualified support or directly at technical service points.
Source: http://NaDomkrat.ru/panel-priborov/pochemu-ne-gorit-podsvetka-v-pribornoj-paneli-vaz-2114
Let's look at the problem: the backlight of the VAZ 2114 instrument panel does not light up

An element such as the dashboard is very important for the driver - because it is thanks to it that he can control the most important parameters of his car while driving. And that is why a serviceable instrument panel ensures not only comfortable driving, but also the safety of the motorist and his passengers.
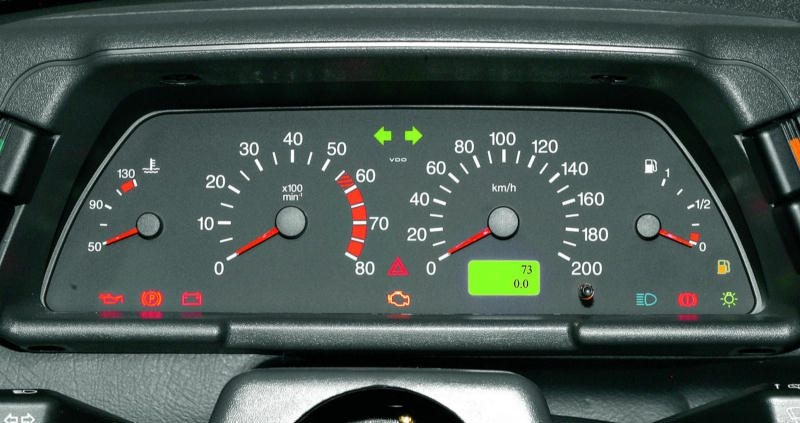
Instrument panel illumination VAZ 2114
For a clearer perception of instrument readings on the panel, especially at night, it has a built-in backlight. True, situations often occur when the backlight of the VAZ 2114 fails. We’ll talk about why this happens and how to restore its functionality with your own hands below.
Causes of malfunctions
There are a number of reasons why the instrument lighting of the VAZ 2114 may stop working correctly.
The most common of them are:
- light bulbs have burned out or diodes have failed (with LED backlighting);
- contacts and connectors have oxidized;
- fuses are blown;
- damage has occurred in the wiring itself;
- the integrity of the common contact board has been compromised;
- Lost contact with the “mass”.
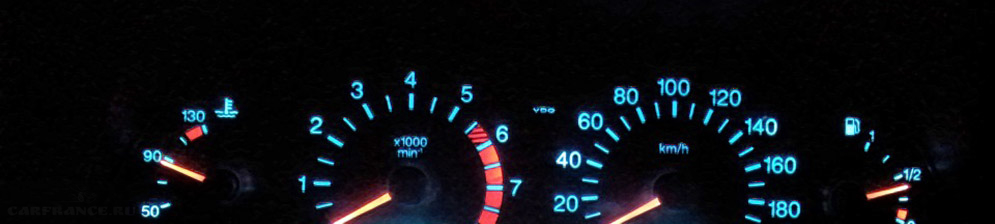
Lights in the instrument panel
In order to find out the exact cause, you will have to perform dismantling work and carry out diagnostics. You don’t need any complicated tools for this—it’s enough to have a simple tester (multimeter) or voltmeter.
Diagnostic procedure
In order to remove the instrument panel, you will need a set of screwdrivers and two wrenches - 8 and 21.
The entire procedure is performed in the following order:
- Unscrew the three screws and remove the trim.
- Unscrew the five screws on the right side of the console and remove the screen.
- Disconnect the negative cable from the battery.
- Disconnect the wiring harness that goes to the cigarette lighter.
- Disconnect the heater fan mount.
- Unscrew the bolts responsible for fixing the steering block brackets.
- Remove the light bulb sockets, light guide and decorative insert.
- Remove the lamp responsible for illuminating the hydraulic corrector.
- Unscrew the screws of the top and bottom rows of the panel and completely dismantle it.
At this point, dismantling the panel can be considered complete. Now you can move on to finding the reasons why the instrument panel of the VAZ 2114 does not light up.
Checking the electrical panel backlight system is performed as follows. First, all light bulbs are checked for functionality. If they are in good condition, all connector contacts are cleaned of oxides (they can be treated with kerosene or WD-40). After this, the serviceability of the wiring itself is checked - to do this, it is necessary to “test” it using a multimeter.
If the test results show that all elements of the system are operational, but the backlight still does not work, then the problem lies in the fuse box - it should be checked and replaced with a new one (if necessary).
VAZ 2114 fuse box
It is also worth noting that replacing the fuse box should be done very carefully, without jerking, using special dielectric tweezers.
Panel backlight upgrade
If the original dashboard lighting of the VAZ 2114 does not suit you, you can always modify it, thus improving its functionality and making it more pleasing to the eye.
The first thing you need to do is purchase a new set of light bulbs.
It is best to opt for LED ones - they have lower power consumption, have a higher light output, and also make instrument readings more readable.
True, you should first calculate the required number of LEDs to illuminate each device and alarm icon (there are 13 regular light bulbs in the dashboard, but more LEDs may be required. In case the replacement is made not with individual LEDs, but with LED blocks (lamps) , then their number will also be 13).
The process of upgrading the panel backlight is performed in the following order:
- dismantle the block;
- unscrew (counterclockwise) the original sockets, install the sockets for the LED backlight;
- install resistors and lamps in special sockets;
- bring the wires from the backlight to the common board and fix it on it;
- check the functionality of the new backlight;
- If everything works, reassemble it.
LEDs in the VAZ 2114 panel
During such tuning, you should definitely monitor the condition of the instrument needles - they are a rather fragile element and, if handled carelessly, can easily bend, break or deform, as a result of which instrument readings may be incorrect. In addition, upon completion of the entire process, you should check whether the arrows are set to “zero” and, if necessary, adjust their readings.
Also, immediately after completing the installation of the new backlight, you should check the functionality of all electronic devices and components using the on-board computer. If all identifiers work correctly, then you can reinstall the instrument panel (proceeding in the same order as its dismantling (see above), but in reverse order).
Source: https://VAZremont.com/ne-gorit-podsvetka-paneli-priborov-vaz-2114
The instrument lights of the VAZ 2114 do not light up
The panel on which all the instruments are located is a very important part of the car, since with its help you can really control how the injector works, the speed of movement and the operation of the braking system.
In addition, the panel will help you understand why the car does not start. If the instrument panel does not light up, then it is impossible to easily take readings from them on a VAZ-2114, especially at dusk.
The numbers will merge, and the motorist risks getting into an emergency. We'll tell you how to get rid of this problem.
Why might the dashboard lights not light up?
There are many reasons for this malfunction. The electrical wiring of the VAZ-2114, like all domestic cars, is not the strongest part. The most common reasons for backlight failure:
- failure of a group of LEDs;
- the light bulb burned out;
- the appearance of oxide on the connectors;
- broken or shorted electrical wiring;
- fuse failure;
- faulty common contact board;
- dimensions are damaged;
- lack of supply of “mass” to the body.
A voltmeter and tester will help you find the cause of the malfunction. With its help, you can check sections of electrical wiring and lamps. The device will also help you find out which fuse has failed. In most cases, you will have to remove the dashboard. We will talk about this procedure further.
How to fix problems
Prepare for work a set of screwdrivers (straight and curved), keys 8 and 21, special plastic tweezers for removing fuses and a tester. Next, disassembly should be carried out according to the instructions:
- Disassembly begins with removing the cover. To do this, you need to unscrew 3 screws. There is a protrusion under it that needs to be removed from the body bracket.
- To remove the screen you need to unscrew 5 screws, they are located in the console lining on the right.
- Remove the terminal from the battery (usually the negative terminal is recommended) to disconnect the power to the car. Only after this, disconnect the wiring harness block from the cigarette lighter.
- Remove the handle from the lever. Disconnect the fastening of the electric fan located on the heating unit.
- After this, remove the bolts on the steering block brackets. Remove the light guide, lamp sockets and decorative insert of the instrument panel.
- Using a 21 key, remove the hydraulic corrector illumination lamp.
- Remove the screws from the bottom and top so that you can remove the dashboard.
It is important that the electrical circuit is in a place safe from dust and moisture. Cover it with a cloth or thick film to prevent the entry of aggressive substances.
Test the light bulbs first. If they fail, they must be replaced with new ones; in most cases, this is enough to restore the panel’s functionality. However, do not exclude other causes, for example, check connections and conductors for the presence of oxide. Carbon deposits often form on lamp sockets, which also leads to a lack of panel illumination.
If only the instrument panel stopped working, but all the lamps showed operability during testing, then the reason is hidden in the fuse block.
In this case, check each fuse and replace the ones that are broken. When purchasing components, you must be guided by the marking of the failed fuse.
You should not replace it with homemade products or components with higher current strength.
If the fault lies in damage to the board itself, which is extremely rare, then you simply need to replace this element.
How to replace the backlight
Sometimes it is necessary to disassemble the dashboard if a car enthusiast decides to modify it. The backlight may simply not suit the car enthusiast with the color of the lamps and the intensity of their work. In order to completely update the backlight, you will need to calculate the number of lamps for each sensor and purchase them.
When installing LEDs into sockets, it is important to observe their polarity. You may need to carefully grind down the sockets to get the bulbs to fit into place. After you assemble the new backlight, check its functionality by connecting it to power. You can check the build quality with a special device.
The next step is to connect the new backlight to the main board and to the lamp circuit. Carefully secure the LEDs so that they do not interfere with your installation of the panel. When assembling, check the position of the instrument needles; they must be set to zero during assembly. The arrows should not bend or deform.
Next, all you have to do is secure the entire structure with screws and carry out the final reassembly.
It is important not to try to assemble the panel completely at once; do not fasten the decorative parts so that you do not have to remove them again.
After connecting the instrument panel to the electrical circuit, check the build quality and operation of the sensors using the on-board computer. If everything is normal, then finally secure the panel and complete the assembly.
What to do if the backlight of the VAZ 2114 instrument panel does not light up
VAZ 2114 and its instrument panel
On this car, as well as on the VAZ 2113 model, an electronic instrument cluster from the VAZ 2115 is installed. In addition to instruments for monitoring the operation of the engine and its systems, indicator lamps are additionally installed. in the amount of 12 pieces and 6 light bulbs that illuminate the scales of control instruments.
It became clear how many light bulbs are in the dashboard of the VAZ 2114; a few words should be said about their purpose:
- Turn signal, separately for left and right sides;
- Minimum fuel level in the tank;
- Turning on the side lights;
- Emergency condition of the brake system;
- Turning on the high beam headlights;
- Engine control warning lamp;
- Turn on the alarm;
- A lamp indicating the discharge of the vehicle;
- Signaling of the applied handbrake;
- Emergency drop in oil pressure;
- Choke opening lamp, except for models with electronic fuel injection.
Light bulbs are also installed to illuminate the instrument scales. All indicators signaling the emergency state of one or another system have red filters, the rest are green or orange.
You can often hear the expression that the instrument panel on a VAZ 2114 does not work; this is an incorrect definition of a malfunction. This is only possible in one case, when it is not connected at all in the car.
One or more devices may fail, there may be burnt out lamps, but something will remain operational. Most often, lamps burn out, so let’s take a closer look at the option with burnt out lamps.
One or more light bulbs do not light up
In this case, there can be two situations:
- The backlight of the VAZ 2114 instrument panel does not light up;
- One or more warning lamps are not working.
Let's consider the first variant of malfunctions, when the backlight of the VAZ 2114 instrument panel does not work. You must begin checking the functionality of the backlight by checking the serviceability of the fuse in this circuit. This only applies when all the backlights are off.
The fuse box on this model, as well as on the VAZ 2113 and VAZ 2115, is located in the engine compartment on the driver's side. You need to remove its cover and find the fuse responsible for the backlight, this is F10. It is designed for a current of 7.5 A. If it burns out, replace it with a new one and check the operation of the backlight paws.
Further events can develop as follows: either everything works or it doesn’t. If the instrument panel backlight works, the test ends here, otherwise it is necessary to continue troubleshooting. It may be due to poor contact of the connectors or an open circuit in the power supply of the backlight lamps.
To find and eliminate these problems, you need to remember the basic concepts of the laws of electrical engineering, and have a car LED electrical circuit tester, tester or voltmeter. If there is neither one nor the other, then it is better to seek help from an auto electrician.
The situation is much simpler when one or more, but not all, backlights are off. Burnt out light bulbs are simply replaced with known good ones.
From the practice of auto electricians, we can conclude that in most cases a fuse or light bulb blows. It rarely comes to troubleshooting using instruments, but sometimes it happens.
You should be aware that if a replacement (new) fuse blows repeatedly, you should look for a short circuit in the electrical circuit.
In the second case, they do approximately the same, but take into account that there are no fuses for each indicator lamp. They try to replace the light bulb with a new one, if it doesn’t light up again, then the contacts need to be checked.
As a rule, this is enough to troubleshoot problems.
Otherwise, it is better to ask a specialist for help, because the sensor that works in conjunction with this warning lamp may be the culprit.
Dashboard lamps
Removing the instrument panel and replacing light bulbs
To remove the tidy, you need to have a Phillips screwdriver and “dexterous hands”. Replacing light bulbs in the dashboard of a VAZ 2114 is only possible with the panel removed.
To do this, remove the decorative cover of the radio that is connected to it. To do this, use a screwdriver. You need to start from the bottom edge, you need to do everything very carefully so as not to damage the fragile plastic parts. When it moves a little, you should pull it towards you a little and you can release the upper part.
Next, the procedure will be as follows:
- You need to disconnect the wire from the cigarette lighter;
- The panel cover is removed in much the same way as for a radio, with the difference that there are also two screws and latches;
- Again, you need to disconnect all the wires going to the panel;
- Four screws are unscrewed and the panel can be removed from its place. This must be done carefully and accurately.
The question of how to change the light bulbs on the instrument panel is not very difficult; even novice drivers can cope with it. You need to find the burnt out light bulb and carefully remove it from the socket. It is removed along with the cartridge. To do this, you need to turn it counterclockwise and pull it out.
After replacing the burnt-out lamp, the socket is installed in the socket, again very carefully. After this, the panel can be put in its place. Installation occurs in reverse order. To avoid the fact that the VAZ 2114 dashboard does not work, do not forget to connect all previously removed wires and connectors to their places.
Recently, many owners of VAZ cars have been engaged in various types of tuning, including upgrading the instrument panel. There are a large number of options for such modernization.
You can add white backlighting to the instrument panel, replace lamps with LEDs, and change instrument dials.
There are also options where the instrument arrows are illuminated, as well as other modification options.
ktotam 03 Oct 2007
Hello! When you turn on the side lights, low beam, high beam, the panel is not illuminated (neither the priority panel, nor the sidebar/low beam key, nor the heater panel), but the green light is on (that the lights are working) and when the high beam is on, the blue light is on (that the high beam is on) . I looked through the book lengthwise and crosswise, then diagonally, except for the electrical diagram of the panel itself, and how to fix a problem like “if the lamp does not light, then replace it,” I did not find anything. I rang the board, checked/replaced the light bulbs, what should I do?
Maybe there is some kind of sensor? Or maybe it's the button? A cliff cannot form on its own.
molotok1 03 Oct 2007
I had a similar problem, but I also had the backlight of the license plate not working, in the end the fuse just burned out (visually it was intact)
Sergey 04 Oct 2007
This fuse looks like, look, the dimensions on one side shouldn’t work either.
BAHEK 04 Oct 2007
This fuse looks like, look, the dimensions on one side shouldn’t work either.
come on, as soon as I remember, the right side should go out. I had a similar problem too.
IrbisW 05 Oct 2007
Dimensions work. But the license plate illumination, etc., the panel is not illuminated (or illuminated) and all the lights seem to be on near, high beam, etc. Maybe I just don’t know where this panel light is turned on)) like when the light is on. annoying at night. the panel is not visible, and you also know that the number is not illuminated (((
So fuses?
Sergey 05 Oct 2007
ktotam 05 Oct 2007
Today, on your orders, I checked the dimensions. Side lights are working Side lights are working Room lighting is working
Your opinions.
Sergey 05 Oct 2007
Today, on your orders, I checked the dimensions. The headlights are working. The headlights are working. The room lighting is working.
Your opinions.
Suspicious<\p>
Source: http://ladafakt.ru/ne-gorit-podsvetka-priborov-vaz-2114.html
Instrument lighting does not work - on a VAZ 2115 - how to find the fault
Dear visitors, hello everyone!!!
I have created the “auto electrics” section for you and at the beginning I want to share with you my idea of why exactly such a section was created and how it relates to everything else that was previously described on this site.
In general, I don’t find much difference here in, say:
- how to identify faulty lighting in an apartment,
- How to identify faulty lighting in vehicles.
The comparison is of course rough, but nevertheless, it makes a slight difference. For example, if a large current load is created in the electrical circuit of an institution, in this case either the fuse in the electrical distribution point blows, or the residual current circuit breaker in the distribution panel is triggered.
As for auto electrics, if the current value for a separate circuit exceeds (the same thing), the consequences lead, for example, to the burnout of any light bulb or fuse located in the mounting block of the car.
Previously, I had to troubleshoot minor electrical faults in vehicles such as:
- ZIL-157;
- ZIL-130;
- LUAZ-969 M
and VAZ 2115.
So, let's start with the VAZ 2115 car.
Why doesn't the instrument panel light come on?
I'll give you an example from my life. I went fishing in the summer with my friend in a VAZ 2115 car. On the way, before arriving at the place, the instrument panel lights stopped lighting up.
The malfunction would seem insignificant for daytime, but in the evening and at night the driver in this situation is unable to concentrate his attention on the instrument readings, which means it was necessary to eliminate the malfunction.
What to do in this situation, where should you look for the cause of the malfunction? Spare bulbs were available, fuses were missing. Or maybe the reason is not in the fuses, but in a break or lack of contact? In general, it’s impossible to immediately figure out where to start. That is, we asked ourselves a single thought: How can we determine the malfunction in this case?
How to identify a malfunction
There was no indicator screwdriver, just a small flashlight and some thin copper wire. It was decided to identify a blown fuse in the mounting block by dialing. For this diagnostic method, it was necessary:
- disassemble the flashlight;
- cut one wire (in the flashlight circuit);
- add two small pieces of wire (about the same cross-section) to the ends of the cut wire;
- close the flashlight key (turn on the flashlight).
As a result, the result was a homemade device for testing individual circuits and, in particular, for testing fuses in the mounting block located under the hood on the driver's side.
You, of course, understood how to use such a “device” (two wires with bare ends are taken, which are subsequently connected to the fuse contacts).
The two wires brought out from the flashlight serve as “device probes”, when closed, the flashlight light comes on.
A blown fuse was subsequently found (identified) in the mounting block, this is a 7.5 A fuse F10, which is responsible for lighting:
- devices,
- engine compartment
and car number.
There was no spare fuse of the same type in reserve and, accordingly, the question arises: How can I replace the fuse?
How can I replace the fuse?
In the current hopeless situation, it was necessary to install a piece of thin copper wire instead of a fuse, after which the instrument panel and other current consumers began to work properly.
Of course, this is not the best way to fix the problem, but nevertheless, after fishing we arrived home safely.
Upon arrival home, the car driver installed a working fuse of the appropriate color.
Replacing the fuse on a VAZ 2115
Each fuse that is included in the electrical circuit of the car must correspond to its rated current value, which thereby protects current consumers for a particular circuit from malfunction.
fuses for vaz 2115
To make it easier to find a fault both in the lighting and in other consumers, the manufacturer provides colors for the fuses. The schematic representation of the mounting block (Fig. 1) clearly shows the location of the fuses and relays included in the electrical circuit of the car.
rice. 1
Fuse colors
There is no need for any explanation regarding the color marking of the fuses; everything already looks quite clear. Each fuse with a certain color will correspond to the maximum current value.
Let’s say that if the power windows malfunction, you must first check fuse F6 with a maximum current value of 30 Amps, and then (depending on the circumstances), check the remaining connections in this circuit.
That's all for now. Follow the section.
Source: http://zapiski-elektrika.ru/avtoelektrika/ne-rabotaet-podsvetka-priborov-na-vaz-2115-kak-najti-neispravnost.html
Replacing light bulbs in the instrument cluster of VAZ-2113, 2114, 2115
Today we will talk about such a common problem as the failure of the dashboard lamps on the VAZ-2114. The VAZ-2114 model is good in many ways, it is aesthetically pleasing and dynamic, has good technical characteristics, but the dashboard leaves much to be desired in terms of quality and reliability. We will tell you how to replace panel lamps in this article.
Dashboard lamps
The dashboard provides the driver with a lot of useful information that allows him to monitor the condition of the car, the driving process, diagnose breakdowns in a timely manner and correct them. So, the panel light comes on for the following reasons:
- The battery is not charging.
- For one reason or another, the handbrake is stuck.
- Not enough fuel in the tank.
- The oil pressure has decreased (which indicates the need to urgently stop the engine to avoid more serious consequences).
- Excess water in the filter. To prevent water from entering the pump, which could lead to damage, you need to drain excess water from the filter.
- The fuel system is malfunctioning.
- There was a failure in the propulsion system and much more.
As you can see, the panel lamps allow you to determine what is wrong in the car; if the lamps themselves fail, then you can miss a very important breakdown, which can even lead to an accident. This is why it is so important not to delay replacement (the lamps cannot be repaired).
Today, the car market offers a wide range of lamps for the control panel, ranging from the standard version, which is cheaper but also has average characteristics, to modernized versions that give the panel, and therefore the entire atmosphere of the car, a different, more expressive atmosphere.
Professionals also advise replacing standard lamps with LEDs, which largely decorate the panel.
So, we list several of the currently most popular options suitable for the VAZ 2114.
- LED lamps Sho-Me SM-T5 (blue, white and red). Country of origin: Korea, price: 80 rubles. for a couple.
- High-brightness SMD LED module – 20 rubles.
- LED Sho-me SM-T5-cap-super (white) – 50 rub.
- Halogen lamps from Osram and Philips cost approximately 40-80 rubles apiece.
As you can see, prices for lamps are not high. It is worth noting that replacement takes very little time, which we will talk about later.
Replacing dashboard lamps yourself
When the panel lamps stop lighting, you should immediately replace them with new ones. For this job we will need the following arsenal:
- Phillips screwdriver
- new light bulbs.
Let's get started
First of all, we remove the decorative trim of the radio (since the dashboard and radio are connected to each other, you will have to disturb the music system too), which is held on by fasteners; here it is better to use a screwdriver, threading it under the trim.
The main condition of work is caution. You need to start detaching the cover from the bottom edge. When the bottom edge comes off, you need to pull it towards you a little. Now detach the top edge. Further:
- Disconnect the wire directed to the cigarette lighter.
- In the same way as we removed the cover from the radio, we remove it from the dashboard. Above the left and right edges we find two self-tapping screws. They need to be unscrewed. We unscrew the screws located at the top and bottom.
- We remove the trim with a little effort (since it is also held on by fasteners, so the decorative plate will have to be rocked a little).
- We disconnect all the wires: from the alarm system, from the clock, from the headlights and other things.
- We remove the control panel itself, for which we unscrew the four screws on which it is held. In order not to damage the wires, it would be better to disconnect them on the one hand.
- Now the most important thing. We remove the sockets of the light bulbs that have stopped burning. To remove the cartridges, you need to turn them counterclockwise with a gentle movement. We replace the defective lamps with new ones, wrap them and install the entire structure in the reverse order of disassembly.
Brief summary of the work done
As you can see, this work is not labor-intensive and does not require large financial investments or effort. Therefore, you should not rush to contact a car service center, where you will most likely be offered to replace the entire dashboard, which will cost not several hundred rubles, but not one thousand. Now you know what to do if suddenly the light bulbs on the panel fail. We wish you good luck and a safe journey!
Source: http://mylada.net/remont/vaz-2113-2115/zamena-lampochek-v-pribornoj-paneli-vaz-2114.html