Replacing the crankshaft oil seal: step-by-step instructions and features
If oil oozes from under the crankshaft, this indicates wear of the special seal. An oil leak can cause a lot of problems for a car owner. In this case, it is necessary to replace the crankshaft oil seal.
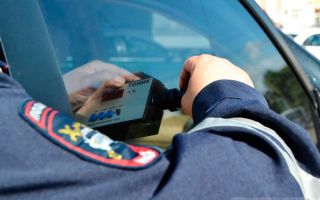
At a service station, the cost of work is far from low, especially if the rear oil seal is leaking. Let's see how to perform the replacement operation yourself. This will help save money and improve the car owner’s repair skills.
Purpose of the oil seal
For efficient engine operation, constant lubrication is required. To solve this problem, engineers introduced a lubrication system into the internal combustion engine, in which oil circulates under pressure. Lubricant is supplied to various components and parts inside the motor. Oil sprays out under pressure.
Sometimes lubrication is carried out by gravity. The main task is to reduce friction as much as possible, remove wear products, protect against damage and overheating. In this case, you need to select the crankshaft.
It comes out of the power unit housing, and to prevent oil from leaking out, the hole in which the crankshaft rotates must be sealed.
The crankshaft oil seal is used as a seal. Another name for it is the root seal. There are two such seals. One is the front (from the crankshaft pulley side), the second is the rear (from the flywheel side).
What does the seal look like?
These sealing elements are made of silicone or fluorine rubber.
These materials were not chosen by chance - they are resistant to high temperatures, as well as to the effects of lubricating fluids.
This allows you to completely avoid the risk of damage to the part due to overheating that occurs during friction. In fact, the part is a ring. The size is equal to the diameter of the engine crankshaft.
Where is the oil seal installed?
The seal is installed on the engine block in the place where the crankshaft exits the block to the outside. This location may differ on different cars and internal combustion engine models.
So, on classic rear-wheel drive VAZs, where the engine is located longitudinally and the timing chain drive is chain driven, the oil seal is installed in the crankshaft shield behind the support bearing. On front-wheel drive cars, the engine is located transversely, and the timing mechanism is often belt-based.
The oil seal in such engines is installed in the cylinder block due to the fact that there are no crankshaft shields on such internal combustion engines.
Malfunctions
Even taking into account the fact that the crankshaft seal can withstand high temperatures, the material is wear-resistant and has a limited service life. To understand when it is necessary to replace the crankshaft oil seal, it should be borne in mind that high-quality original parts last no more than 200 thousand kilometers. It must be said that an element can fail for a number of reasons.
Among the reasons are untimely oil and filter changes, as well as engine overheating. Oil that has not been changed for a long time contains dirt, dust, and wear products of engine parts.
The seal is in constant contact with the oil. Dirty oil causes scratches and scoring on the seal surface.
Then, over time, the scratches increase, and the edge of the oil seal at the point of contact with the crankshaft begins to leak lubricant.
As for overheating, the oil seal is designed to operate at high temperatures, but it also has a limit. Due to severe overheating, the product is deformed, elasticity is lost, and it can no longer provide sufficient tightness. Oil leaks occur. In this case, an urgent replacement of the crankshaft oil seal is necessary, otherwise all the oil will leak out.
Replacement and features
Obviously, the main reason for replacement is an engine oil leak. In this case, the leakage can be either intense or insignificant. In both the first and second cases, it is better to replace the worn part. It is not recommended to operate a car with a “sweating” oil seal.
There are two seals in the engine: rear and front. If you are replacing the front crankshaft oil seal, it is also advisable to replace the rear one. But the front one is especially important. The fact is that it is located near the timing belt - if oil gets on the belt, then there is a serious risk of the belt slipping a tooth or several. Also, the belt material may lose its characteristics and breakage is possible.
The rear oil seal is installed at the junction of the engine and gearbox. If oil leaks here, this will lead to a decrease in the lubricant level, as well as dirt in the lower part of the engine. Oil can get on the clutch and it will slip.
Procedure for replacing the front oil seal
Let's see how to replace the front crankshaft oil seal. You need to understand that the procedure is labor-intensive.
The first step is to dismantle the pulleys. Then remove the protective cover, under which the timing belt is located. Next, remove the belt. Then remove the crankshaft timing belt. Finally, the front oil seal is removed and a new part is installed in its place.
Rear oil seal
To replace the rear crankshaft oil seal, you need to remove the gearbox, then remove the clutch. Next, dismantle the damaged seal and clean the seat. After this, a new seal is installed. Then all the nodes are assembled in the reverse order.
Replacing oil seals on an Opel
Let's see how to replace the crankshaft oil seal on an Opel Astra. In general terms, the procedure is clear, but there are subtleties and features. You can diagnose a rear oil seal leak by looking at an oily clutch disc.
To replace, you need to remove the gearbox, clutch, and note the position of the flywheel relative to the crankshaft. Next, unscrew the flywheel mounting bolts - there are five of them. To prevent the flywheel from turning, hold it with a screwdriver.
Next, unscrew and unscrew the sixth flywheel bolt and remove it.
Then dismantle the exhaust pipe, drain the oil from the internal combustion engine, and remove the oil level sensor block. After this, remove the bolts that secure the engine crankcase to the clutch.
They also unscrew the crankcase bolts that are screwed to the cylinder block and remove the oil pan. Then unscrew the screws holding the DPKV and remove the sensor.
Next, unscrew the bolts of the crankshaft main bearing cover, remove the cover, and remove the rear oil seal from its cage.
A little oil is applied to the edge of the new oil seal, and installation is carried out using a special mandrel. Then all dismantled elements are installed in the reverse order. On an Opel, replacing the front crankshaft oil seal is carried out according to the same scheme. There are no particular difficulties in this process.
Replacing oil seals on rear-wheel drive cars
Here the procedure is more complicated than on front-wheel drive models. To replace it, you need to disassemble many elements. So, in the case of the VAZ-2107, you will need to remove the front cover.
To do this, you will need to remove the generator belt, the cooling casing along with the fan, and unscrew the crankshaft pulley bolt. Then you need to remove the pulley itself. Then unscrew the pan lid. It is removed along with the gasket.
When the front cover is removed, replacing the VAZ crankshaft oil seals is not difficult.
The new part is installed in place of the old one in the cover. The working edge should be directed inwards. The part is pressed into place with a hammer. Then everything is put back together in reverse order.
To get to the rear oil seal, you need to disassemble even more - the procedure will require enormous effort and a lot of time.
Here it is also necessary to remove the gearbox, driveshaft, flywheel, starter, as well as all elements that may interfere with removing the gearbox. After this, dismantle the clutch. Only then can you gain access to the oil seal.
Replacing the crankshaft oil seal with your own hands in this case is very long and difficult, so you need to be patient.
Conclusion
Here's how to replace crankshaft seals. On front-wheel drive cars, this task can be accomplished even by beginners. As for rear-wheel drive with a longitudinal engine, the procedure requires enormous costs and time. The price for replacing crankshaft oil seals at a service station is affordable (from two thousand rubles), so you can entrust the car to specialists.
Source: https://www.nastroy.net/post/zamena-salnika-kolenvala-poshagovaya-instruktsiya-i-osobennosti
How to replace the crankshaft oil seal correctly (rear, front)
As you know, by the types of repairs that a car enthusiast can perform on his own, one can judge his qualifications in this field.
You can greatly improve your skills by learning how to replace an engine crankshaft oil seal.
The need for such a DIY replacement appears when an oil leak forms at the crankshaft seal. In such cases they say that the oil seal has leaked.
Replacing the crankshaft oil seal is a procedure whose cost at a service station is not low, especially if the culprit of the repair is the rear oil seal - changing it is always more difficult.
Purpose of the seal
Any car owner with specific technical knowledge understands why a seal is needed. It prevents oil leakage from the mechanism's oil system. In our case, the oil seals are located at both ends of the crankshaft. Each has its own size and cost. Accordingly, one of them is the front, the other is the rear. Let's look at how to change each of them.
If it leaks from the engine, then an experienced motorist’s suspicions instantly fall on the oil seals and cuffs. Their job is to seal rotating joints.
The crankshaft is an important component of a car. An engine block is always a rather complex structure. If a leak is detected, most likely the seal located at the ends of the crankshaft has leaked. The latter must protrude outward from the engine block on both sides.
The timing wheel is fixed on the crankshaft from the front flank, and the clutch elements are fixed from the rear flank (which in some way explains the unequal size of the shaft ends). Of course, no oil leak is appropriate in this case. The lubricant must always remain inside the engine block.
Why does the oil seal deteriorate?
The cuff is a kind of ring with a rigid outer ring and an elastic inner edge. The latter just comes into contact with the shaft. If the oil leaks through the seal, it means that the spring edge has weakened and does not compress the bushing more effectively. The seal needs to be changed.
An oil leak is always unpleasant and dangerous for the engine. Due to the fact that during operation the cuff loses its elasticity or simply deteriorates, the oil leak intensifies, creating an ocean of problems for the car owner. Knowing how to replace this element can make your life much easier.
Attention. You can change the rear and front oil seals yourself in different ways, since the seals differ significantly due to the structural features of the power plant. Of course, size also matters.
Cuffs or oil seals have been used in the automotive industry for a long time; they have a complex purpose and design features.
In more detail it looks like this. The seal itself fits tightly to the surface during shaft rotation. To ensure that the seal is always effective, special notches are provided on the gland. If the cuffs are new, the oil does not leak or leak anywhere.
Over time, the seal lips shrink and the elements become obsolete, so they are no longer able to provide the required seal. The result is a lubricant leak, which can happen both in front of the shaft and at the back.
Preparatory work
The basis of competent DIY repairs or replacement of any element is preparation. You must be able to prepare professionally and take into account all stages of the upcoming work.
- Clean up the machine and work area.
- Select a set of necessary tools.
- Buy consumables and spare parts.
The cost of crankshaft seals is not very high. As mentioned, the size of the seals is also not the same. After all, they have different design features.
It is necessary to take care of new gaskets at the preparation stage if they become unusable during the replacement process. Their cost is low and their efficiency is high. As a rule, if oil leaks, it is not only the oil seals that are to blame.
As for the tools, this is a standard set of screwdrivers, wrenches, as well as a set of special mandrels for installing seals yourself.
Note. Again, here you have to take into account the size of the seals. For example, on “nines”, to repair the front seal, you need to prepare a 27-mm end wrench; replacing the rear seal is carried out with a device with an outer diameter of 90 mm.
And finally, preparatory work always means the cleanliness of the work area. In this case, you will need to thoroughly wash the power unit, clearing it of dirt and traces of oil. There will definitely be grease stains if the seal is leaking.
How to change the rear seal
This is always more difficult than installing a new front oil seal. It is necessary to take into account the design features, because it is more difficult to remove the rear seal that has leaked due to its secrecy. The oil seal is located behind the clutch system, which means mandatory dismantling of the box, flywheel, etc.
Please note that if the oil seal leaks, lubricants can get on the clutch and flywheel elements, which will significantly reduce the friction properties.
The rear seal sits in the original housing, secured with several bolts. Two of them are screwed from the bottom, directly through the oil pan.
After removal, the new rear crankshaft seal is pressed into place in place of the old one. The size of the seal is not small, which makes installation much easier. The seal is also simple in design, so there are no problems with press-in. The only difficulty is providing access to the oil seal.
How to update the front seal
This is much easier and faster to do. This seal is located directly at the end of the bushing on which the timing wheel sits. For example, consider the VAZ 2109. To replace the front oil seal, you must first remove the engine protection and timing belt cover.
After this, the piston of the 1st cylinder is placed in the TDC position. The belt is loosened and removed.
Now you need to remove the front wheel by jacking it up. Then the pulley and generator belt are removed. The shaft wheel with key must be dismantled.
The oil seal must be carefully removed using a screwdriver, and then a new one must be installed.
The new seal is installed using a nozzle or a wrench-tube 27.
Please note that there is a considerable chance of damaging the crankshaft surface, and this is already a big expense. The front oil seal should be dismantled without scratching the seat.
If you are a motorcyclist, the owner of an Izh Planet, for example, then replacing the crankshaft oil seal is carried out in a similar vein, of course, taking into account the design features of automobile and motorcycle engines. The cost of the seals is approximately comparable.
Source: http://AutoLirika.ru/remont/kak-zamenit-salnik-kolenvala.html
Replacing the engine crankshaft oil seal, fixing a leak, or if the front or rear oil seal squeezes out, how to change it yourself
The crankshaft, like many other components of an internal combustion engine, has oil seals in the shape of a round cuff.
Such elements protect the crankshaft-engine block assembly, seal the working environment from the environment, and prevent dust from entering.
The oil seals have a special cross-section: the shaft is tightly wrapped around a plastic ring, which does not interfere with its rotation and ensures the tightness of the engine. A working oil seal lets through only 3-5 ml of oil per thousand kilometers.
Structure of a typical oil seal
Such parts operate under conditions of constant friction, humidity, and temperature changes, so oil seals are made of durable rubbers, silicone, and some polymers (for example, polyurethane). The main dimensions of the oil seal are its internal diameter, external diameter and height.
The main dimensions of the oil seals: D - outer diameter, d - inner diameter; B - oil seal height
Types of crankshaft oil seals
Manufacturers, in order to save materials or reduce prices, produce crankshaft oil seals with sections of varying complexity. Let's consider their main types, namely:
- with a metal outer surface (option a);
- with a smooth surface (option b);
- with a corrugated surface (c);
- with hydrodynamic effect (d).
Model a seals will not provide the same degree of sealing as models b-d, but require less rubber for production and lower cost accordingly.
A smooth oil seal (type b), even with sufficient density, will have cavities in the seat; such an assembly may “sweat”.
Grooved grooves (like those of oil seal B) are crushed during installation and contribute to a tighter fit in the engine housing, this is an advantage over “bare” oil seals (a).
Special mention should be made of hydrodynamic seals (model d). They are more technologically advanced and efficient. The principle of their operation is as follows:
- special notches of small depth with the direction of rotation are applied to the inner plane;
- high crankshaft speeds swirl the oil in the area of the inner plane of the statically fixed oil seal, the oil flow hits the internal notches and receives the direction of movement from it;
- Such processes improve the efficiency of stuffing box units.
In order to further seal the oil seal-engine housing assembly, it is recommended to apply sealant to the outer surface of the oil seal before installation.
The crankshaft oil seal is installed at the points where the shaft exits the engine and is secured by pressure plates or adjacent engine components. The crankshaft has two oil seals: front and rear. The rear oil seal, as a rule, has a separate housing - a “flange”.
VAZ 2106 engine structure
1 – crankshaft pulley; 2 – generator drive belt; 3 – front crankshaft oil seal; 4 – camshaft drive chain; 5 – spring plate; 6 – guide sleeve; 7 – valve; 8 – internal spring; 9 – outer spring; 10 – lever spring; 11 – adjusting bolt; 12 – valve drive lever; 13 – camshaft; 14 – oil filler cap; 15 – cylinder head cover; 16 – spark plug; 17 – cylinder head; 18 – flywheel; 19 – rear crankshaft oil seal; 20 – oil pressure sensors; 21 – piston; 22 – oil level indicator; 23 – oil drain plug; 24 – connecting rod; 25 – oil pan; 26 – drive shaft of auxiliary units; 27 – crankshaft. Set of crankshaft oil seals VAZ 2106
Typical malfunctions of crankshaft seal units
A modern oil seal is a resource part. There are models that can operate up to 1 million kilometers. A standard oil seal will “live” approximately 100,000 km. When the structure of the seals is damaged, oil begins to leak. A leaking oil seal may not affect engine performance, but you should not delay replacing it.
Leaking rear crankshaft oil seal
In case of critical wear, the oil seal may not withstand internal pressure and may move from its seat. If the seal is pushed out, the engine will likely lose a significant amount of oil, which can lead to unplanned repairs.
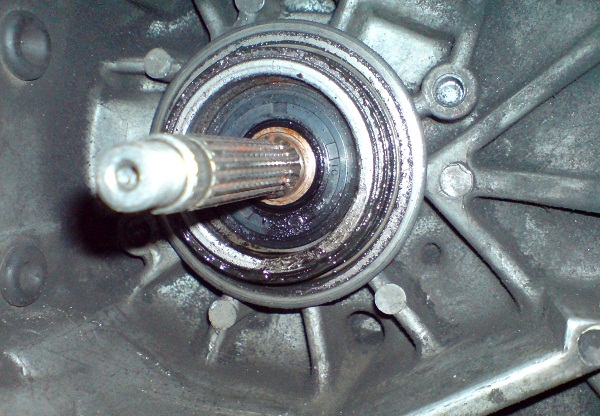
If the crankshaft oil seal on your car repeatedly squeezes out, or the leak does not stop after replacing the oil seal, it means that a wear has formed on the surface of the shaft, and the size of the oil seal is larger than necessary for sealing. A shaft with such defects must be restored or replaced.
Crankshaft wear from contact with oil seal
Replacing crankshaft seals
Replacing crankshaft oil seals is a labor-intensive process. To perform such repairs, it is necessary to dismantle parts that interfere with operation. In the case of the rear oil seal, you will have to remove the entire gearbox. Let's consider the procedure for such repairs using the example of a VAZ 2106 engine.
For the work you will need: a car lift, a transmission hydraulic stand, a standard set of tools, a set of new oil seals, a solvent for degreasing surfaces.
Replacing the front oil seal VAZ 2106
- We dismantle the crankshaft pulley. To do this, unscrew the fastening nut and pull off the pulley with a mounting spatula.
- We pry up the oil seal and remove it (a screwdriver or other similar tool is suitable for this).
- We clean the oil seal seat from dirt and degrease it.
- We install a new oil seal. You can use the old seal and a hammer to seat the new seal in place.
- We assemble the unit in the reverse order of disassembly.
Pry the oil seal out with a screwdriver
Replacement of rear oil seal VAZ 2106
- We dismantle the gearbox.
- We fix the flywheel with a screwdriver (you can use special clamps).
- We dismantle the flywheel.
- We dismantle the clutch housing shield.
- After removing the fastening bolts, dismantle the holder (cover) of the front oil seal.
- We change the paronite gasket of the holder and the oil seal.
- We assemble the dismantled parts and assemblies in the reverse order of disassembly.
Removing the clutch housing shieldRemoving the clutch housing shield
Source: https://SwapMotor.ru/tehnicheskoe-obsluzhivanie/kak-pomenyat-salnik-kolenvala.html
How to replace the front crankshaft oil seal?
A leak in the front crankshaft oil seal is one of the most common failures associated with rubber elements included in the engine design.
Oil seals are used to seal the points where the shaft exits the housing. In the case of the crankshaft, these elements are installed at the outlet holes of the cylinder block.
Location of rubber elements on the crankshaft
In the design of power plants, two oil seals are used on the crankshafts - front and rear. They both prevent lubricant from leaking out of the engine.
The rear oil seal is installed on the end of the shaft to which the flywheel is screwed. Due to the fact that this end switch is presented in the form of a flange, the dimensions of the oil seal are quite large, with a significant layer of rubber.
This ensures a considerable service life of the rubber element.
The front oil seal is located on the end of the shaft, which is used as a drive for systems and mechanisms of the power plant or auxiliary equipment. The rubber element is located behind the drive gear, which is mounted on the shaft end and secured with a key connection. The dimensions of this oil seal are smaller than the rear one. And this affects the resource of the element.
Due to the leak, oil gets onto the outer surface of the engine, causing it to become dirty. This also increases the consumption of lubricant, which must be replenished periodically.
Leakage is especially dangerous for engines in which the timing belt is driven by a belt. Oil-based liquids have a negative effect on rubber elements.
If oil gets in, the belt can delaminate and break, which is especially dangerous if the engine is “plug-in” (if the belt breaks, the pistons collide with the valves).
Causes of leakage. Determining the location of the leak
The reason for the leak is that the oil seal is skewed
An oil seal can leak for several reasons:
- Natural wear and tear. No matter how carefully the elements of the crank mechanism (CCM) are adjusted to each other, the crankshaft still vibrates during rotation, which leads to wear on the inner surface of the oil seal. Because of this, it no longer fits tightly to the shaft and lubricant leaks out through the gap;
- Loss of elasticity. This happens due to the rubber drying out, it becomes “tanned” and the tightness of the seal decreases;
- Installation is skewed. Incorrect installation leads to the appearance of leaks through which lubricant under pressure leaks;
- Low quality rubber element installed when replacing a leaking oil seal. There are many fake spare parts on the market and the likelihood of purchasing a defective product is high.
Since the oil seal is located in a place where inspection is not very convenient, the problem is judged by traces of oil under the car and severe contamination of the lower part of the engine.
But it is worth noting that lubricant can also leak in other places - from under the pan gasket, oil filter.
Therefore, before eliminating a leak, it is necessary to carefully inspect the lower part of the power unit in order to accurately determine the location of the leak.
This can be done on an overpass or inspection hole, after first dismantling the crankcase protection (if there is one). In the case where it is impossible to determine the location of the leak due to severe contamination, the bottom of the engine is cleaned, and then, after a short trip, everything is inspected again.
Dust will stick to the leak site, which is used to determine the location of the leak.
Having established that the oil is leaking due to a damaged or worn oil seal, you can begin replacing it.
Note that although the front crankshaft oil seal leaks more often than the rear, it is much easier to replace it.
The technology for replacing this rubber element is the same for any engine, but the complexity of the work depends on the design features of the engine itself.
Algorithm for replacing the crankshaft oil seal
To replace the front crankshaft oil seal, you will need a standard set of wrenches, specialized tools (wrenches for unscrewing the crankshaft pulley bolt), a gear puller (for cars with a timing belt drive), and truings for pressing in a new rubber element.
Video: A simple method for removing the oil seal
If you take cars equipped with engines with a timing belt drive, then the replacement technology is as follows:
- We place the car in the pit and immobilize it.
- We provide access to the attachment drive pulley mounted on the crankshaft.
- Remove the accessory belt.
- We provide access to the timing belt.
- We set TDC according to the marks (on the camshaft gear, crankshaft pulley, flywheel). We fix it in this position.
- Unscrew the crankshaft pulley mounting bolt. Once again we check the installation of marks.
- Loosen the timing belt tension roller.
- We remove the belt.
- We pull the drive gear off the crankshaft (carefully so as not to lose the key). Usually the gear is pulled off by hand, but sometimes a puller is required.
- Thoroughly wash and clean the surface near the crankshaft end switch.
- Pry off the oil seal with a screwdriver or pliers. We do this carefully so as not to damage the seating surfaces, since even the slightest scratch will lead to a loss of density and renewed oil leakage.
- We wipe the seating surfaces with a rag.
- Lubricate the new oil seal and put it in place, making sure that the edges do not turn under.
- We hammer the rubber element until it stops using a straightener (a piece of pipe of the appropriate diameter).
- We put everything back together, making sure that the marks match and the drive belts are tensioned correctly.
But this is a general technology. If you take each engine separately, there will definitely be nuances.
Features of replacement on different engines
Video: Oil leak from under the front crankshaft oil seal of VAZ 2114, how to change the oil seal!
For example, if you take VAZ models starting from 2108, equipped with an 8-valve timing belt, then replacement is the easiest to do. The problem can only arise with unscrewing the pulley mounting bolt. To avoid this, engine rotation is blocked by turning on the gearbox and squeezing the brakes.
On 16-valve engines, work is more difficult. This is due to the difficulty of fixing the camshaft after installation according to the marks.
For example, on Renault Logan cars, this will require a special locking plate for the shafts, as well as a lock for the crankshaft.
And in general, to provide access to the timing belt on 16-valve engines, you have to remove many elements from the engine; in some cases, you also need to jack up one side of the engine, having first removed its support.
If we take engines in which the timing belt is driven by a chain, then they have their own nuances. On the one hand, it is easier to change a leaking oil seal on them, since there is no need to disassemble the timing drive.
But on the other hand, access to the oil seal is very limited and replacing it is not easy.
For example, on a VAZ-2107, to replace the oil seal, you just need to remove the auxiliary equipment drive belt and unscrew the pulley.
And then we simply pick up the leaking oil seal and install a new one.
But this car has a longitudinal engine layout.
Because of this, the space between the engine cover and the radiator is very small, and it is almost impossible to install the oil seal without distortion. Therefore, to carry out work more conveniently, it is better to remove the lower timing cover.
And this increases the labor intensity of the work. In addition, under this cover there is a gasket that must be changed or at least coated with sealant.
But on such engines, after replacement, you will not have to install the shafts according to the marks, since the gas distribution mechanism drive is not affected during work.
In general, before starting work on any car, you should familiarize yourself with the features of the replacement and be sure to follow the technology for carrying out the work.
Source: http://AvtoMotoProf.ru/svoimi-rukami/kak-zamenit-peredniy-salnik-kolenchatogo-vala/
Sadness or replacement of the front crankshaft oil seal - logbook Renault Sandero Stepway Filter Produlli 2011 on DRIVE2
Greetings, reader!
Just in the fall I changed all the belts and rollers and drove about three thousand at the most. And bam! The oil seal is leaking. As I knew, not so long ago I ordered mandrels for the correct installation of the oil seals, but they haven’t been made yet.
And as usual, I was visiting my parents in another city, I wanted to leave the car there and come back the next weekend with spare parts and a mandrel. But it doesn’t work out; a family trip is planned for next weekend.
It was decided to do it.
Removing the oil seal
Vehicle mileage: 59300 km.
Car age: 4.5 years.
Everything is disassembled in the same way as the timing belt replacement procedure. The engine is supported using available means, the upper right engine mount, the auxiliary belt, the timing belt protective covers are removed, the timing belt itself and the pulley are removed - behind it there is an oil seal. We see that everything is covered in oil.
Full size
Front crankshaft oil seal
Full size
Front crankshaft oil seal
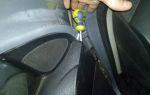
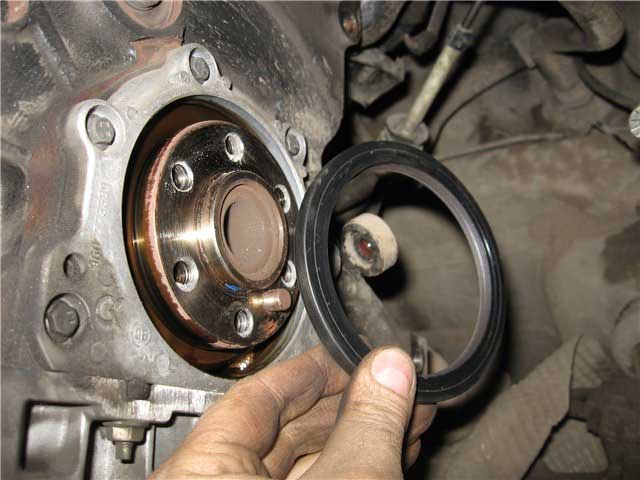
To remove the oil seal, you need to pierce it with something sharp in the middle and then pick it out. This must be done carefully so as not to damage the surfaces on both sides of the oil seal. The outer side of the oil seal has a metal insert, so you need to pull on it.
Old oil seal and tool for picking out
Full size
Cleaned the seat from dirt and oil
At this stage it is also necessary to check the camshaft seal and pump. They turned out to be fine.
Then my brother and I went to look for spare parts in the city. All (three!) stores have the same Elring oil seal, so they took it. The belt was taken by Contitech.
At first there was an idea to wipe the belt and rinse it in acetone, but we decided to consult a specialist. He gave an objective answer. He said that the belt needs to be changed because...
it is threaded with threads that become saturated with oil, and then the rubber begins to peel off from the threads. It’s decided - it’s time to replace it!
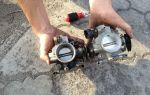
Spare parts
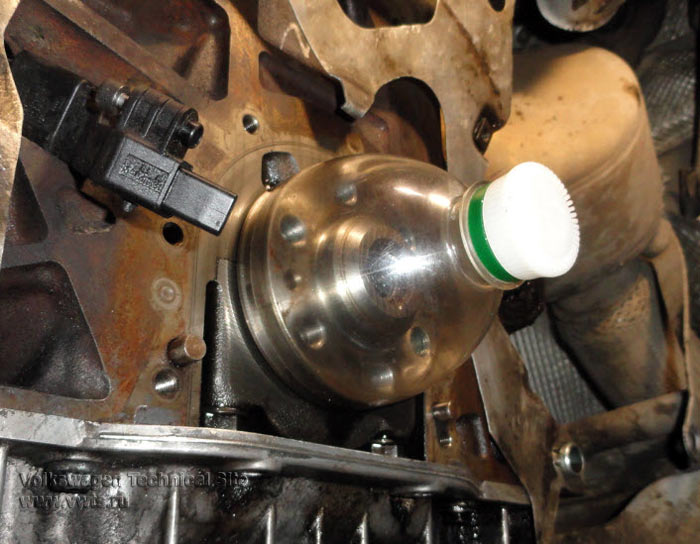
Installing a new oil seal
There's a little secret here. It is necessary to cut an even piece of the side wall from a plastic bottle. It will be useful to us so as not to damage the oil seal when we put it in place.
A device made from a piece of a plastic bottle. Shown with old seal
Then we lubricate the oil seal, the device from the bottle and the seat with machine oil.
Lubricate with oil
Lubricated the seat with oil
We put the film on the oil pump gear shaft and carefully use our hands to begin pushing the oil seal into place.
We begin to put on the oil seal
The forces must be applied on the outside of the oil seal so that they fall on the metal insert inside it. When the seal no longer fits with your fingers, it is very convenient to put it in place using a mandrel. The difficulty is that the oil seal does not have a seating plane at the back and can be planted too deep! (Thanks to the French!) We will plant it with improvised means.
At first I simply tapped it lightly in a circle with a small block until it sat flush with the surface of the engine. But the mounting hole has been chamfered and it needs to be seated deeper - until the end of the chamfer. It's somewhere around 1-1.5 mm. Then I ground off the block and made a protrusion on one side - the same 1.5 mm.
They continued to seat the oil seal in place along the outer contour, with light blows in a circle.
Full size
A device in the form of a bar with a protrusion. Ledge - Right
Full size
The new seal is in place!
You can do all this practically alone, with a little help when unscrewing the bolt on the crankshaft. Yes, and it can be unscrewed by one person by wedging the crankshaft in the clutch basket window.
Full size
And here is the mechanic himself. During the procedure I aged 20 years :)
Here is a selection of spare parts articles for our cars.
Here is a selection of videos for self-repair and maintenance. There is also a replacement for the front crankshaft oil seal.
According to the law of meanness, today they brought ready-made mandrels and now the pump should start running.
Smooth roads and a dry timing belt!
PS I have just one question for you. How long do Elring oil seals and Contitech belts last?
Price: 980 ₽ Mileage: 59,300 km
Source: https://www.drive2.ru/l/9741537/
How to change crankshaft seals
Quite often, especially drivers of domestic cars, are faced with the problem of premature wear of crankshaft oil seals and their replacement.
The quality of domestic oil seals leaves much to be desired, and the surface of the shafts is not as ideal as on foreign cars.
Engine oil leaks through oil seals and constant topping up of oil still make drivers think about replacing them, long before engine overhaul. In this article we will look at how to replace crankshaft oil seals in your garage.
Causes of rapid wear of crankshaft oil seals.
In general, high-quality oil seals from reputable manufacturers can last up to 150 thousand km on an engine. But often their wear and oil leakage occurs earlier, especially if the oil and filter were not changed in a timely manner, and metal dust, which is present in dirty oil, contributes to their rapid wear.
Even rapid wear of the oil seals can occur from careless repairs, when, when replacing them, the polished surface of the crankshaft is scratched, which rubs along the working edge of the oil seal. And scratches on the shaft begin to quickly wear out the working edge of the oil seal.
Premature wear (more likely not wear but damage) of oil seals can also occur due to engine overheating (read how to avoid overheating the engine here). When the engine overheats, the crankshaft becomes very hot and the seal material, which is not designed for high temperatures, cannot withstand and deteriorates.
The need to replace the oil seal on any engine can arise not only from its wear, but also from its being squeezed out by excess pressure in the engine crankcase. This often happens in winter, when ice jams occur in the crankcase ventilation system (due to condensation), and excess pressure in the crankcase can squeeze some of the oil through the oil seal, or squeeze out the oil seal itself.
And before removing the pulleys (or gearbox and clutch) to replace the seals, you first need to figure out the reason for the increase in pressure in the crankcase and thoroughly examine the crankcase ventilation system, that is, check whether it is clogged with ice or coked oil (mixed with dirt). After eliminating the malfunction, you can begin replacing the seals.
Car engines have two crankshaft oil seals, front and rear.
The front oil seal is usually smaller in diameter and easier to replace than the rear one, and it is located either in the front cover of the engine block or in the oil pump housing (on some engines the front cover is made as one part with the oil pump housing).
The rear oil seal is somewhat more difficult to replace, since you have to remove the gearbox and clutch parts to get to it. Below we will take a closer look at how to replace both oil seals, since most often they wear out at the same time, and it is also advisable to change both of them (front and rear).
Replacing the front crankshaft oil seal.
On most foreign car engines, in order to get to the front oil seal, you need to remove the timing belt and alternator belt pulleys covering it. But on some simpler engines (for example, the Zhiguli classic), in order to get to the front oil seal, you only need to remove the generator pulley (and, of course, the belt), since the timing chain is located inside the crankcase.
On engines with a timing drive using a toothed belt, to replace the oil seal, in addition to the generator pulley, you also need to remove the toothed belt pulley (of course, the belt too), which is located under the generator pulley.
But before you do this, first set all the pulleys to the marks corresponding to the position of the piston of the first cylinder at TDC (at the moment of compression (this is described in detail in the article about adjusting valve clearances here).
There are marks on the pulleys and on the crankcase and they must match. But on some engines, the mark on the camshaft pulley should be placed opposite the connector of the engine head and its block (check your engine manual).
Aligning the timing belt pulleys to the marks is necessary so that when returning the pulley and timing belt to their place on the engine, the valve timing does not go astray (an error of just one or two teeth can lead to valves and pistons meeting on some engines).
After aligning all the toothed pulleys to the marks (it is enough to set only the camshaft pulley to the mark), you can loosen the tension on the belt tension roller and remove the toothed belt itself. After removing the belt, you can remove the timing pulley from the front of the crankshaft.
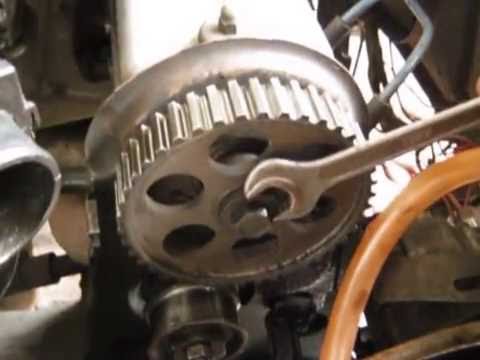
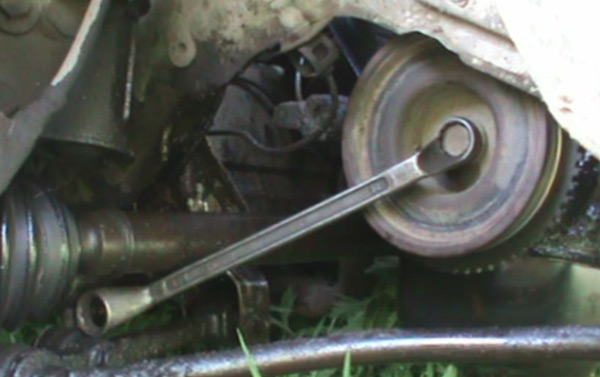
When removing the timing belt pulley from the front of the crankshaft, it is helpful to use a small pulley, but you can also use two screwdrivers, as in the photo on the left.
After you have removed both the generator pulley (by unscrewing the pulley nut or bolt) and the timing belt pulley (and its key), you can remove the old oil seal directly from the crankshaft, using a special tool for carefully removing oil seals (read about it here).
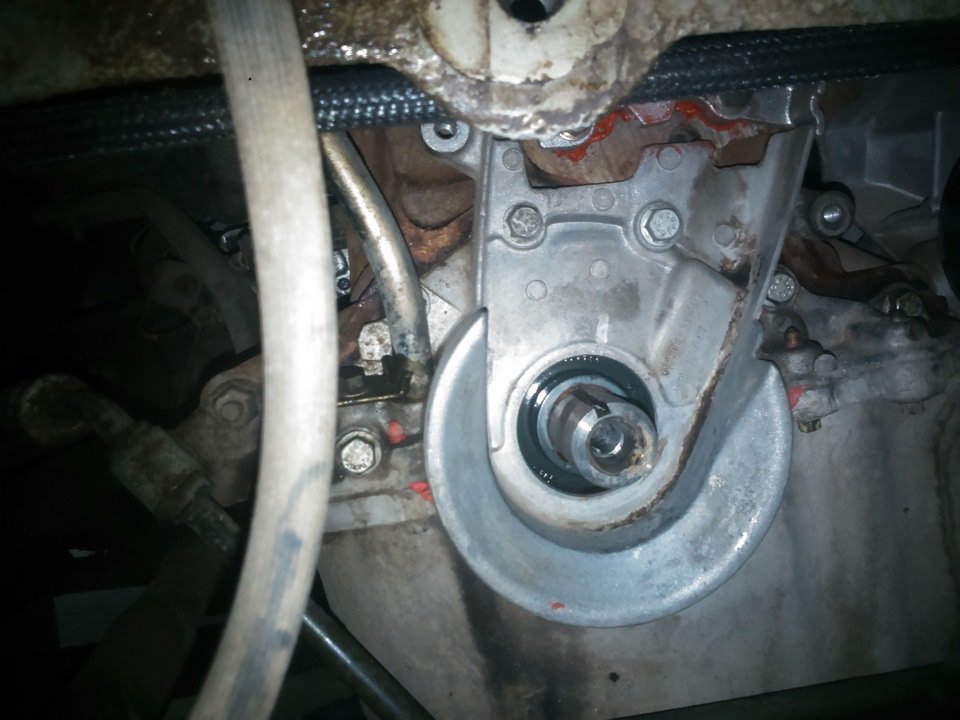
If you don't have this simple tool, then it's better to remove the oil seal cover (or oil pump cover - on some engines) located on the engine block. The old oil seal is pressed into this cover, which when removing this cover is much easier to remove and what is important is not to scratch the polished surface of the crankshaft.
To remove the front cover, on many engines you need to unscrew only 4 bolts, or 6. Only when unsticking the cover (after unscrewing the bolts), try not to damage the cover gasket, but it is better to replace the gasket with a new one, because it costs a penny. Having removed the cover along with the old oil seal, we place it on the table and, picking up the oil seal with a screwdriver (see photo on the left), remove it from the cover.
Then we lubricate the outer part of the new oil seal with sealant, and press it into the hole in the cover using a mandrel and a small hammer (the spring around the working edge of the oil seal, when it is pressed in, should be located inside the engine).
As a mandrel, you can use a large union head from the tool kit (see photo on the left), or a piece of pipe that fits the diameter of the oil seal (1-2 mm less than the outer diameter of the oil seal).
After pressing the oil seal into the cover, lubricate its working edge with clean engine oil and return the cover (with a new cover gasket) to its place, carefully placing the oil seal along with the cover onto the lubricated crankshaft and tightening it to the engine block with standard bolts.
All that remains is to return the pulleys to their place; of course, first we return the timing gear pulley (and its key), which will fit onto the crankshaft and its mark will coincide with the mark on the crankcase (usually the mark on the oil seal cover), because you have previously aligned them according to the marks. Next, we return the timing belt to its place, tighten it using a tension roller, and it is advisable to check its tension using the special device described in this article.
After this, we return the generator pulley and the generator belt to its place. As I said above, on engines with a timing mechanism driven not by a toothed belt, but by a chain, to get to the front crankshaft oil seal, you just need to remove the generator pulley.
Replacing the rear crankshaft oil seal.
Here you will have to spend more time to get to the oil seal. And you will need an inspection hole in the garage and an assistant, since you will have to remove the parts that drive the wheels of the car (the driveshaft on rear-wheel drive vehicles) and then a rather heavy gearbox, unscrewing the bolts that hold it in a circle.
After removing the box, the bolts holding the clutch basket are unscrewed, and the basket itself and the clutch disc are removed (photo below).
In general, many people replace the rear oil seal along with replacing the worn clutch disc. After removing the clutch parts, the bolts holding the engine flywheel are unscrewed, and the flywheel itself (and its casing covering it from below) is removed.
When unscrewing the flywheel bolts, it must be secured against rotation using a powerful screwdriver, as shown in the photo on the left.
Most often it happens that to remove the flywheel you may need an appropriate puller. After removing the flywheel, the oil seal cover bolts are unscrewed, the cover is removed along with the oil seal and it is replaced with a new one, just as I described about the front crankshaft oil seal.
All that remains is to return all the parts to their place - the flywheel, the clutch disc with the basket, the gearbox and the wheel drive (for example, a cardan drive).
As can be seen from what was described above, replacing an oil seal, especially the rear one, is not so quick, which means there is no point in buying cheap oil seals that can leak again, and you will have to bother with replacing them again. Therefore, try to buy only the most expensive oil seals from reputable manufacturers; it is better to overpay and forget about repairs for a long time.
Usually, as the crankshaft seals wear out, the camshaft seal may wear out and leak, and you can read about how to replace it here.
I hope that after reading this article, many novice repairmen or drivers will be convinced that in order to change crankshaft seals, you can do without a car service and do everything yourself in your garage, good luck to everyone.
Source: http://suvorov-castom.ru/kak-pomenyat-salniki-kolenvala/