Repair and service of cars, engines and automatic transmissions
_____________________________________________________________________________
Replacing the timing belt for Toyota 4A-FE, 5A-FE, 7A-FE engines
Removing the timing belt Toyota 4A-FE, 5A-FE, 7A-FE Remove the generator and coolant pump drive belt. – Loosen the 4 bolts securing the coolant pump pulley.
– Loosen the generator mounting bolt and the adjusting bolt. – Loosen the adjusting bolt and remove the alternator and coolant pump drive belts. – Remove the 4 mounting bolts and remove the coolant pump pulley.
Unscrew the spark plugs, having first removed the high voltage wires, holding them only by the rubber boots. Remove the cylinder head cover. – Disconnect the positive crankcase ventilation system hoses from the crankcase ventilation valve.
– Unscrew the 3 cap nuts, remove the rubber bushing and the cylinder head cover along with the gasket.
Toyota 4A-FE (AE101, AT190), 5A-FE and 7A-FE engines for Toyota Corolla, Corona, Toyota Karina E, Toyota Sprinter, Kaldina cars
Rice. 1. Removing and installing the timing belt for internal combustion engines of Toyota 4A-FE (AE101 and AT190), 5A-FE and 7A-FE cars Toyota Corolla, Crown, Toyota Karina E, Celica, Toyota Sprinter, Kaldina
1 – crankshaft pulley (drive pulley for the generator and coolant pump), 2 – bolt securing the crankshaft pulley (MZ = 118 Nm), 3 – drive belt for the generator and coolant pump, 4 – protective cover No. 1 of the timing belt, 5 – protective cover No. 2 of the timing belt, 6 – protective cover No. 3 of the timing belt, 7 – timing belt (timing belt), 8 – timing belt guide, 9 – engine electrical wiring, 10 – protective shield (protective pad) of engine electrical wiring, 11 – hoses of the forced crankcase ventilation system, 12 – high voltage wires, 13 – spark plug, 14 – cylinder head cover, 15 – gasket, 16 – camshaft timing pulley, 17 – camshaft timing pulley mounting bolt (MZ = 59 Nm) , 18 – coolant pump drive pulley, 19 – timing belt tension roller, 20 – timing belt tension roller mounting bolt (MZ = 37 Nm), 21 – crankshaft timing belt pulley, 22 – tension roller spring.
Rice. 2. Removing and installing the timing belt for Toyota 4A-FE (AE92, AE95, AT171 and AT 180) Toyota Corolla, Corona, Toyota Karina E cars
1 – crankshaft pulley, 2 – crankshaft pulley mounting bolt (MZ – 118 Nm), 3 – generator and coolant pump drive belt, 4 – timing belt protective cover No. 1, 5 – plug, 6 – belt protective cover No. 2 Timing belt, 7 – coolant pump pulley, 8 – engine wiring bracket (4A-FE), 9 – timing belt protective cover No. 3, 10 – timing belt tension roller, 11 – timing belt tension roller mounting bolt (MZ – 37 Nm) , 12 – timing belt guide, 13 – timing belt, 14 – crankshaft toothed pulley, 15 – tension roller spring, 16 – camshaft timing pulley, 17 – camshaft timing pulley mounting bolt МЗ = 47 Nm, МЗ = 59 Nm (4A-FE) – Disconnect the generator connector, generator wire, emergency oil pressure sensor connector, two electrical wiring clamps. – Unscrew the 2 fastening bolts and remove the protective cover of the electrical wiring. – Disconnect the 2 positive crankcase ventilation hoses from the cylinder head cover. – Unscrew the 4 cap nuts and remove the sealing washers, cover and cover gasket.
Toyota 4A-FE (models AE92, AE95, AT171 and AT180) Toyota Corolla, Corona, Toyota Carina E cars
Set the piston of the first cylinder to TDC at the end of the compression stroke. – Rotate the crankshaft pulley and align the groove on the pulley with the “O” mark on the timing belt protective cover No. 1. Make sure that the hole in the camshaft pulley is aligned with the mark on its bearing cap.
Otherwise, rotate the crankshaft one revolution (360°). – Rotate the crankshaft pulley and align the groove on the pulley with the “0” mark on the timing belt protective cover No. 1 (for models AE and AT) or with the index pin (for model AW).
– Remove the oil filler cap and make sure you can see the notch on the camshaft. Otherwise, rotate the crankshaft one revolution (360°). Remove the crankshaft pulley. – Using a suitable tool, remove the pulley fixing bolt. Remove the timing belt protective covers.
Remove the Toyota 4A-FE, 5A-FE and 7A-FE timing belt for Toyota Corolla, Corona, Toyota Karina E, Toyota Sprinter, Kaldina. – Loosen the tension roller bolt, move it all the way to the left and then temporarily fix it in this position with the same bolt. Remove the timing belt.
Remove the tension roller and tension spring by completely unscrewing the tension roller mounting bolt. If necessary, remove the crankshaft timing belt. In case of difficulty, use 2 screwdrivers. To prevent damage to the cylinder block elements, place a rag.
If necessary, remove the camshaft drive timing gear (4A-FE, 5A-FE and 7A-FE). While holding the camshaft from turning, installing an adjustable wrench on its hexagonal part, unscrew the fixing bolt and remove the pulley. Check the tension pulley spring.
Measure the length of the spring in a free state, as well as the force required for a given deformation (stretch) of the spring (“installation” force). If the spring length and/or “setting” force is not within specifications, replace the spring.
Installing the timing belt for Toyota 4A-FE, 5A-FE and 7A-FE engines of Toyota Corolla, Corona, Toyota Karina E, Toyota Sprinter, Kaldina cars
Keep the camshaft and crankshaft sprockets away from water or oil and keep them clean. Install the camshaft drive timing pulley (if removed). – Align the locating pin on the camshaft nose with the groove of the timing pulley and slide the pulley onto the camshaft.
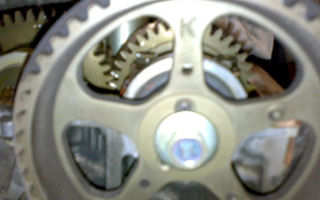
For 4A-FE, 5A-FE and 7A-FE, 2 types of pulleys with one or two grooves are used; in the latter case, the alignment pin on the camshaft toe should be aligned with the groove that has the corresponding mark (“A” – 4A-FE, “K”) ” – 5A-FE, “E” – 7A-FE). – Temporarily install the pulley bolt.
– Hold the camshaft by its hexagonal part with an adjustable wrench and tighten the camshaft pulley bolt. – Position the camshaft dowel pins. – Align the camshaft locating pins with the grooves of the timing pulleys and install the pulleys onto the camshafts. In this case, the installation marks should be located at the top.
– Holding each camshaft by its hexagonal part with an adjustable wrench, tighten the camshaft pulley bolt (MZ = 59 Nm). Temporarily install the tension roller and tension spring. – Secure the roller with the bolt without tightening it. – Install the tension spring. – Pull the roller to the left as far as it will go and tighten the bolt.
Set the piston of cylinder 1 to the TDC position at the end of the compression stroke. – Having installed the adjustable wrench on the hexagonal section of the camshaft, turn it and align the mark on the camshaft bearing cap with the center of the small hole on the camshaft pulley or with the center of the hole that has the appropriate mark (“A” - 4A-FE, “K” - 5A -FE, “E” – 7A-FE).
– Using the crankshaft sprocket bolt, rotate the crankshaft and align the timing marks on the sprocket and the oil pump housing. Install the timing belt, observing the marks and ensuring the necessary tension in the area between the crankshaft and camshaft timing pulleys (4A-FE, 5A-FE and 7A-FE).
– Slowly loosen the tension roller bolt. – Slowly turn the crankshaft clockwise 2 turns from TDC to TDC, after installing the crankshaft timing pulley bolt. Tighten the tension roller mounting bolt (MZ = 37 Nm). – Temporarily loosen the crankshaft timing pulley bolt. Check the timing belt tension.
Deflection of the timing belt Toyota 4A-FE, 5A-FE and 7A-FE cars Toyota Corolla, Crown, Toyota Karina E, Toyota Sprinter, Kaldina. under a force of 20 N is: 5 – 6mm If the deflection does not meet the specifications, rearrange the tension roller. Install the timing belt guide with the flange facing outwards. Install protective covers No. 1, No. 2 and No. 3 of the timing belt (MZ = 7.4 Nm).
Install the crankshaft pulley (to drive the generator and coolant pump). – Align the key on the crankshaft with the groove in the pulley and slide the pulley onto the shaft. – Using a suitable tool, install and tighten the crankshaft pulley mounting bolt.
Install the cylinder head cover of the Toyota 4A-FE, 5A-FE and 7A-FE engines of Toyota Corolla, Corona, Toyota Karina E, Toyota Sprinter, Kaldina. (camera cover). – Remove old sealant from surfaces. – Apply fresh sealant to the areas. – Install the gasket on the timing cover. – Replace the cover and secure it through the seals with 4 cap nuts.
Toyota 4A-FE (AE101, AT190), 5A-FE and 7A-FE engines
Connect 2 positive crankcase ventilation system hoses to the cylinder head cover. Secure the electrical wiring protection with 2 bolts. Connect: generator connector, generator wire, emergency oil pressure sensor connector, two electrical wiring clamps.
Install the spark plugs and connect the high voltage wires. Install the alternator and coolant pump drive belts. – Temporarily secure the coolant pump pulley with 4 bolts. – Put on the drive belt and secure the adjusting bolt and the generator mounting bolt.
The adjuster bolt retaining bolt should only be tightened after the alternator drive belt and coolant pump tension have been adjusted. – Tighten the 4 pump pulley bolts. Adjust the tension of the generator drive belt and coolant pump.
_____________________________________________________________________________
_____________________________________________________________________________
- Automatic transmission ZF
- Mitsubishi engines
- Toyota engines
- ZMZ-406
General automatic transmission structure
_____________________________________________________________________________
_____________________________________________________________________________
CVT variator Audi
Automatic transmission Toyota
_____________________________________________________________________________
_____________________________________________________________________________
Automatic transmission Mazda/Mitsubishi
Automatic transmission ZF
Mitsubishi engines
Toyota engines
- Cylinder block and head 3S-FE/3S-GE
- Timing belt maintenance 3S-FE, 3S-GE
- Crankshaft of engines 3S-FE, 3S-GE
- Technical characteristics of the engine 3S-FE, 3S-GE
- Camshafts 3S-FE and 3S-GE
- Engine cooling system 3S-FE and 3S-GE
- Fuel systems 3S-FE, 3S-GE
- Engine parameters 4A-FE, 5A-FE, 7A-FE and 4A-GE
- Engine cylinder head and block 4A-GE, 4A-FE, 5A-FE, 7A-FE
- Throttle valve 4A-FE, 5A-FE, 4A-GE, 7A-FE
- Cooling fan 4A-FE, 5A-FE, 7A-FE, 4A-GE
- Injectors for engines 4A-FE, 5A-FE, 4A-GE, 7A-FE
- Replacing the water pump 4A-GE, 4A-FE, 5A-FE, 7A-FE
- Piston group and crankshaft of engines 4A-FE, 5A-FE, 4A-GE, 7A-FE
- Diagnostics of engines 4A-FE, 5A-FE, 7A-FE and 4A-GE
- Replacing cylinder block components 4A-GE, 4A-FE, 5A-FE, 7A-FE
- Cooling system 4A-FE, 5A-FE, 4A-GE, 7A-FE
- Engine lubrication system 4A-FE, 5A-FE, 4A-GE, 7A-FE
- Fuel system of engines 4A-FE, 4A-GE, 5A-FE and 7A-FE
- Ignition system 4A-FE, 5A-FE, 4A-GE, 7A-FE
- Engine thermostat and radiator 4A-FE, 5A-FE, 7A-FE, 4A-GE
- Gasoline pump 4A-GE, 4A-FE, 5A-FE, 7A-FE
- Timing belt for engines 4A-FE, 5A-FE, 7A-FE
- Removing the cylinder head of engines 4A-FE, 5A-FE, 7A-FE
- Valve adjustments 4A-FE, 5A-FE, 7A-FE
- Installation of the cylinder head of the engine 4A-FE, 5A-FE, 7A-FE
- Replacing the timing belt 4A-GE
- Removing the cylinder head of 4A-GE engines
- Valve settings 4A-GE
- Installation of the cylinder head of the 4A-GE engine
- Engine parts 1AZ-FE / 2AZ-FE
- Control unit and sensors 1AZ-FE and 2AZ-FE
- Components of engine operating systems 1AZ-FE, 2AZ-FE
- Engine management system 1AZ-FE and 2AZ-FE
ZMZ engines
Mitsubishi engines
Timing belt and engine block heads 4G18/4G15
Cylinder block and crankshaft of internal combustion engine 4G15/4G18
Characteristics of the 4G15/4G18 engine
Engine power and cooling systems 4G18/4G15
Toyota engines
Cylinder block and head 3S-FE/3S-GE
Timing belt maintenance 3S-FE, 3S-GE
Crankshaft of engines 3S-FE, 3S-GE
Technical characteristics of the engine 3S-FE, 3S-GE
Camshafts 3S-FE and 3S-GE
Engine cooling system 3S-FE and 3S-GE
Fuel systems 3S-FE, 3S-GE
Engine parameters 4A-FE, 5A-FE, 7A-FE and 4A-GE
Engine cylinder head and block 4A-GE, 4A-FE, 5A-FE, 7A-FE
Throttle valve 4A-FE, 5A-FE, 4A-GE, 7A-FE
Cooling fan 4A-FE, 5A-FE, 7A-FE, 4A-GE
Injectors for engines 4A-FE, 5A-FE, 4A-GE, 7A-FE
Replacing the water pump 4A-GE, 4A-FE, 5A-FE, 7A-FE
Piston group and crankshaft of engines 4A-FE, 5A-FE, 4A-GE, 7A-FE
Diagnostics of engines 4A-FE, 5A-FE, 7A-FE and 4A-GE
Replacing cylinder block components 4A-GE, 4A-FE, 5A-FE, 7A-FE
Cooling system 4A-FE, 5A-FE, 4A-GE, 7A-FE
Engine lubrication system 4A-FE, 5A-FE, 4A-GE, 7A-FE
Fuel system of engines 4A-FE, 4A-GE, 5A-FE and 7A-FE
Ignition system 4A-FE, 5A-FE, 4A-GE, 7A-FE
Engine thermostat and radiator 4A-FE, 5A-FE, 7A-FE, 4A-GE
Gasoline pump 4A-GE, 4A-FE, 5A-FE, 7A-FE
Timing belt for engines 4A-FE, 5A-FE, 7A-FE
Removing the cylinder head of engines 4A-FE, 5A-FE, 7A-FE
Valve adjustments 4A-FE, 5A-FE, 7A-FE
Installation of the cylinder head of the engine 4A-FE, 5A-FE, 7A-FE
Replacing the timing belt 4A-GE
Removing the cylinder head of 4A-GE engines
Valve settings 4A-GE
Installation of the cylinder head of the 4A-GE engine
Engine parts 1AZ-FE / 2AZ-FE
Control unit and sensors 1AZ-FE and 2AZ-FE
Components of engine operating systems 1AZ-FE, 2AZ-FE
Engine management system 1AZ-FE and 2AZ-FE
ZMZ engines
Characteristics of the ZMZ-402 engine
Timing belt of the GAZ-402 engine
Connecting rod-piston group and crankshaft ZMZ-402
Design of the ZMZ-402 lubrication system
Details of cooling and power systems ZMZ-402
Cylinder block and pistons of the ZMZ-405 engine
Technical characteristics of the ZMZ-405 engine
Crankshaft and timing drive ZMZ-405
Design of the ZMZ-405 cooling system
Engine lubrication system ZMZ-405
Adjustments of parts of the ZMZ-405 fuel system
Cylinder block and pistons of the ZMZ-406 engine
Electronic engine control system ZMZ-406
Main components of the ZMZ-406 engine
Electrical control system ZMZ-406
Timing system of the ZMZ-406 engine
Crankshaft and flywheel of the ZMZ-406 engine
Assembly parts of the ZMZ-406 cooling system
Main mechanisms of the ZMZ-406 lubrication system
Components of the ZMZ-406 fuel system
Design of the K-151 carburetor of the ZMZ-402 engine
_______________________
Car alarms
Repair and service
- Ford Focus 2
- Ford Focus
- Ford Fusion
- Ford Mondeo
- Ford Transit
- Lada Granta
- Lada Kalina
- VAZ-2110
Source: http://avtosteh.ru/dvigatel_toyota_4a_fe_remen_grm.html
Replacing the Toyota Corolla timing belt, how to change the chain in the engine?
Repairing and replacing a Toyota Corolla timing belt or replacing a chain in a Toyota Corolla engine is a rather labor-intensive process and requires the skills of a real car mechanic. The only consolation is that the timing chain on the Toyota Corolla requires virtually no maintenance.
But if the mileage on the car is quite high, and the noise under the hood increases, then this operation cannot be avoided.
But if you still decide to carry out the repair yourself, then carefully read the following instructions. Without this, it will not be possible to replace the chain, since the operation is quite complex, painstaking and very long.
The ideal option is to carry out such a replacement on a removed motor.
https://www.youtube.com/watch?v=aiz6HlP2fhs
The timing chain components are shown in the schematic diagram just below.
To get to the Toyota Corolla timing belt, you will need to perform the following operations:
1. Remove the right engine mount cushion 2. Remove the ignition coils 3. Remove the cylinder head cover 4. Remove the poly V-belt tensioner assembly
5. Remove the right engine mount bracket
An important point is to install the piston of the first cylinder at TDC of the compression stroke, for which you need to perform the following operations -
Rotate the crankshaft pulley and align the mark on it with the synchronizing mark “0” on the timing chain drive cover. Make sure that the marks (dots) on the camshaft drive gears are located opposite each other, as shown in the following diagram.
Otherwise, rotate the crankshaft 1 revolution (360°) and align the marks as indicated above.
Next, we remove the crankshaft pulley, for which official dealers use a special tool SST 09960-10010 (09962-01000, 09963-01000).
Another important point is removing the chain tensioner, for which you need to unscrew two nuts, see the photo below.
NOTE
Do not rotate the crankshaft if the chain is not tensioned by the tensioner.
Removing the Toyota Corolla timing chain drive cover. Remove 10 bolts and 2 nuts. Using a TORX E8 socket wrench, remove the stud. Separate the timing cover by inserting a screwdriver between the cover, the cylinder head and the cylinder block, looking at the location of the bolts on the cover.
The timing chain drive cover seal must be changed when replacing the chain.
Next, remove the chain tensioner shoe by unscrewing just one bolt.
To remove the Toyota Corolla timing chain, use 2 screwdrivers to remove the chain along with the drive gear, as shown in the figure below.
Be sure to place a rag under the screwdriver to avoid damaging the engine. If it is necessary to turn the camshafts with the chain removed from the gears, the crankshaft should be turned no more than 1/4 turn to avoid contact of the valves with the pistons.
Installing a new timing chain.
Set the piston of the first cylinder to TDC on the compression stroke. To do this, align the marks on the timing gears. Turn the camshafts by the hexagonal part so that the 2 marks (dots) on the drive gears are located opposite each other.
Turn the crankshaft by the crankshaft pulley bolt until the timing gear key aligns with the dot mark on the oil pump, as in the following diagram.
Install the chain tensioner shoe and secure it with the bolt. Tightening torque: 18.5 Nm. Install the crankshaft angle sensor sprocket with the “F” mark toward the front of the vehicle.
Installing the Toyota Corolla timing chain drive cover is a very important operation that requires care and precision.
Remove any remaining old sealant from the mating surface of the cylinder block and drive cover.
Apply the sealant in a continuous bead (diameter 3.5–4.5 mm) as shown in the following illustration. Scheme for laying sealant on the timing cover side.
Secure the timing chain cover with 10 bolts and 2 nuts.
Tightening torque: 13 Nm for bolt A and nut A. 18.5 Nm for bolt B. Using a TORX E8 socket wrench, tighten the stud. Tightening torque: 9.5 Nm.
Installing the chain tensioner assembly.
Make sure there is no dirt on the O-ring, then install the hook as shown in the figure below.
Apply a thin layer of engine oil to the O-ring. Secure the chain tensioner with 2 nuts. Tightening torque: 9.0 Nm. If the hook comes loose when installing the chain tensioner and releases the plunger, re-lock the plunger with the hook.
Next, install the crankshaft pulley and tighten it to 138 Nm. The position of the crankshaft when removing the plunger should be as shown below.
Turn the crankshaft counterclockwise, then remove the hook from the locking pin and release the plunger.
Checking the operation of the plunger will ensure that the chain tensioner is working properly. Turn the crankshaft clockwise and make sure that the plunger presses the chain tensioner shoe. If the plunger does not extend, use a screwdriver to push the shoe toward the tensioner until the hook disengages from the locking pin so that the plunger can extend.
Apply a thin layer of engine oil to the crankshaft position sensor O-ring.
Secure the crankshaft position sensor with 2 bolts. The tightening torque of these bolts is 9.0 Nm. Install the coolant pump assembly. Install the right engine mount bracket with a tightening torque of 47 Nm. Install the serpentine belt tensioner assembly.
Secure the cylinder head cover and 3 mounting brackets with 9 bolts, 2 sealing washers and 2 nuts. Bolt tightening torque: 11 Nm for bolt A and nut A, 9.0 Nm for bolt B.
The long-term and reliable operation of the Corolla engine depends on the correct assembly of the timing belt, so install and assemble the chain carefully. Don’t forget to apply sealant to all the places where you removed it during disassembly, in order to avoid oil leaks in the future.
Source: http://ruauto99.ru/2017/05/zamena-grm-toyota-corolla-kak-pomenyat-cep-v-dvigatele/
How does a Toyota timing belt change?
The timing belt is one of the most important engine components. The service life of the power unit depends on the timeliness of its replacement. If you have special skills and tools, and, most importantly, if you strictly follow the sequence, replacing the Toyota Corolla timing belt is a simple operation. You can do it yourself in a garage.
The timing belt in your engine is the most important maintenance item for your vehicle. What happens if this component breaks? How often does the belt need to be changed? Is it difficult to replace the timing belt yourself? You will get answers to these and other questions in our material today.
Japanese cars are very reliable and high quality, however, they do not last forever. This primarily applies to such a car brand as Toyota.
Like any other car, the service life of many components depends on the conditions and time of operation of the car. First of all, it affects filters, all kinds of rubber bands, chassis, and also the timing belt.
In this article we will talk about how to correctly replace and adjust the timing belt according to the marks on a Toyota Corolla.
Many car owners ignore the need to replace the timing belt due to the high cost of this procedure. Unfortunately, this oversight can lead to more serious damage to the engine and its components, which will cost much more to repair than just replacing the belt. And if the belt, for example, breaks, the engine will simply stall and stop functioning.
The timing belt performs a very important function in the design of a car, since it is an intermediary between the gas distribution mechanism and the pulley (its drive). The quality of the engine itself and its power characteristics depend on the operation of the timing belt. The consequences of a belt failure are immediately noticeable to the driver, as driving the car becomes almost impossible.
More details: grandrepairauto.ru
I got around to the timing belt and bought it in the fall. Either there is no tool, or there is no place, but then I discovered My Own Mechanic and went to change it. You can find the numbers of the belt and rollers in my last blog post. Climbed from below, unscrewed the power steering belt tensioner (red mark) and loosened the lower bolt of the power steering pump (yellow mark)
To replace the timing belt you will need the following tools: - Socket heads for 10, 12, 14, 19 and an extension for them - A driver and a ratchet - A set of open-end wrenches - Clamps or a strong thin thread. — Powerful clamps — Hammer 300-400g.
— Claw puller with a jaw span of at least 100 mm. for oil seals - Clamps for tightening the timing belt - Marker for marks - It is advisable to prepare a device for fixing the pulley. You can make do with improvised means, but this is quite inconvenient and you need a large selection of improvised means.
— It is advisable to use a torque wrench.
https://www.youtube.com/watch?v=K7XcLe-3sAc
Making room for access to the belt First of all, you need to disconnect the resonator, the cooling system hose and the air cleaner. Afterwards the spark plugs are disconnected, but you don’t have to do this.
Don’t forget to disconnect the battery, and you also need to remove the radiator fan and all V-belts, and the belt cover also needs to be removed.
To remove the belt, you need to remove it in the place where the triangles are, the force should be directed according to the arrows.
repair, information for maintenance, automotive news, reviews, diagnostics, forum Replacing the timing belt (timing belt), oil seals, tension pulley of the engine of a Toyota model 4a-fe.
Toyota equips cars with a particularly common and reliable type of engine, the 4a-fe model. It features a sixteen valve timing system, eight intake and eight exhaust valves, and two camshafts. Cylinder displacement 1.
6 liters, developing a power of 115 horsepower, delivering maximum comfortable, maneuverable driving.
The timing belt is responsible for the quality operation of the engine, and it is with its help that the gas distribution mechanism of the internal combustion engine is driven.
The mechanism, in turn, promotes the correct supply of the fuel mixture to the cylinders, then removes combustion products. When the engine is running, the timing belt is in constant motion, performing a transfer function.
Replacing the timing belt on a Toyota Corolla is an important routine procedure.
Read more: mymirtoyota.ruMore on the topic: Toyota latest news, Lastochka latest news
Source: http://www.chsvu.ru/kak-proisxodit-smena-remnya-grm-tojota-2/
Toyota Corolla timing belt replacement
The timing belt is a very important part of the Toyota Corolla and it plays an intermediary role between the gas distribution mechanism and the pulley.
While it is intact, there are no obvious signs of work in the Toyota Corolla, but once it breaks, further operation will become almost impossible.
This will entail not only additional capital investments in repairs, but also loss of time, as well as physical stress due to the absence of your own vehicle.
On newer Toyota Corolla cars, a chain is used instead of a belt, so the order of work will be different. In this article, the replacement is made on the 4A-FE engine, but the same will be done on the 4E-FE, 2E and 7A-F.
Technically, replacing a belt drive in a Toyota Corolla is not difficult. If you are not confident in your abilities, it would be safer to contact a Toyota Corolla service center or a regular service station, where the replacement will be carried out by professionals.
What does the timing belt cover of 1.6 and 1.8 liter engines consist of:
- Toothed strap.
- Guide flange.
- Toothed belt cover No. 1.
- Drive pulley.
- Stub.
- Toothed belt cover No. 2.
- Toothed belt cover No. 3.
Often, premature wear of the strap is due to the fact that too much tension was created and unnecessary physical stress was created on the engine, as well as its bearings.
However, if the tension is weak, the gas distribution mechanism may be destroyed.
To avoid such problems, it would be more advisable to regularly check and, if necessary, replace the belt drive, and also professionally and efficiently adjust its tension.
Procedure for removing the Toyota Corolla timing belt
- First you need to disconnect the ground from the battery terminal, as well as the plus.
- Block the rear pair of wheels and set the car to the handbrake.
- We unscrew the nuts securing the front right wheel, lift the car and place it on stands.
- Remove the front right wheel and the side plastic protection (to get to the crankshaft pulley).
- Remove the washer fluid reservoir.
- We turn out the spark plugs.
- Remove the engine valve cover.
- Remove the drive straps.
- Remove the intermediate roller of the air conditioning compressor drive belt.
- If the Toyota Corolla is equipped with cruise control, unscrew the actuator.
- We install a wooden stand under the car engine.
- We set the piston of the first cylinder to TDC (top dead center) of the compression stroke; to do this, align the mark on the crankshaft pulley with the “0” mark on the lower timing cover.
- We pry up and take out the cover of the inspection window. We fix the flywheel and unscrew the bolt on the crankshaft pulley (it should come off without much effort).
- Remove the timing belt timing belt covers, and then remove the timing belt guide flange.
- Loosen the tensioner roller, press the roller in and tighten the bolt again. We release the driven gear from the timing belt.
- We unscrew a couple of nuts on the engine mount support at the bottom and a bolt at the top.
- Without completely removing the support, lower the engine and pull out the timing belt.
- We free the drive gear from the timing belt and it is removed from the engine compartment.
Precautions when replacing the timing belt:
- Under no circumstances should you turn the strap inside out;
- The strap should not come into contact with oil, gasoline or coolant;
- It is prohibited to hold the camshaft or crankshaft of a Toyota Corolla from turning;
- It is recommended to replace the timing belt every 100 thousand km.
Installing a timing belt on a Toyota Corolla
- We thoroughly clean the front part of the engine in the area of the toothed belt.
- We check whether the crankshaft and camshaft marks are aligned.
- We put the belt drive on the driven and driving gears.
- We put the guide flange on the crankshaft.
- Install the bottom cover and crankshaft pulley.
- Install the remaining elements in the reverse order.
- We check the functionality with the ignition on.
You can also watch a video on replacement:
Replacing the timing belt on a Toyota Corolla Link to main publication
Source: http://CorollaCar.ru/remont/dvigatel/zamena-remnya-grm-tojota-korolla.html
Replacing the timing belt on 4e-fe - logbook of the 1994 Toyota Corolla Lastochka on DRIVE2
I got around to the timing belt and bought it in the fall.
Either there is no tool, or there is no place, but then I discovered My Own Mechanic and went to change it. You can find the numbers for the belt and rollers in my previous blog entry.
Here is my mini photo report.
I put chocks under the rear wheels , jacked up the car, and removed the left wheel
Opened the hood, loosened the power steering pump bolt
Climbed from below, unscrewed the power steering belt tensioner (red mark) and loosened the lower bolt of the power steering pump (yellow mark)
Next, I loosened the generator tension bolt.
Unscrew the four bolts of the timing belt cover
I took out the power steering and alternator belts. Pulled out the top of the protective cover
We move under the wheel arch and unscrew one of the pulleys. We hold the central bolt (at 19), and unscrew the small ones (I think at 12)
In theory, the pulley should be removed without effort, but I had to sweat to remove it. Just in case for beginners: crankshaft - from below, camshaft - from above =)
Next, use a crank to turn the central bolt of the pulley clockwise until the mark on the camshaft aligns. And the slot on the pulley should meet the zero on the plastic protective timing cover . My timing belt was at -10, when I removed the timing belt, I turned the crankshaft by about one tooth.
Now you need to clamp the pulley so that it does not turn and unscrew the central nut. It got really stuck on me, it didn’t want to wrench, after a lot of watering with WD40 and a pneumatic gun, it came unscrewed.
Next, I removed the remaining pulley with a puller, although in theory it should also come out without effort.
Unscrew the 3 remaining bolts of the protective timing cover and pull it out. I miraculously didn’t have a photo, but you can see them, I think you’ll figure it out. After you remove the cover, there will be something like a perforated washer . She just pulls it out by hand.
We removed the cover and see this picture. It is necessary to loosen the tension roller bolt and remove the spring.
Next, unscrew the parasitic roller bolt and remove the timing belt.
Next we install a new parasitic roller
Then put the new timing belt on from below, pull it into tension through the parasitic roller and put it on the camshaft. Make sure it doesn't sag or jump off the tooth.
Next, install the tension roller and put the spring in place
Tighten the idler and tension pulley bolts.
Next we assemble in reverse order. Reinstall the perforated washer , the toothed belt protective cover, then the pulley on the crankshaft and tighten the bolt.
Check the labels again
Just in case: the marks on the crankshaft (zero on the toothed belt protective cover) and the camshaft (point 4E with the top point) must align.
There is also an intermediate shaft, to the right of the crankshaft. The intermediate shaft does not have any clear position that needs to be “set”. Its rotation only causes the gears in the oil pump to rotate.
Now use the crank to turn the crankshaft pulley a couple of turns clockwise, thereby checking that you have assembled it correctly.
If everything is OK, then we assemble the rest: the second pulley, the upper part of the toothed belt protective cover.
We tighten the power steering belt with a bolt, and we need to rest the generator against the crowbar so that the poly V-belt is tensioned and tighten the nut.
Well, now you can start the engine and enjoy life.
Renting a box with a tool for 2.5 hours cost me 500 rubles, instead of 3-4 thousand for a replacement at the service. I'm happy)
Price: 500 ₽ Mileage: 353380 km
Source: https://www.drive2.ru/l/8989036/
Toyota Corolla timing belt replacement
Toyota Corolla timing belt replacement
The timing belt performs a very important function in the design of a car, since it is an intermediary between the gas distribution mechanism and the pulley (its drive).
The quality of the engine itself and its power characteristics depend on the operation of the timing belt.
The consequences of a belt failure are immediately noticeable to the driver, as driving the car becomes almost impossible.
If you drive a car without eliminating this problem, you can break down many other parts located in the gas distribution mechanism, which will entail large material costs. But in addition to the integrity of the timing belt, setting the belt tension plays an important role in its performance.
The belt should not be too tight, otherwise this will lead to its failure, as well as to additional mechanical loads on the engine and bearings.
But also, the belt should not be loosely tensioned, as this will lead to improper operation of the gas distribution mechanism, which will lead to its destruction.
To solve a problem with the timing belt you need to:
- Replacing the timing belt with a new model of appropriate quality.
- Adjustment of belt tension according to all rules.
- Maintenance of the timing belt during machine operation.
The process of replacing the timing belt in a Toyota Corolla is not a complicated procedure, which is why it is easier to do it yourself than to take your car to a car service center, where you will spend a lot of money and time.
Precautionary measures
What to watch out for when replacing a timing belt:
- Don't forget to remove the battery terminal.
- Do not turn the crankshaft and camshaft on the timing belt, as this can lead to valve failure.
- Also, do not forget to unscrew the spark plugs, otherwise you may get injured when turning the crankshaft with a wrench.
- If the tension pulley bolt is loose, the engine should never be started, as the timing belt and cover may be damaged.
- It is not recommended to use the starter when unscrewing the pulley bolt.
- The belt must not be stretched, bent or twisted.
- Also, do not stretch high-voltage wires.
- The plastic cover is very easy to damage, so when you fix the pulley, do not lock it by the surface that is located under it.
- Do not use a hammer to hit the edges of the pulley as they are very fragile.
Replacing the timing belt
To replace the timing belt on a Corolla you need:
- First you need to remove the battery terminal, explosive wires and unscrew the spark plugs.
- Remove the cover that covers the window in the engine shield and loosen the generator belt, then remove it.
- Now you need to fix the pulley and loosen the fastening bolt.
- The next step is to unscrew the nuts securing the cover, lifting it up.
- Now unscrew the other valve cover mounting nuts.
- Unscrew the fastening bolts in the upper timing belt cover.
- Now carefully inspect the belt, if it is tight, without cracks or damage, this may mean that it is a new model or is still in good working order.
- The hole on the camshaft pulley should be 5 mm and marked 2E; if this is not the case, turn the crankshaft and check the marks.
- Now you need to unscrew the pulley mounting bolt, after which you need to spray this place.
- Slightly rock the pulley in different directions and try to remove it. If it doesn't work, use a wooden block for this.
- After this, you can unscrew the bolts securing the timing cover and remove it, then remove the guide washer.
- Now temporarily secure the pulley in place and turn the crankshaft clockwise, now remove the pulley.
- After you loosen the tension roller, you need to push it all the way to the left and then tighten it.
- Finally you can remove the timing belt. Loosen the bolt, remove the spring, and then remove the tension roller itself.
- Next, you need to clean the space under the timing cover from dirt, dust, and so on.
- The next step is to install a new idler and tension roller and a second spring.
- To tighten the tension roller bolt, it must be pressed down until it stops.
- Check that everything is in place and has not moved, and now you can put on the new timing belt from bottom to top.
- Now install and secure the belt washer and its lower cover.
- Rotate the crankshaft in a clockwise direction until all marks line up.
- Check the belt tension; if the tension is correct, it can be twisted 90 degrees.
- Now you need to tighten the pulley bolt, install the upper timing cover and tighten the bolt.
- Next, you need to install and tension the alternator belt, and then install the spark plugs.
- The work has almost come to an end; we need to reinstall the valve cover and engine boot cover.
- Now we connect the battery terminal, making sure to tighten it with a bolt.
- Finally, start the engine and check for normal operation; there should be no extraneous sounds.
Read also
Source: http://grandrepairauto.ru/zamena-remnya-grm-toyota-corolla.html