DIY active antenna. Review. | Master Vintik. Everything with your own hands!
An active antenna is a regular antenna with a built-in amplifier. It can be used for both receiving and transmitting signals.
The active antenna can be made using the printed circuit wiring method. Active antennas, due to their higher gain compared to conventional antennas, are widely used in various radio devices.
Active receiving antennas are the most commonly used, and we will talk about them today.
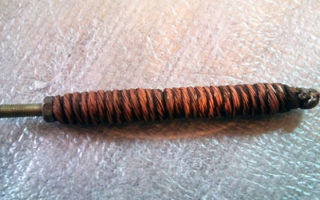
The circuit uses wire varnished in silk insulation (PELSHO) 10 cores, each with a diameter of 0.05 mm. By increasing the number of turns by 3 - 5, you can cover the range from 10 to 40 kHz. In this case, it is necessary to use a variable capacitor with a small initial capacitance.
The wire is wound on a mandrel 60 mm long. And it consists of four sections of 160 turns each. A 10 x 200 mm ferrite rod is used for the antenna.
Compensated ferrite antenna
In the circuit of a compensated ferrite antenna, the numbers indicated next to the winding indicate the number of turns. A ferrite rod measuring 10 x 200 mm is used in the same way as the previous antenna.
A wire with a diameter of 0.1 mm is used to wind all sections, with the exception of coil L2, which is wound with twenty-core Litz wire.
By successively changing the orientation of the ferrite antenna in space and adjusting the variable differential capacitor, as well as changing the distance between the windings L1 and L2,3,4, you can achieve very good detuning from the unwanted unwanted frequency that breaks through.
Active antenna 1.8 - 30 MHz
In the circuit of this antenna, the coils of the secondary bands are short-circuited with respect to the operating range in order to avoid any manifestation of the effect of absorbing the energy of the received signal.
On some bands, high-amplitude signals cause interference on adjacent channels.
In this case, you can influence the corresponding coil by connecting a resistor with a resistance of about 10 Ohms in parallel to it.
Active antenna 0.1 - 30 MHz
In the circuit of this antenna, two LC circuits are series oscillatory circuits, the tuning of which is concentrated in the frequency ranges of 800 kHz and 4.5 MHz. Due to the presence of distributed capacitances of the inductors, they also act as bandpass filters between 2.5 - 5 and 12 - 30 MHz, respectively.
Active antenna 0.05 - 50 MHz
The two-transistor circuit has a voltage gain of less than unity, but the power gain is sufficient to use a small antenna designed for the low input impedance of the receiver.
Carefully! When using a longer antenna, distortion may occur due to cross modulation.
Selective antenna amplifier
This device operates at frequencies up to 30 MHz. If it is necessary to use a cascade at the cable output, it is necessary to turn on a cascade with a common collector. Linearity of the characteristic and preselection greatly reduce the likelihood of parasitic and mutual modulations.
Active antenna with additional amplifier
The additional differential amplifier discussed above allows it to be matched to the cable if the latter is connected to the coil tap and the appropriate collector current is selected.
The amplifier is a circuit with a fixed gain, while the device shown in the figure below allows gain control by influencing the collector current of transistor T2.
Used Books:
- Funkamateur, Berlin, 1996
- L'Electronique parte Schema, Dunod, Paris, 1994
- 2-band EH antenna
- Parabolic 3G antenna in 5 minutes
- Frequencies of free satellite channels
Homemade dual-band HF antenna
Responding to requests from colleagues, I’m telling you about my version of a 2-band EH antenna for the 20 and 10 meter bands. Read more…
The simplest 3G/4G antenna with your own hands
In my country house there are connection problems due to low signal levels. In the article below, I will tell you how I solved the problem with connecting my 3G modem for free, in just 5 minutes of work. Read more…
Many people have receivers for watching satellite TV channels and listening to radio channels. Multifeeds are often used to view several satellites. Sometimes they are called “gorynychi” - several heads (converters) on one antenna. In the central part of Russia, multifeed for 75, 85 and 90 satellites is often used. Example photo on the left. Below, the table shows an updated list of free ku-band channels of the most popular satellites. Read more...
Source: http://www.MasterVintik.ru/aktivnaya-antenna-svoimi-rukami-obzor/
How to make a car antenna with your own hands? Read how
Quite a lot of people are interested in how to make a car antenna with their own hands. Of course, now you can buy such a device. But store-bought options are not always of high quality. They break down pretty quickly. Also, in many cases they have range restrictions.
When purchasing, you need to pay attention to this fact. Otherwise, you will end up with an expensive trinket that will simply be on the car. At the same time, there will be no effect from this. This is why so many homemade radio detection devices are installed on cars.
Moreover, this does not require special skills.
Types of antennas
How to make a car antenna with your own hands? To answer, you need to decide why you need it. The type of antenna will depend on this. Receiving devices are divided into the following types according to the method of signal reception:
- Passive . This is the simplest option. The receiving device catches radio waves and transmits them to a radio or walkie-talkie without amplifying the signal. Typically used to receive high-power local radio stations;
- Active . It has a built-in amplifier. Thanks to this, it is possible to listen to radio stations that may be quite far away. In practice, the use of such antennas is not always justified. If you only travel around the city, and once a week to the country, then there is no point in purchasing or making such an antenna.
In addition to the method of receiving and processing the signal, antennas differ in the installation method:
- Outdoor antennas are usually passive. They are located on the body, so it is possible to achieve maximum signal reception efficiency;
- Internal . Such devices are located in the cabin. Most of these antennas are active. Knowing where you will place the antenna, as well as the reception characteristics in the area where you usually drive, you can quite accurately determine the type of device.
Do it yourself
There are several options for assembling such a device. First, let's consider the simplest option - a passive antenna:
- To begin, take soft copper wire. It will need about 2-3 meters;
- We wind the wire around the anchor bolt. At the same time, make sure that the turns do not overlap, otherwise there will be interference;
- Solder a wire to one end of the resulting winding that will connect to the radio;
- We select a plastic case;
- We install the antenna on the roof. There are several ways to do this. The simplest is to use a powerful magnet, but incorrect positioning of the antenna relative to it can lead to interference. It will be more secure to secure it with bolts. To do this, you will have to drill holes in the roof. But there will be no interference, and the antenna will be installed as reliably as possible;
- All that remains is to stretch the wire. The easiest way to do this is on a stand.
It is somewhat more difficult to make an antenna with an amplifier. More precisely, the antenna itself is not difficult to make; in fact, the process is no different from that described above. As a last resort, you can take a regular passive antenna and add a homemade amplifier to it. Making an amplifier is much more difficult.
To do this, you will need skills in working with a soldering iron. First, find the circuit diagram of the amplifier. You can make a device with freely lying parts, or on a printed circuit board. The last option is more convenient. But, for this you will have to tinker with preparing the board.
But everything will be placed as compactly as possible.
To create an amplifier, you will need a transistor. It should have frequency filters of 115-120 MHz, as well as 60-65 MHz. Typically, a KTZ68A .
You will also need several resistors and capacitors. They should be selected based on the performance of the transistor. You will also need an inductor. All this is installed on the circuit board and soldered.
After which, it is connected to the antenna and checked.
Buying a ready-made antenna . In fact, such a device as an antenna is not expensive. Therefore, many car enthusiasts prefer to buy a ready-made version. This applies to passive antennas. More powerful active antennas are more expensive.
It makes sense to make them yourself, but this type of device is used quite rarely.
Conclusion
Now, it is difficult to imagine a car without a radio.
Many people also install walkie-talkies, this allows them to monitor the situation on the road and respond in a timely manner to possible danger. That’s why the question arises, how to make a car antenna with your own hands.
There are quite a lot of ways to solve this problem, from the simplest ones, which do not require special skills in radio engineering. Before assembling homemade amplifiers. To assemble the last option, you will need to tinker, but the result will be obvious.
Source: http://avto.leasteria.ru/?p=2300
DIY car TV antenna
x
Check Also
Obviously, the cleaner the air, the healthier it is. However, as A.L. Chizhevsky established, for normal life it is necessary to inhale not just clean, but negatively ionized air. With absence …
Installing a satellite dish with your own hands: 11 simple steps Installing a satellite dish is possible without the use of additional equipment, and anyone can connect and configure the receiver. Experts from the publication ThisDom suggest you can handle...
The modern living room interior offers a large amount of free space. There may be problems with its presence if the room itself is small and there are too many things in it. Experienced specialists...
To receive a local radio station, you can assemble a simple detector receiver. And when using a small radio component - a transistor, you can amplify the signal tens and hundreds of times. The transistor consumes very little energy...
The only difference between a coffee maker and a coffee machine is the price! The first ones are cheaper. It is easier to trace the pattern from one manufacturer. I like Bork’s classification, which created three types of devices: The list is based on the complexity of the device. The coffee station can...
Choosing a coffee maker for use at home Many of our contemporaries cannot imagine starting their day without a cup of coffee. The traditional method of preparing the drink in Turk, of course, has many adherents. But everything...
Few people know: the first Simple Satellite came off a carrier on October 4th, which differed little from an intercontinental ballistic missile. The new product was a derivative of a powerful weapon, with which N. Khrushchev wanted to show...
In Western countries, almost every family has an oral irrigator. In Russia, they learned about the possibility of caring for the oral cavity with the help of an irrigator not so long ago. However, this device conquers...
Responsibility for the most common names: - Moldova, or the US in this case, in this case, in the same way üíûé këàïàí. Proposition of the foreign version, and This is the case. Reminders of the world...
Let's talk about which steam cleaner is better to buy - it's a paradox, but the product does not always turn out to be what they try to make it out to be. Usually the counter is crowded, loaded with goods, it is difficult to decide for what reason to take the Ariette steam cleaner, ...
Despite the rapid development of satellite and cable television, the reception of terrestrial television broadcasts still remains relevant, for example, for places of seasonal residence. It is not at all necessary for this purpose to buy a finished product, homemade...
The refrigerator is currently an indispensable element of household appliances, and it is very difficult to find an apartment that does not have such a white cabinet. As soon as this unit breaks down, people understand...
Today, double-door refrigerators are becoming increasingly popular. They take up more space, so it is better to install them in large apartments or private houses. The refrigerator and freezer departments in such models are located next to each other. ...
A fairly powerful, directional antenna for WI-FI. Delta Ds 2400-21. COPY. Antenna gain 20.5 dB. Directional pattern: 15×24 (H/V). Range: 2100 - 2700 MHz. Making such an antenna with your own hands is quite...
The fan's humidity sensor is called a hygrostat. Some models are carefully built in in advance; these are recommended to be taken into the house. Regarding other hygrostats, the devices are produced as room or duct ones, depending on the location of the parameters measured. The first...
Purchasing an expensive high-resolution TV will not always provide picture quality. An important element of television broadcasting is a signal receiver capable of ensuring the quality of its transmission. To determine its type, you need to make a choice...
The article will try to comprehensively assess the problem. People were born who consider exploitation unsafe. Other subjects argue: living is harmful - most die. Probably the truth is in the middle, everyone has their own. Is a slow cooker harmful to your health? Throw it away...
Tap water often has an unpleasant taste and smell of chlorine. In addition, a high degree of hardness causes corrosion of household appliances. To get the most out of the benefits of a coffee machine, it is imperative that you use it regularly...
Source: http://sibloma.ru/bytovaya-texnika/avtomobilnaya-tv-antenna-svoimi-rukami
Learn how to install a car radio antenna with your own hands
Modern life is filled with flows of information. It comes to us using various devices. One of them is a car antenna - a quarter-wave vibrator that catches incoming signals. The frame of the car is earth.
All this makes it possible to pick up communications, transmit navigation information, broadcast news and music.
Antennas vary in size and installation method. The transmitted signal must be clear so as not to distract the driver with interference while driving.
General characteristics
A car antenna is a very simple design that you can assemble yourself. You can also easily purchase it at the car market or in specialized stores. To make it yourself or buy a quality product, first of all, you need to understand several points:
- function;
- wavelength and range;
- modulation, its type.
Antennas are divided into two types:
An active antenna has an amplifier that improves the quality of the received signal. But, if the car is located next to the tower, the result will be the same.
They can be installed inside the car or outside. The type of mount for car antennas will depend on this. There are several mounting methods when connecting a car antenna:
- suckers;
- clamps;
- cutting method;
- threaded connection;
- embedding method;
- magnets.
Installation using suction cups and magnets is the easiest. But cutting in and embedding is not an easy task. An experienced car enthusiast can handle it.
Antenna selection
Usually they try to install a compact, small antenna. But you need to take into account all the parameters that will affect the signal quality, and carefully study the technical data sheet.
Pay attention to the noise level, it should be less than the gain. The best option would be a combined device. It will already have a built-in GPS module and a television tuner.
You should pay attention to the range in which the signal will be transmitted.
An important factor when choosing is design . The antenna should fit the car as closely as possible and not stand out too much.
Find out at the point of sale where service centers for repairs and maintenance are located.
When the choice is made , it is necessary to compare the connectors on the antenna cable and the shell of our device . They must completely match each other. Now you can connect.
Installation in a car
You need to decide on the place where the car antenna will be mounted , because the type of mounting will depend on this. Connect the connectors, and if it is active, connect the power supply. Next, follow the manufacturer's installation instructions. As soon as everything works, immediately fix it in a previously prepared place.
The next, final stage is cord laying . The first step is to remove the car trim. Route the wires to the front pillar. Secure with adhesive tape to securely fix the wires, glue the entire length.
On the instrument panel, find a hole through which you need to pull the cord to the car radio, connect the cables of the device and the antenna, and be sure to insulate it. Now it's time to check the work.
If everything is in order, return the casing to its place.
Do it yourself!
If a car enthusiast is a jack of all trades , then he can easily assemble a homemade antenna from components and connect a car antenna. Everything you need can be purchased in markets and stores . It will be much cheaper than purchasing ready-made ones in salons.
You need to assemble the antenna so that:
- was located in the car interior and did not interfere with the view;
- there were no questions from traffic police officers;
- no inconvenience was created for passengers;
- ensured stable and high-quality signal reception .
When the car moves, it constantly vibrates. This negatively affects the reception of the broadcast signal . During the trip, signals are supplied from different directions, so this must be taken into account during assembly.
A conventional quarter-wave vibrator is not a very good choice, since it is large in size, complex in mounting and manufacturing, and will create inconvenience for the driver and passengers.
This is where the production of a frame structure will come to the rescue. It will be perfectly located on the rear window, under the seal. The design should be slightly narrowed at the top , with a capacitor located in the middle.
It will tune the antenna to different frequencies. There are two of them:
- 27 and 65 MHz
- 28.2 and 68 MHz
The upper resonance always occurs in the lower broadcast range.
There is nothing complicated in the scheme. So how do you make a car antenna?
- It is required to stretch the wire modification MGTF 0.5 . It must be positioned in the form of a trapezoid around the perimeter. The dimensions should be as follows:
- The top edge is sixty-five and a half centimeters long (plus 65.5);
- Sixty-six and a half centimeters (plus 66.5 cm) - bottom edge;
- The side edges are forty-five centimeters.
- Arrange the pluses in such a way that it is as convenient as possible to add wires for the matching capacitor. They will pick up the signal.
- Pull two wires towards the center, strictly vertically. Attach the trimmer capacitor exactly in the middle. The wires will be long (45 cm), so they need to be rolled in a zigzag shape and carefully hidden under the insulating pipe.
- In the place where the wire is cut in half, solder the cable. On the other hand, gaps must be excluded.
The hardest job is done! Now, using communication equipment, it is easy to connect the car antenna through the connector to the receiver. Take the cable of the optimal length, without strong sagging, but it should not be stretched too much.
Since this is a passive antenna, the signal will drop out periodically. It is recommended to connect an amplifier.
You already have experience working with a soldering iron, so you can also do it yourself. But this process is more complex and time-consuming. For this you will need:
- amplifier circuit;
- printed circuit board;
- transistor;
- inductor.
All parts must be carefully soldered. Then check everything by connecting it to the antenna. Can be powered via a fuse. If the process is very complex, then it is better to buy a ready-made amplifier.
For a more visual example of how to make a car antenna, you can watch the video.
Advantages of a homemade antenna
By assembling the antenna with your own hands, you will get a number of advantages over factory products. Although ours will not cover a large reception radius, it will be compact and almost invisible on the car. After all, very often, factory models are bulky, and this can interfere with those who like to relax in the forest.
By connecting an antenna of your own assembly, you save yourself from purchasing a matching device. Its installation leads to additional cash costs.
Suitable for installation and connection to any make and model of car. And if any breakdown occurs, the repair will be simple!
Most motorists know that a store-bought antenna will not always be better. You need to have a very good understanding of all the characteristics in order to buy a high-quality and durable item.
The considered option is, in principle, quite simple. A little effort and patience - and you're done! And your favorite radio wave will always be clearly audible inside the car!
Source: https://instrument.guru/avto/uchimsya-ustanavlivat-svoimi-rukami-antennu-dlya-avtomagnitoly.html
How to make an antenna for a radio in a car, how to create an antenna for an FM radio with your own hands
How to install a radio antenna in a car with your own hands
Antennas for cars are different. They are mainly used for receiving FM radio stations or for watching television programs on mini-devices equipped with a special tuner. In addition, antennas in the car are needed as a navigation channel. In military environments, vehicle antennas are essential for signal reception.
Today we will talk about how to make an antenna for a radio in a car in order to listen to FM radio stations, how not to make a mistake when purchasing a ready-made device, and you will also find out what types of car antennas exist.
Classification of car antennas
If you want to make a radio antenna with your own hands, then it will not be difficult for you, since such a device has a fairly simple design. The main thing when working is to choose the right wavelength (FM is most often chosen) and the type of modulation. However, we will return to this later, but now let’s find out what categories car antennas are divided into.
According to their purpose, they are adapted to receive:
- radio broadcasting in different bands, mainly FM;
- television broadcasting;
- information from a satellite in order to ensure the operation of navigation systems.
There are also communication antennas.
Installation of the device on a car can be carried out:
- using magnets;
- through suction cups;
- mortise method;
- threaded connection method;
- clamp;
- using the built-in method.
According to the method of placement, antennas can be outdoor or indoor, and according to the type of amplification - active or passive.
There are a number of other classifications. but they are too specific, so we will not dwell on them.
The size of the device depends on the range. For example, the 27 MHz communications antenna is large. The most powerful specimens can be about 2 meters long.
In order to work correctly, the antenna should be installed on the machine in a strictly vertical position, which is determined by the type of polarization. Of course, connected structures can be tilted with a lever or a thumb so as not to break in certain places, but they are mainly used by drivers of large vehicles.
A digital television antenna for a car looks like a flashing light on a police car, only it has a different shade.
A device of this design is quite simple; its main task is to receive hundreds of MHz.
Most often, the digital installation is placed on the roof of the car using a magnet, and the wire is pulled over the door without additional modifications. The signal has horizontal polarization.
What to look for when purchasing
Antennas for car radios are also small, but they are slightly larger than television antennas because the wavelength is longer.
For this purpose, short pins are suitable, reminiscent of devices for receiving walkie-talkie signals, but their length will be shorter than that of police flashing lights.
To avoid accidentally buying an antenna for a TV receiver instead of a special model for a radio, study its technical characteristics:
- the antenna for the radio is designated as FM or AM (frequencies 70-108 MHz);
- for television - DVB - T (frequency up to 900 MHz);
- for navigation - GPS (400 MHz);
- for radio communications - CB (27 MHz).
Also, don't forget to pay attention to the antenna connectors. Most often, they should match your device, but it won’t hurt to check this before purchasing.
It is believed that an external type car antenna provides better reception, but this only applies to work in urban environments.
However, devices for installation inside a car interior are easier to install, but at the same time they are cheaper, and accordingly, they will work worse than external ones.
Today, you can find all kinds of hybrid products on sale that can be used for all of the above needs - watching programs, listening to FM radio stations, and navigation.
There are also models with the function of switching reception from highway to city and vice versa. Such techniques differ from each other in sensitivity and interference suppression features.
So, on the highway, the reception range can increase to 80 km.
Tandem models are common. equipped with a pair of pins, one of which is designed for watching TV programs, and the second for listening to radio programs. Of course, to use such devices for their intended purpose, you will need special equipment.
How to make a radio antenna with your own hands
The main difficulty in assembling an antenna for listening to FM radio stations is the constant vibration of the car body.
Therefore, simple household antennas for terrestrial use will not work here and will have dead spots in terms of reception.
For an ordinary ground-based device, it is absolutely the same from which side the signal will be sent, but for one that is constantly in motion, a special approach to DIY assembly is required.
A properly hand-assembled car antenna should have the following characteristics:
- do not raise unnecessary questions from representatives of the traffic police due to unnecessary modifications to the body;
- must stand up in the cabin;
- provide reliable reception;
- have high efficiency.
A simple quarter-wave vibrator is not suitable in this case due to the following disadvantages:
- it is difficult to manufacture;
- relatively large;
- difficult to mount;
- may interfere while driving.
The best option for a passenger car is obtained from a frame structure, which should be laid directly under the rear window seal. It should be slightly narrowed upward; in its center there is a capacitor, which tunes the antenna to resonance on one channel or another. There are two receiving frequencies, it can be 27 and 65 MHz or 28.2 and 68, respectively.
The upper resonance should correspond to the lower radio broadcast range. Therefore, we perform the following actions:
- we lay wire MGTF 0.5 along the perimeter of the rear window in the form of a trapezoid;
- the pluses must stand in the place where the wires for the matching capacitor are added and must remove the signal using a cable;
- We draw two wires to the central part of the glass vertically towards each other and install a tuning capacitor there. The length of the wires should be 45 cm. Weave them in a zigzag and place them under the insulation;
- Solder the cable from the side where the wire is cut in half, and there should be no such breaks on the opposite side.
Now that the work is done, you can connect the antenna via the connector. used by communication equipment. The cable should not be too long. The antenna is passive, so the signal can be greatly attenuated in the path. If you install communication equipment near the rear window, it will be better.
Advantages of a DIY antenna
A homemade antenna has a number of advantages compared to a factory model. Of course, they will not have the long range and excellent reception that you would like. But you will be able to fit it to your car and not have problems with too much height, which often prevents you from driving normally in hard-to-reach places.
In addition, you will not need to wind the matching device, and this is an extremely difficult job. Because you need to accurately maintain the number and pitch of turns, and also select the wire of the required thickness. In addition, all this requires sealing, which will result in you purchasing a number of accessories in addition to the antenna itself.
A capacitor for a homemade design is necessary due to the shortened circuit. The coefficient is 0.3.
The electrical extension of the frame is carried out using central loops up to the desired size, while the capacitor dampens the reactance to match the cable, allowing everything to be adjusted to resonance.
Since the antenna is broadband, it can be installed in almost any case on the rear window of any car model without any major modifications. The adjustment should be made according to the minimum standing wave ratio.
Many car enthusiasts have long learned that sometimes purchasing and installing a factory antenna for a car is not only more expensive, but also more difficult to install than a home-made one.
And the quality of reception is sometimes worse than that of a “homemade” one. Therefore, if you want to delight yourself with the melodies of songs on your favorite FM stations while driving, try your hand at making the device yourself.
As you can see, this is not as difficult as it might seem.
Sidorkov Evgeniy Sergeevich
http://elektro.guru
Source: http://legkoe-delo.ru/remont-avtomobilya/avto/81485-kak-sdelat-antennu-dlya-radio-v-mashine-sposoby-sozdaniya-antenny-pod-fm-radiopriemnik-svoimi-rukami
DIY car antenna: varieties and creation
Car antennas today differ in purpose. In combat conditions they receive communications, in peaceful conditions they receive broadcasting channels and navigation information. The car antenna is a quarter-wave vibrator, supplemented with matching devices.
The signal line, the ground, will be the body of the car. Due to these two components, signal reception becomes possible. Due to the simplicity of the design, they make a car antenna with their own hands. First determine the purpose of the device, wave range, and modulation type.
Three main components laid down by the design.
Types of car antennas
We mentioned the types of car antennas, but here is a redundant classification:
- Radio reception.
- TV reception.
- Reception of satellite information from navigation systems.
- Communication car antennas.
- Method of installing antennas on a car:
- Magnetic.
- On a suction cup.
- Mortise.
- Threaded connection.
- On a clamp.
- Built-in.
Connection diagram for a car antenna under the rear fender
- External car antennas.
- Salon (internal).
Surely an experienced car enthusiast will be able to add a couple of signs, but we will limit ourselves to the specified classification. FM antennas fit inside the cabin.
Hobbyists make accessories with their own hands, using pieces of cable with a characteristic impedance of 50 Ohms. The braid is electrically connected to the car body (ground).
Be careful of catching lightning while driving through a field. The thunderstorm chooses the point closest to the sky.
The size of the car antenna depends on the range. Communications (walkie-talkies with a frequency of 27 MHz) are large. Powerful varieties reach a length of 2 meters (they are placed on trucks); according to science, they should be made 50 cm higher. To reconcile the differences between the actual size, a quarter of the wavelength is an “extension” coil at the base.
For use, the car antenna for communication is installed vertically. Determined by the type of polarization. The communication antenna can be tilted by means of a thumb or lever, so as not to break it when driving through a forest or overcoming the spans of a low bridge. Communication antennas are mostly used by drivers of large trucks.
It is allowed to equip jeeps and civilian cars, but at times the appearance will be unsightly.
Note. Factory antennas are tuned to the wavelength. The mustache is shortened, equipped with a protective cap at the end. The operation is carried out according to the instructions. The guide includes a chart of recommended sizes. The violation causes a decrease in reception sensitivity.
The digital car TV antenna looks like a police flasher and is made in a different color scheme. The device is devoid of unnecessary bells and whistles and accepts a frequency of hundreds of MHz.
The first multiplex in Moscow chose 559 MHz. The digital car antenna on a magnet is placed on the top (roof), the wire passes over the door without any modifications.
A horizontal polarization signal; the device’s task is to receive an arbitrary azimuth.
Broadcasting antennas are rarely boasted of being large, since the wavelength is higher and the dimensions are larger. Small height pins, like those decorating portable radios. Beware of accidentally buying a car radio antenna intended by the manufacturer to decorate a television receiver. For fear of making a mistake, read the technical specifications in the store:
- Radio is designated FM, AM (frequencies 70 - 108 MHz).
- Television - DVB - T (frequencies below 900 MHz).
- Navigation – GPS (about 400 MHz).
- Radio communication – SV (27 MHz).
Sometimes dealers forget to indicate the antenna capabilities. The range of 400 - 530 MHz is given, it is mentioned that “the option of receiving GPS signals is available.” One can only guess what the copy can do; the first Moscow multiplex passes by. Frequencies above 400 MHz are used by portable radios and departmental communications of the Ministry of Internal Affairs.
It remains to pay attention to the connector. It matches the vast majority of devices for which it is intended; it would be useful to check the compatibility issue.
They say that an external car antenna provides better reception; the question concerns mainly urban reception. While racing along the highway, the windows of a typical passenger car will not create serious obstacles to the passage of electromagnetic radiation.
Installation of interior car antennas is simpler. Accessories are lower than external ones, hence the worse quality.
The store will provide all sorts of hybrid models, including options a la All in One. You can switch reception from city to highway. It is distinguished by sensitivity and interference suppression features.
The suburban reception range increases to 80 km. They sell unique tandems. A pair of similar looking pins are laid out, one of which picks up TV broadcasts, the other picks up radio and communications.
Using the delights of the set requires the purchase of appropriate receiving equipment.
Making a car antenna with your own hands
The only difficulty is that the body of the car is constantly moving. Traditional terrestrial household antennas in this case will form reception dead zones. There will be long periods of time when maneuvering when there is no reception.
Applies to horizontal polarization, not vertical! In the latter case, the antenna does not care about the azimuth of the signal arrival. The mast stands vertically! This was discussed by ordinary frame biquad antennas and quarter-wave vertical vibrators.
Let's see what else is useful to nature.
Zeroing the braid using mass
How to make a car antenna with your own hands to:
- did not cause any complaints from the traffic police for excessive modification of the body;
- stood up in the cabin;
- ensured reliable reception of radio frequencies;
- had high efficiency (since you need to work on transmission).
A quarter-wave vibrator is not suitable for this case. Difficult to manufacture, equipped with relatively large dimensions (see above), difficult to attach, and interferes with driving. Here is an idea from drivers of VAZ 2106 cars (an experienced radio amateur will remake the concept, abstracting from the make of the car).
A frame structure is used, laid under the rear window seal of the car. Slightly narrowed at the top, slightly different in size than required by the 27 MHz frequency, there is a capacitor in the center, which is used to tune the car antenna to resonance on the desired channel. Please note that there are two receiving frequencies:
- 27; 65 MHz.
- 28.2; 68 MHz.
The upper resonance occurs in the lower range of radio broadcasting. The car antenna circuit is simple:
- It is necessary to line the perimeter of the rear window in a trapezoid with MGTF 0.5 wire:
- Top edge 56.5 + 56.5 cm.
- Bottom edge 66.5 + 66.5 cm.
- Sidewalls 22.5 + 22.5 and 45 cm.
The spiral section reduces the overall length of the antenna
- The pluses are where we will add the wires of the matching capacitor, we will remove the signal with the RK-50 cable.
- In the middle of the glass, two wires go vertically to the center, where a trimmer capacitor (5 - 25 pF) is attached exactly along the axis. Each one is 45 cm long. Therefore, you will have to twist it in a zigzag and place it under an insulating tube.
- We solder the cable from the side where the wire is cut in the middle. There should be no gap on the opposite side.
The car antenna is connected through the connector used by communication equipment. The cable length is short, or rather, you should take a shorter one. Since the antenna is passive, the signal will be greatly attenuated in the path to the receiver. If you really put connected equipment near the rear window, it’s worth doing.
Advantages of a homemade loop car antenna
See the advantage. It is unlikely that our DIY car antenna will have too long a range or show miracles of reception, but it is competitive with some factory models that are mounted on the roof and have a height greater than that of a passenger car.
Plus, in the forest, the city won't hurt. In addition, there is no need to wind the matching device. This is not easy; in addition to the exact number and pitch of turns, you will need to find the desired thickness of the wire.
The structure will have to be sealed; the event will require the purchase of a number of additional materials.
Anyone who once held a walkie-talkie with their hands will understand the meaning. The antenna is covered with a thick sealant; the devices will allow you to broadcast, at best, for a couple of kilometers. If the terrain is not rough. In our case, ease of installation, ease of design, and accessibility for the average user are achieved.
A capacitor is required: the circuit is shortened. According to the author of the idea, the coefficient is 0.3.
The middle cables are used to electrically extend the frame to the desired size; the capacitor dampens the reactance to match the RK-50 cable and will allow the system to be tuned to resonance. The author claims that the antenna is broadband.
In most cases, it is possible to install it on the rear window of any car without major changes to the design. The setting is carried out to the minimum standing wave ratio.
In some cases, buying an antenna for a car and installing it will be more expensive, more complicated and will provide poorer reception quality. There is nothing difficult in the above design, and every car enthusiast can try the accessory at his leisure. A two-meter mast is not suitable for a passenger car; it would be more appropriate for a tank! Which, as you know, are not afraid of dirt.
- DIY TV antenna
- DIY TV antenna
- DIY radio antenna
- DIY GSM antenna
Post a diagram or approximate drawing of this antenna. I have 9 radios and not a single antenna, I don’t even have anything to check.
Source: http://car-avz.ru/glavnaya/konstruktivnyj-remont/9742-avtomobilnaya-antenna-svoimi-rukami-raznovidnosti-i-sozdanie