How to properly bleed ABS brakes
Recently, most cars are equipped with an auxiliary anti-lock braking system ABS, the purpose of which is to regulate the braking distance.
At the moment of braking, it eliminates wheel locking and, as a result, significantly reduces the braking distance of the car.
Thanks to the anti-lock braking system, simultaneous braking of all wheels is possible, which significantly increases the vehicle's stability on the road and is most important in the autumn-winter period.
In order to bleed the brakes of a car, an experienced driver will need no more than two hours, but this is only possible on cars that have a conventional standard braking system installed. But such a system has not satisfied the needs of motorists for a long time, and automakers are increasingly installing ABS.
What is the difference between bleeding brakes with ABS and without ABS?
Bleeding the brakes on a car with ABS is not an easy task, and the problem is not the complexity of the pumping process itself, but rather a lack of awareness. Bleeding brakes on a vehicle with ABS and without an anti-lock braking system differs significantly in some key points and has its own characteristics.
Three main differences between an anti-lock braking system and a conventional brake:
- In an ABS system, unlike non-ABS brakes, the piping system (the rear wheel circuit) is under increased pressure.
- The presence of an anti-lock braking system requires regular monitoring of the brake fluid level. If its level is at an extremely low level, the drive pump runs dry and begins to pump only air, thereby quickly stopping functioning.
- The operating time of the pump should not exceed two minutes, but if it has worked longer, it is necessary to turn on the ignition for ten minutes to cool it down.
Types of ABS systems
Before you take steps to bleed ABS brakes, you should familiarize yourself with it. At the moment, there are two main types of ABS, which differ from each other in the main feature - the order in which the system components are placed.
1) The first type of ABS - the main unit contains the pump itself, a block of hydraulic valves, and a hydraulic accumulator.
The steps for bleeding the brakes occur in a sequence similar to bleeding as in a car with conventional brakes without an anti-lock system.
- It is necessary to find the fuse responsible for the operation of the car’s ABS and remove it, thereby achieving a complete shutdown of the system.
- Find the RTC bleeder fitting and unscrew it. Further bleeding of the ABS brake system should be carried out strictly with the brake pedal depressed.
- Turn on the car ignition, but the ABS fault light should light up. At the same time, the pump starts, expelling air from the brake system. An extinguished brake light means that everything was done correctly.
2) The second type of ABS - all the components (hydraulic accumulator, hydraulic module with valves) of this system are located in different units.
You will need a special scanner that diagnoses the ABS system and retrieves all the necessary information from the electronic control unit of the brake system.
Such a scanner is quite expensive and is rarely found among car owners, which is why bleeding of brakes with ABS is usually carried out in a service station. Most ABS are equipped with activation devices SBC or ESP, just like ABS they are pumped only at service stations.
How to bleed ABS brakes
First of all, it is worth noting that pumping should be done with a partner.
It is recommended that shortly before carrying out work, inspect the thread of the bleeder fitting; it is often heavily corroded, and in order to avoid stripping and breaking the thread, the metal must be treated in advance with WD-40 lubricant. In addition, to avoid adding too much brake fluid when replacing brake fluid, you should mark its level on the expansion tank.
After disconnecting the ABS system plug, you can begin the bleeding process. With such a system, it is possible to pump the brakes efficiently and correctly only in rooms equipped with a pit or overpass. It is recommended to bleed the front left wheel first, followed by the front right one. Next comes the left rear wheel, then the right rear wheel.
Procedure for bleeding ABS brakes
1) A pre-prepared transparent hose must be secured to the fitting of the brake cylinder, and its other end must be lowered into a container.
2) Set the gear lever to the neutral position, apply the handbrake (handbrake) and turn on the ignition to reset the AT in the circuit to 80 atmospheres.
3) It is necessary to press the brake pedal intensely until resistance appears on it, after which the pedal must be held in the pressed position. Use a special wrench to unscrew the fitting and wait until the brake pedal hits the floor. After this happens, the fitting must be tightened and the brake pedal released.
These steps should be repeated until all the brake fluid in the reservoir drops to the level of the hydraulic drive pipe. To prevent air from entering the brake system, brake fluid must be added to the reservoir regularly.
4) Air accumulates in the clutch hydraulic drive and when it is squeezed out, approximately 100 ml of brake fluid is lost.
At the end of the brake bleeding procedure, to make up for losses, brake fluid must be added to the expansion tank to the maximum level mark.
The procedure described above must be carried out on each wheel. There should be no air bubbles in the brake fluid.
5) The next stage of work is to control the free play of the brake pedal. If pumping is done efficiently and correctly, the free travel of the pedal is up to 30% of the total amplitude of pedal movement.
6) The final step in bleeding the brakes is to fill the reservoir with new brake fluid. Its quantity must strictly correspond to the level of the mark previously applied to the tank. Screw the expansion tank cap tightly and connect the anti-lock braking system plug.
At the same time as bleeding the brakes, it is recommended to pay attention to the tightness and tightness of all elements of the brake system.
To check the functionality of the system, you need to start the car engine and press the brake pedal all the way for ten seconds. At this time, the ABS service indicator in self-diagnosis mode should light up and soon go out.
This indicator algorithm indicates high-quality pumping of the system and the absence of other malfunctions.
You can evaluate the effectiveness of the system by conducting a test drive with regular braking. If there is a pulsation in the brake pedal when braking, this indicates that the system is in good condition.
Important! If the design of the ABS system provides for the installation of electronic activators SBC and ESP, bleeding of the brake system is carried out only in a service station.
Anti-lock braking system performance
Thanks to the presence of ABS in the braking system, it is possible to significantly reduce the braking distance, which allows the driver to maintain good vehicle control in emergency braking conditions.
This allows you to avoid many unforeseen situations and makes it possible to maneuver during braking. These advantages make the anti-lock braking system an important element of the braking system.
The presence of ABS in the car is better for an inexperienced driver in any case; it allows emergency braking even in an intuitive way, applying maximum force to the brake pedal, while maintaining the ability to maneuver.
Among the many advantages of the anti-lock braking system, according to experts, there is only one drawback - braking the car on loose areas (gravel, sand, high snow).
The braking distance becomes much longer than when the wheels are completely locked, since the car does not “bury itself” in the loose surface, but continues to move normally.
However, today modern ABS already have algorithms that are successfully used when braking even on such surfaces.
If the material was interesting or useful for you, publish it on your social network page:
Source: http://jrepair.ru/interesnoe-na-jrepair-ru/agregats/kak-pravilno-prokachat-tormoza-s-abs
Bleeding ABS brakes: how to do it correctly
During the repair process, air often gets into the brake system (this happens when the structure loses its tightness, brake fluid is replaced, etc.). You can tell that there is excess air by the soft and increased pedal travel. Bleeding the brakes will help get rid of it.
Many cars are equipped with ABS: bleeding such a system will have certain features.
Content:
ABS system design
Before you begin work, you should familiarize yourself with the general structure of the anti-lock braking system.
It consists of the following components:
- speed sensors;
- valves that act as motion modulators (located in the brake system line);
- the main control unit, which processes information from the sensors and regulates the operation of the valves by reducing or increasing the brake pressure.
How to properly bleed ABS brakes
Before starting the procedure, you need to determine what type of ABS the vehicle is equipped with.
The first possible option is to locate the components of the structure (pump, accumulator, valves) in one place. This is the simplest scheme, as a result of which bleeding ABS brakes can be done independently.
The procedure will be as follows:
- Find the fuse that ensures proper functioning of the system and remove it from its socket.
- Unscrew the bleeder cylinder fitting.
- Start the car by pressing the brake pedal (the ABS light on the panel must light up).
- Start the pump and wait until the air comes out.
- If the light stops lighting, complete the procedure (the indicator going out will indicate that everything was done correctly).
How to bleed ABS brakes if the components are not located in the same place? Performing this operation will require an expensive device (scanner) that reads data coming from the ABS unit, so if it is not there, it would be logical to immediately contact a specialized service, which will cost much less.
Proper bleeding of brakes with ABS of the second type is also carried out in a certain sequence ( you must understand that the instructions presented below are general recommendations that may vary for different car models ).
First, you should reduce the pressure: turn off the ignition, then press the brake pedal about 15 times, then disconnect the connectors on the brake fluid container.
Pumping starts from the front wheels of the car:
- a hose is put on the fitting (this must be done with the engine off), after which it opens 1/2 a turn;
- the gas pedal is depressed and fixed (the brake fluid should begin to come out with the formation of bubbles);
- After the bubbles stop appearing, the bleeder fitting is tightened tightly.
The brakes on the rear wheels will be bled separately.
Right wheel first:
- a hose is put on the completely unscrewed fitting;
- the brake pedal is depressed and the ignition is turned on;
- the pump starting to work will rid the system of air accumulated in it (it’s time to stop the procedure if there are no bubbles in the escaping liquid).
To adjust the brakes of the left rear wheel, proceed as follows:
- put the hose on the fitting and turn it out a full turn;
- do not touch the brake;
- a started pump begins to pump out brake fluid with air impurities;
- press the brake pedal approximately halfway;
- screw the fitting;
- release the pedal;
- After the pump has stopped completely, connect the connectors to the container with fuel liquid.
How to bleed brakes with ABS so as not to fear for your own safety? To do this, after completing the work, you need to make sure that the system is tight and there are no leaks. Having filled the brake fluid to the required level, it is worth testing the brakes: it is not recommended to accelerate very quickly - it is better to first check the operation of the brake system at low speed.
Bleeding brakes with ABS video
Source: http://moj-vnedorozhnik.ru/v-pomoshch-voditelyu/prokachka-tormozov-s-abs-kak-pravilno-eto-delat
How to bleed the brakes correctly?
To remove air from the brake system, it is not necessary to go to a car service center. This task is not too difficult, and if you have a lift, inspection hole or overpass, it can be solved independently.
Let's talk about how to properly bleed the brakes yourself, and in what sequence this procedure is performed.
But before that, it must be said that if the system has additional modules to facilitate its operation (ESP, SBC), you will still have to go to a service station, since most motorists do not have special equipment to work with them.
When should you bleed your brake system?
The brake mechanism must be bled to remove trapped air.
Most often, this is done during the replacement of the vehicle (on most models, such an operation is performed every two years or after every 50,000 km, whichever comes first).
In addition, bleeding is necessary after the repair is completed (for example, when the vacuum booster or gas turbine engine is changed). Bleeding is also necessary when there is depressurization (this happens with damaged hoses), and when the liquid level in the tank drops below the minimum.
How to bleed the brakes?
This procedure is easiest to perform if you have an assistant who will press the brake pedal at your command. But if you don’t have to wait for outside help, you can do it yourself.
The order in which the brakes are pumped depends on the make and model of the car; the sequence of work is described in the operating instructions.
When starting to bleed the mechanism after replacing the brake fluid or repair, you need to stock up on a rubber hose (preferably transparent), as well as a container into which the brake fluid will be drained.
1 – bleeder fitting; 2 – hose; 3 – vessel with liquid
To access the fittings, the vehicle is placed on an overpass or inspection hole (hanged on a lift). The wheel on the side that will be pumped should be removed (and so on, on each side). Before starting work, the fitting must be cleaned, and a small amount of brake fluid must be poured into the prepared container so that air does not enter the system during bleeding.
First, let's figure out how to bleed the brakes with an assistant:
- Attach a hose to the fitting, after first pouring liquid into the GTZ tank (if it is not there).
- Place the other end of the pipeline into a tank with fuel fluid.
- Give the command to the assistant sitting in the driver’s seat to press and release the pedal as much as possible several times, then press it again and hold it in that position.
- Unscrew the fitting so that the liquid flows into the container.
- Gradually add brake fluid to the reservoir.
- Continue pumping until there are no air bubbles in the flowing liquid.
- Close the fitting.
The contours of the remaining wheels are pumped in the same order.
How to bleed brakes without an assistant?
It’s easier to bleed the system with two people, but if necessary, you can do this without outside help. There are several ways to pump yourself:
- Using a gas stop. This method differs little from pumping with an assistant, the only difference is that it is not a second person who presses on the pedal, but a gas stop. Accordingly, you need to press the pedal yourself several times, then, holding it in the pressed position, set the stop, and then begin to bleed the fuel fluid. When it begins to flow out of the mechanism, the stop will gradually push the pedal down to the maximum position.
- Using a syringe. To do this, the syringe is hermetically built into a lid similar to the one on the tank. Then you need to fill the syringe with “brake fluid” and install the lid with it on the tank instead of the standard one. Next, the fitting is unscrewed, a container is placed to drain the liquid, and pressure is injected using a syringe.
- Using a car nipple. This element, just like in the previous case, the syringe, cuts into the lid, which is then put on the tank instead of the standard one. Having put on the cover, you need to connect one of the ends of the hose to it. The second is connected to a chamber in which the air pressure does not exceed 1 atm. Then the fitting opens and the aired fuel fluid flows under pressure into the prepared vessel.
We have listed the main methods for bleeding brakes yourself. Some experienced drivers act slightly differently, but the principle remains the same.
Most common mistakes
It is not uncommon to make serious mistakes when performing this procedure, which can cause the brakes to fail. Here's what you absolutely shouldn't do:
- Mix different liquids together. The consequence of mixing a glycol composition with a mineral composition will be the formation of clots, which will lead to clogging of the line and damage to the rubber cuffs of the hydraulic drive. In addition, liquids of different classes cannot be mixed due to different boiling points - this will lead to a decrease in the performance characteristics of the liquid.
- Allow the fuel fluid level to drop significantly. If, when pumping liquid into the system, you do not monitor what its level is in the expansion tank, this can lead to a critical decrease in the amount of liquid composition and air suction.
- Exceed the pressure in the expansion tank. When pumping yourself, you must monitor the pressure so that it does not exceed 0.8 atm, otherwise the tank may burst.
Recommendations
To perform this procedure correctly, you must not only follow the order of bleeding the brakes, but also take into account a number of important points:
- Make sure that the fluid does not leave the reservoir completely, otherwise air will get into the main brake cylinder, in which case you will have to start pumping from scratch.
- When pumping cylinders installed on the rear sides, there is no need to jack up the car, otherwise the pressure regulator will block the line, and the work will not be completed.
- You cannot unscrew the fitting with an open-end wrench so as not to tear off the edges. To do this, you can use a head of the appropriate size or a spanner.
- A broken fitting does not need to be drilled out; this will damage the cylinder. Wet the element with WD-40, and while it eats away the rust within a few minutes, sharpen a 4-edged awl or screwdriver with a file. Then drive this tool into the fitting and carefully unscrew it.
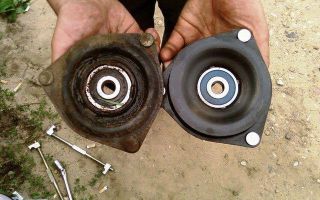
- When bleeding disc brakes, you should simultaneously assess the level of wear on the pads and discs. The working pads should have a thickness of approximately 8 mm (not taking into account the thickness of the metal). You can assess the wear of the discs by checking the thickness of their middle and outer edges. If any of these indicators is less than 11 mm, this part can no longer be used. On new disks this figure is approximately 15 mm.
Answering the question of how to bleed brakes with ABS, let’s say that this procedure should be described in the operating documents of a specific car model.
Properly pumped brakes are not afraid of sudden pressing of the pedal in critical situations. If the pedal sinks during braking, this indicates a brake hose rupture. In this case, you can escape from an accident by pulling the handbrake lever.
Source: https://bodyshop-info.ru/sovety-i-rekomendacii/kak-samomu-sdelat-prokachku-tormozov
How to properly bleed your car's brakes yourself
The vehicle's braking system must be in good condition and respond to pressure on the brake pedal in accordance with the driver's expectations. The slightest problems with the brakes can lead to a traffic accident, so when the first symptoms of malfunctions appear, they must be eliminated.
Most often, drivers take care of their brakes by promptly changing pads and brake discs. However, system maintenance should not end there. It is equally important to replace the brake fluid in your car on time, and at the same time correctly perform the brake bleeding procedure.
When is it necessary to bleed the brakes?
Each car manufacturer sets its own mileage standards before replacing brake fluid. They usually range from 50 to 70 thousand kilometers. When you completely replace the brake fluid, air enters the system, and you cannot do without bleeding the brakes.
In this case, other situations may arise when it is necessary to bleed the brakes and remove excess air from the system:
- After repair work related to brakes: replacing pads, brake discs, cylinders and other system changes;
- If you experience symptoms of excess air in the brake system. The most striking of these is the “softness” of the pedal. That is, the driver presses the pedal with the usual force, but the brakes do not respond or respond partially. Because of this, the speed of emergency braking slows down, and it is prohibited to operate a car with such a problem.
You can properly bleed the brakes at a service center, where to perform such a service, the technicians have special devices that allow them to complete the job quickly and efficiently. But if you want to bleed the brakes yourself, then there is nothing difficult about it either.
What you need to bleed your brakes yourself
The procedure for bleeding the brakes is quite simple, but it is better to have a partner to carry out the work. This is due to the fact that during the work process one person will need to press the brake pedal from time to time inside the car. If you can’t find a partner, you can replace it with a gas stop, but doing the work will be much less convenient.
In addition to an assistant, to bleed brakes in a garage you will need:
- A standard set of tools is several wrenches to dismantle parts;
- A short-length rubber hose, the diameter of which will be suitable for pulling onto the fitting;
- New brake fluid. Important: You must use the brake fluid recommended by the manufacturer;
- A small plastic container, a brake fluid bottle will do.
Please note: In automobile stores you can find special tools for bleeding brakes. Essentially, they are a combination of plastic containers and rubber hoses. It is not advisable to buy them if you have the opportunity to assemble such a simple structure yourself.
Before you begin bleeding the brakes, you should refer to the service manual for your specific vehicle model. It needs to clarify according to what scheme the brakes should be pumped.
In most cases, car manufacturers indicate this information, but if it is not there, then the “brake master cylinder rule” applies.
Its meaning is that you need to start pumping the brakes from the wheel that is located as far as possible from the main brake cylinder.
Assume that the brake master cylinder is closest to the front left wheel. In this case, pumping the brakes will proceed according to the following algorithm:
- Rear right;
- Rear left;
- Front right;
- Front left.
By choosing the correct sequence for pumping the brakes, it is possible to remove as much air as possible from the car’s braking system.
How to properly bleed the brakes
Having prepared everything you need, you can start bleeding the brakes. Correctly follow the following algorithm:
- Brake fluid is poured into the master cylinder reservoir so that it reaches the “Maximum” mark on the container;
- On all wheels, the air release valve is cleaned of dirt and dust to prevent debris from entering the system;
- Next, a little brake fluid is poured into the prepared container, and the hose is pulled onto the wheel air release valve, from which pumping begins. Don't forget to remove the cap from the valve first (don't lose it). The second end of the hose is immersed in brake fluid poured into a container;
- After this, you need to give a command to the person in the car so that he presses the brake pedal. It is necessary to make from 3 to 5 clicks, leaving an interval of about 2 seconds between them. On the final press, the pedal must be locked in the depressed position;
- When the pedal is depressed, you need to unscrew the air valve half a turn. At this point, it is important that the hose remains submerged in the brake fluid. When unscrewing, some of the excess air will pass through it, which will be marked by the appearance of bubbles on the surface of the brake fluid;
- After all the bubbles have come out, you need to screw the air valve back on and give the command to release the brake;
- Next, instructions points 4 to 6 must be repeated several times (usually about 5). This is necessary so that all the air is gone;
- Having completely bled the brakes of one wheel, you need to remove the hose, put the protective cap on the fitting and move on to the next wheels.
Important: During operation, brake fluid will leak from the master cylinder barrel. It must be monitored so that it does not fall below the minimum acceptable norm.
After performing the bleeding procedure, check the brake system before driving on busy roads or accelerating at high speeds. If the pedal remains soft, you need to diagnose the brake system, paying special attention to the wear of the pads and discs.
(336
Source: https://okeydrive.ru/kak-pravilno-prokachat-tormoza/
How to bleed the brake system
Many car manufacturers recommend updating hydraulic brake fluid every 18-24 months.
Bleeding the dual system
If there are two independent circuits, pumping is carried out in two stages. The process begins with the wheel that is as close as possible to the master cylinder.
The front and rear brakes of the dual system are equipped with two independent hydraulic circuits.
Designs vary depending on the manufacturer.
The brake lines also pass through a balancer, which limits the pressure in the rear brakes so that they are applied with a slight delay and the car does not skid forward.
On some vehicles, the rear brakes cannot be bled unless full weight is placed on them, and the procedure must be done while the vehicle is on the ground.
Brake fluid can absorb water, i.e. Over time, it becomes heavier and the boiling point drops.
Friction caused by the constant movement of heated fluid in the brake calipers or cylinders causes the water in the fluid to evaporate. The brake pedal becomes less rigid, and in some cases even fails completely.
Air entering the hydraulic system also impairs pedal performance, because... Unlike brake fluid, air is compressible.
If it is not yet time to change the brake fluid, but the pedal is already not working well, inspect the system for air leaks. Air can enter the hydraulic system through leaking seals or faulty brake lines (see Finding Brake Leaks).
The fluid is drained by opening bleeder fittings (nipples, nipples) - small valves located on the brake calipers or cylinders.
Location of drain fittings (nipples)
At the same time, the brake master cylinder is filled with new fluid, because When the old one is drained, the level drops and the cylinder cannot be empty.
If air gets into the system, the process will need to be repeated.
Maintain the fluid level in the cylinder using the mark on the side. You may need a helper or a bypass pipe with a one-way valve to do this (see section Bleeding the clutch).
Avoid getting brake fluid on the paint, as... it will begin to be absorbed in just a few seconds. If drops or streaks form, immediately wipe the surface with a clean cloth. If liquid gets on your hands, wash them thoroughly.
On some vehicles, you can get to the bleeder fitting without removing the road wheel. However, in most cases the wheel will still have to be removed (see section Checking, removing and installing the steering wheel).
In dual circuit brake systems, bleeding usually starts at the front wheel closest to the master cylinder (driver's side).
Bleed the other front wheel, then the rear wheels, ending with the one furthest from the master cylinder.
On a vehicle with a servo mechanism (see section Replacing the master cylinder and servo mechanism), the bleeder fitting may be located on the servo mechanism. If so, start there.
Sequence of bleeding a simple system
How does a single-circuit system work?
One brake pipe supplies fluid to all wheels. When a leak occurs, all brakes are affected.
Bleeding a Single Circuit System: Start with the wheel furthest from the master cylinder. The last one will be the wheel, which is located next to the cylinder.
Bleeding a four-piston system
In modifications of dual-circuit systems, there are brake calipers with two pistons and separate cylinders.
Each cylinder is equipped with a bleeder fitting, so each caliper has at least two fittings.
Half of the master cylinder fluid is supplied to the rear brakes (one of the pistons in each caliper), the other half is supplied to the remaining pistons.
The standard bleeding sequence begins with the rear brake. After this, the two front fittings on one side open. The procedure is repeated for the other side.
There are several bleeding sequences for a four-piston system that use one front fitting and two rear ones.
Bleeding sequence for a four-piston system
There are several bleeding sequences for a four-piston system that use one front fitting and two rear ones.
The bleeding scheme for drum, disc and combined brakes is the same. In the case of a combination of drum and disc brakes, the diameters of the fittings may be different and each will require a separate wrench.
If you need to remove a road wheel, support the vehicle with an axle stand and secure the wheels that are on the ground.
Clean the surface around the fitting from dirt and rust using a wire brush. Wipe the fitting with a clean cloth.
Clean the surface around the fitting from dirt and rust using a wire brush, remove the dust cap (if equipped) and grab the fitting with the correct size wrench.
Leave the key in place and insert a piece of clean plastic tube at least 60 cm long into the fitting so that it does not allow air to pass through.
Place a clean glass container (such as a jar) under the fitting and place the free end of the tube into it. Pour fresh brake fluid into the container until it covers the end of the tube.
Carefully open the fitting. Remember that the fitting is a rather fragile part that can be easily damaged by excessive force.
The fitting is made of soft metal and can be damaged if the wrong wrench is used.
A damaged fitting may break and fall inside. If this happens, use a tool to remove the stripped bolts. If you cannot remove the debris, you will have to buy a new brake caliper or cylinder.
If you are unable to open the fitting with reasonable force, apply oil to the threads and wait a few minutes.
Loosen the fitting half a turn and leave the key in place. You will see the liquid begin to seep through the tube into the jar. If this does not happen, the fitting may be clogged and needs to be cleaned.
While watching the fluid flow, have an assistant press the brake pedal. Be aware that multiple applications can drain the master cylinder, and add fluid as needed.
After bleeding, be sure to close the fitting before removing the tube.
If you see foam-like bubbles in the liquid, this means there is air in the system. Continue draining and adding fluid until the bubbles disappear.
Have a helper press the pedal twice and release it. Close the fitting using a wrench. Remove the tube and wrench, replace the road wheel and move on to the next fitting.
Select the correct size wrench and insert the drain tube. Open the fitting half a turn. At the same time, the liquid will begin to drain into the jar. Make sure the liquid covers the bottom end of the tube.
Bleeding the brake system using a tube with a one-way valve (see section Bleeding the clutch) is completely similar to the procedure described, but you do not need outside help. Check the fluid condition regularly to ensure there is no air in the hydraulic system.
The same methods are used for routine brake fluid changes.
Six presses of the brake pedal while opening the fittings one by one allows you to empty the cylinder of fluid and completely replace it. Before opening the next valve, be sure to close the previous one.
Bleeding sequences for different types of cylinders may be different.
After processing all the fittings, press the gas pedal. It should function normally. If this is not the case, then there is still air in the system. Repeat the bleeding process, changing the sequence, until the pedal operates equally hard when pressed sharply and smoothly, without sinking to the floor.
To check the pumping results, find a road that is clear of traffic, drive at low speed and apply the brakes as usual.
It should stop quickly, and the pedal should not fall.
After this, drive the car at normal speed and sharply press the brake pedal. The braking distance in both cases should be the same.
Try pressing the pedal several times. If it starts to fail, it means there is air left in the system. Repeat bleeding until the brake system operates normally.
If there are no dust caps on the bleed fittings, buy several and install them after bleeding.
Cleaning clogged fittings
If after opening the fitting the liquid does not come out, it is most likely clogged. Use a clamp to close the flexible hose leading to the brake, remove the tube and remove the fitting completely.
Brake pipe clamp
If after opening the fitting the liquid does not come out, it is most likely clogged. Use a clamp to close the flexible hose leading to the brake, remove the tube and remove the fitting completely.
Carefully clean the fitting hole with a thin wire.
Carefully clean the fitting hole with a piece of hard, thin wire.
Install the fitting, insert the tube into it and remove the clamp. Do not try to clean a clogged fitting without removing it, because... Dirt may get into the slave cylinder. Turn the fitting half a turn and make sure that the liquid enters the jar.
Control of the brake pedal when bleeding the main brake cylinders of different types
There are two types of master cylinders - four-way valve aluminum body cylinders and cast iron compression cylinders.
Brake master cylinder with four-way valve and aluminum body (single circuit system)
Cast iron cylinder with compression section (dual-circuit system)
When bleeding different types of cylinders, different actions with the brake pedal are provided, regardless of the type of hydraulic system.
For a cylinder with a four-way valve and an aluminum body, press the pedal to the floor, then quickly press it three times and release.
Repeat this procedure once and continue bleeding until all air is removed from the system.
When bleeding a cast iron cylinder with a compression section, you need to press the pedal to the floor and let it rise slowly. Then you should wait 3-4 seconds and repeat the cycle. Bleeding continues until all the air is removed from the system.
If after this there are still bubbles in the liquid, and you have already used all the pumping sequences, try another method.
Source: http://17koles.ru/how/kak-prokachat-tormoznuyu-sistemu
How to bleed brakes with and without ABS?
The brake system is one of the most important components of a car. And its serviceability, without exaggeration, is the key to safe and reliable driving. Safe not only for you, but also for others.
But what to do if your car’s brakes are not working effectively enough? There is a simple solution - bleeding the brakes, which can be done either independently or in specialized service centers.
This article will discuss how brakes can be bled at home, without the involvement of expensive specialists.
When may this operation be required?
As a rule, bleeding the brake system is carried out in order to get rid of air pockets that form during operation of the system. But besides this, there are other factors, the appearance of which can lead to a premature cleaning procedure. Among the most common reasons, it is especially worth highlighting the following:
- Repair – with any intervention in the operation of this complex, it is subsequently necessary to carry out its prevention;
- Depressurization - over time, oil hoses and tubes may become unusable, crack, or simply become obsolete. After replacing them, bleeding the brakes is a mandatory procedure;
- Replacing the brake fluid - after replacing it, you must immediately carry out the cleaning procedure;
- A drop in the brake fluid level to a critical level is a factor indicating a problem in the system and requiring immediate intervention.
Sequence of the procedure
To ensure maximum efficiency, the brake bleeding procedure must be followed exactly. The procedure is performed in the following sequence:
- Rear right wheel;
- Front left wheel;
- Rear left wheel;
- Front right wheel.
But how to properly bleed the brakes? First of all, you need to lock the wheels, engage reverse gear and then proceed directly to draining the existing brake fluid. It is also worth checking in advance the tightness of the connections, the integrity of the pipes and pipes of the system and the functionality of the existing union screws.
In your work, you need to use a device for bleeding the brakes, which can be either purchased or made by yourself.
Well, you can proceed directly to the procedure, making sure to follow the procedure for pumping the brakes outlined below. It should immediately be noted that it is more convenient to carry out the procedure together, with an assistant:
- Open the reservoir cap and add brake fluid to the maximum level. During cleaning, it is necessary to monitor that its level does not fall below the minimum level;
- We clean the space from dust and dirt, after which we remove the protective cap from the bleeder fitting;
- We put a hose on it, the second end of which is lowered into a handy container;
- We give a signal to the assistant to press the brake pedal several times and fix it in this position;
- We unscrew the fitting half a turn, maybe a little more;
- Old fluid begins to leak out, along with air bubbles, and the pedal sinks to the floor. We wait until it reaches its lowest point and close the fitting, after which we give the signal to the assistant that the pedal can be released;
- We carry out the operation until all the accumulated air is completely released and repeat the procedure with the remaining wheels.
When cleaning, be especially careful - the liquid level should not drop too much, otherwise air will enter the system again.
Having finished pumping all four wheels, check the operation of the brake system - the pedal should not be soft, when pressed, reaching a maximum of half of its stroke.
Bleeding the ABS system
Now let's look at how to bleed the brakes with abs. This procedure is in many ways similar to that described above, but it also has its own characteristics.
So, bleeding the brakes with ABS begins by turning the ignition to position “0” and disconnecting the connectors on the brake fluid reservoir.
Front wheels:
- We put the hose on the bleeder fitting;
- Open it 1 turn;
- Depress the brake pedal all the way and fix it in this state;
- Observe the release of airborne substance;
- Close the fitting and depress the pedal.
Rear right wheel:
- We perform points 1 – 3 similarly to the previous one;
- We fix the ignition in position “2”;
- Air under pressure begins to leave the system and as soon as clean brake fluid comes out, we stop the operation.
Rear left wheel:
- We perform points 1 – 2 similarly to the previous one;
- We don’t touch any pedals;
- With the help of a running pump, liquid mixed with air begins to come out of the system;
- Press the brake pedal approximately halfway and tighten the fitting;
- Release the pedal and wait until the pump stops completely.
At this point, the procedure can be considered complete. As you can see, there is nothing overly complicated here, so even a novice car enthusiast can probably handle it. Good luck with your renovation.
Source: http://NashiKolesa.ru/hodovaya/prokachka-tormozov