Painting a car with raptor - the subtleties of the process
Despite all its visual appeal, gloss, shine and excellent technical characteristics, auto enamel used by the modern automotive industry is not suitable for trucks, pickups and SUVs, which are often operated in quite extreme conditions.
The usual coating on such cars is quickly damaged, the body becomes covered with abrasions and scratches, which not only spoil the exterior, but, over time, contribute to the development of corrosion and destruction of the metal.
In order to reduce regular visits to a car service center to eliminate defects, there is an effective method - painting a car with raptor.
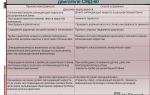
Advantages and disadvantages of the product
Coating the machine with U-Pol Raptor ensures the formation of a protective film with the following positive qualities:
- high strength;
- excellent resistance to friction;
- high adhesive properties;
- resistance to sunlight, moisture, and many chemicals;
- corrosion protection;
- reduction of vibration and noise;
- does not require the creation of sterile conditions in the garage;
- easy cleaning;
- long service life;
- Possibility of self-coloring.
In order to reduce regular visits to a car service center to eliminate defects, there is an effective method - painting a car with raptor
Speaking about the disadvantages, we can highlight the following inconveniences:
- It is strictly forbidden to varnish the painted surface, that is, it will be matte;
- It is prohibited to carry out polishing work on the surface of the vehicle;
- if painting rules are violated, chipping may occur;
- Not everyone likes the resulting effect due to the similarity of the painted surface to rough skin. If this aspect is in doubt, then it is better to examine the coating in detail, if not “live”, then at least in photographs, and only then make a final decision;
- high cost, especially if painting is carried out in a car service center.
Packaging and equipment
This coloring agent is supplied for sale in packaging containing:
- four bottles (each 750 ml) with the main substance;
- hardener (1 l);
- anti-gravel gun designed to work with raptor;
- instructions with detailed recommendations for use;
- quality passport.
To paint in different colors, 10% coloring pigment is added to the base.
Sets may be black or off-white in color. Moreover, the latter can be transformed into any desired shade without much difficulty. To paint in different colors, 10% of the coloring pigment is added to the base.
How to paint a car with raptor?
Preparatory stage
Preparation for painting is one of the most important processes, since the final result largely depends on the quality of its implementation.
First of all, it is necessary to dismantle the bumper, headlights, mirrors, handles, windshield wipers and other attachments.
Everything that cannot be painted, but cannot be removed, is very carefully covered with a protective material (film or paper) and masking tape, otherwise it will be almost impossible to wash off any accidental paint.
The algorithm for further actions is as follows:
- Using a sander, paint and varnish coating and traces of rust are removed from the surface of the body;
- the resulting dust and dirt are blown out with a compressor;
- cleaned areas are degreased with white spirit or anti-silicone;
- areas with dents, chips or scratches are straightened with a special putty;
- after the surface has dried, it is necessary to blow it again;
- The areas to be painted are treated with a primer for metal surfaces.
Raptor staining
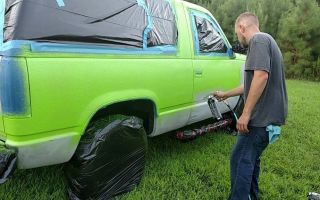
According to the manufacturer's recommendations, raptor coating does not have to be carried out in a specially prepared room - it can be done outside without worrying about weather conditions. However, as practice shows, when applying the composition to car bodies, it is better to avoid contact with dust and small particles of dirt.
Raptor coating does not have to be carried out in a specially prepared room
How to paint a raptor body? The process consists of the following steps:
- The coloring composition is mixed with the hardener in a ratio of 3:1 (mixing is done in a can of paint). It is important to remember that the resulting mixture is suitable for use for three hours.
- Screw the gun with the hose onto the can.
- Painting begins with the roof of the car. Using smooth, even movements, holding the gun at a distance of 50 cm from the area to be painted, apply the first layer.
- At a temperature within +20°C, the coating will dry in 30-60 minutes, after which you can begin applying the second layer.
- Since this substance has a very pungent and unpleasant odor, and is also toxic, the car should dry in a well-ventilated area. Complete polymerization of the material occurs on 21 days. However, careful use of the vehicle is allowed 7-10 days after painting.
Precautionary measures
Since U-Pol Raptor has a negative effect on mucous membranes, eyes, skin, can cause a feeling of drowsiness and even loss of consciousness, and is also a flammable material, when working with it, be sure to use a respirator, safety glasses, gloves and special overalls. The painting site must be provided with fire extinguishing equipment in advance, and good ventilation must also be ensured.
Painting a raptor is not something super complicated. After looking at the corresponding photos and videos, even a beginner can handle it. The most important thing is to strictly follow all the manufacturer’s recommendations and scrupulously complete the work steps.
Source: http://www.AvtoKrasim.ru/u-pol-raptor-dlya-avtomobilya-tyazhelaya-artilleriya-protiv-vneshnix-agressorov/
How I painted a Niva Raptor. Experience and mistakes — Community “All about Paint and Painting” on DRIVE2
Hello everyone! Half a year ago I painted my Niva with a two-component high-strength polyurethane protective coating Raptor (not an advertisement). I would like to share my experience and the mistakes I made, in case it helps someone.
I will not describe the process of removing rust and holes from a car here - this is a separate topic and is covered in other communities.
I’m not encouraging anyone to paint like me - this is just my experience and I drew certain conclusions from it, which I want to share with you.
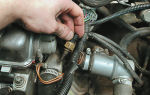
In general, look at the photographs and captions:
We thoroughly mat the surface with sandpaper.
You can do it by hand, but it’s better to use a grinder
There should be no glossy surfaces left, otherwise the paint will fall off in this place
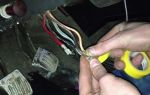
Afterwards we prime with a special primer for Raptor - I primed with a brush))), but it’s better with a bullet with a compressor...
Small irregularities are not scary; due to the structure of the Raptor they will not be visible...
We cover the openings and everything that should not be painted
We drive the car into the paint booth, in my case a garage, partially covered with film)))
We prepare everything for painting, and don’t forget to degrease the car body before applying any coating
And we paint. The air temperature should not be lower than +18
Mistake #1 - I used a compressor and carried a dehumidifier and periodically drops of moisture fell on the paint
Because of this, spots formed on the hood ((( (more glossy than the main color)
Mistake #2 - I painted the door upside down, because of this the structure of the Raptor turned out to be directed in the other direction and when installed on the car, the door seemed to have a different shade...
Painted the door openings
I painted all the doors from the inside and also the windshield opening
Painted the fenders on top under the hood
This is how the shagreen turned out - after it dried completely it became smoother...
First trip after painting 1
First trip after painting 2
First trip after painting 3
Niva operation
In general, I liked the coating, it does not require painstaking preparation of the surface and is easy to apply even by a person who is not experienced in this matter - I’m talking about myself))), but it requires adherence to technology. Next I will describe a little the six-month operation of the Raptor on my car.
Compared to regular paint, the Raptor is not scratched; it drove through the forest and through bushes and rubbed branches on the sides - there were no marks. Pleasant to the touch. Easy to clean using a brush instead of a sponge.
there is one unpleasant moment - due to its structure, in the rain it leaks along all the seals, especially the windshield (((It is necessary to coat it with sealant under the seals.
In the event of a targeted impact with something strong, it can break off - a piece about 1 cm in diameter above the neck of the gas tank broke off when I accidentally hit the corner above the neck with a fuel nozzle (my case is not isolated). Otherwise, it’s holding up great so far, I don’t regret the coating at all, but time will tell. I hope it helped someone, and don’t repeat the mistakes of others.
All the best and see you again.
Source: https://www.drive2.com/c/2442786/
Raptor painting. How not to paint with raptor | RAPTORMANIA.RU raptor painting with high quality and with a guarantee
This page was created for educational purposes only. Most likely, it will be of interest to anyone who is planning to paint their car in U-Pol Raptor .
The main problem of most services that undertake raptor painting is that there are no qualified specialists with practical experience working with this protective coating.
As practice shows, even an experienced painter who deals with classic car painting does not cope as easily as he would like. This is due to the specific properties of the raptor.
It is denser than paint, the layer is much thicker, preparation for painting should be completely different. A lot depends on the soil used. And also a number of other nuances.
And all this needs to be taken into account only so that the coating simply sticks well to the body and does not fall off; we are not talking about appearance now.
To make a car in a raptor look aesthetically pleasing, and not like it’s spattered with anti-gravel, with smudges, sagging, etc., you need practical experience and a lot of experiments. It took us more than a year to learn how to paint not only efficiently, but also beautifully. At the moment we can offer you several options for shagreen, without loss of quality.
Typical problems and mistakes when painting with raptor
Poor preparation
As the U-Pol Raptor advertisement says, the composition has strong adhesion, i.e. adheres perfectly to the surface. In part this is true.
But advertising will not tell you how beautifully the raptor falls off a poorly prepared surface as soon as the polymerization period is over.
Often it is because of this that “garage mechanics” and other handymen are not qualified specialists and are carelessly negligent in their preparation, hoping for the miraculous properties of the raptor, which ultimately leads to a sad result.
Bad paint job
Due to the grain structure of the raptor, it is difficult to paint the part the first time, either the layer will be too thick , which will look uneven, or the layer will be too thin and will not completely cover the body, which subsequently leads to the formation of rust. It is for this reason that we always paint in two layers.
save on material can also be included in a separate category . Using the raptor application technology, up to 50 ml of S2041 tinner can be added to the composition to make the texture finer.
But some people think that they are smarter than everyone else, and add an ordinary solvent to the composition, and in much larger proportions than destroying the protective properties of the coating, as a result the raptor becomes less hard, any scratches leave whitish marks, and it becomes much easier to catch the chip.
Another common problem is a negligent attitude towards his work, when the “master” doesn’t give a damn about the client’s car, because “it’s not yours, don’t mind”... Somewhere I got distracted, somewhere I didn’t want to check... As a result, damaged interior elements, a lot of wasted nerves and time.
Indiscriminate painting
In addition to the preparation and painting itself, car disassembly and detailed painting are of great importance. When we paint a Raptor, the car is disassembled as much as possible, to the point where one large element is divided into several small ones. For example, the rear bumper of the Chevrolet TrailBlazer is disassembled into 5 parts, each of which was painted separately.
This is necessary in order to ensure the durability and appearance of the paint, if you paint a car, for example, without removing the bumper, the raptor may stick between the bumper and the body, at first this will not affect anything, but after polymerization is complete, when the raptor becomes stronger and less elastic, cracks and peeling of the coating are possible due to vibration between the elements.
You also often encounter “masters” who paint directly over the rubber seals under the handles or hinges... Consequences - due to vibration, the integrity of the layer is compromised, the raptor begins to crumble and fall off in pieces, which entails the formation of corrosion and loss of appearance.
Chrome painting
The next important aspect of painting is the chrome elements. They cannot be painted in the usual way because any paint will not stick.
In this regard, we offer coloring only for plastic chrome elements from which we remove the chrome chemically. This applies to the radiator grille, nameplates, mirror caps, handles and other small elements.
We paint metal chrome elements only after sandblasting.
Conclusion
To summarize the above, we want to say that folk wisdom is rarely wrong and “kroilovo always leads to miser,” to put it more culturally - the miser pays twice.
This article was written not only as an advertisement, but also to protect you from falling into such “masters”. We will not poke our fingers at specific companies; you can find this information yourself on the Internet. By the way, most of the photographs on this page were obtained from open sources; some photographs were taken by us before eliminating the identified problems.
When sending your car to a service center where the price is cheaper, you should think twice, because in the worst case scenario, you will lose not only money, but also a lot of time, which will take to correct such painting in a normal workshop, plus in the case of poor preparation , first the raptor will need to be removed from the body, and this will add +40-50 thousand rubles in additional costs. So maybe it’s worth doing everything well the first time?
If we calculate the hard numbers, we get that on average a five-door jeep costs:
- raptor 3-4 boxes = 18-24,000 rub.
Source: http://raptormania.ru/kak-ne-nado-krasit-raptorom/
Do-it-yourself raptor car painting (photo + video tutorial)
Paint and varnish materials used in the automotive industry have distinctive features. Usually, this is a catchy, glossy appearance. But there are cars that are used in difficult weather conditions: jeeps, pickups, trucks, all-terrain vehicles. Simple paint can be damaged, the body will become covered with scratches and abrasions. And then rusty spots will appear, and the metal will begin to slowly deteriorate.
The modern paintwork market has many effective products for machines of this type. Painting your car with raptor will help solve this problem effectively. This polyurethane coating was developed specifically for such purposes. The world-class manufacturer, U-POL, has proven itself to be excellent.
Positive and negative qualities
Raptor, when applied to the surface of the body, produces a protective film that has several advantages in comparison with typical car paint:
- abrasion resistance,
- excellent strength,
- not afraid of the sun's rays,
- great chemical resistance,
- good adhesion,
- easy to clean,
- excellent corrosion protection.
But there are also disadvantages:
- the surface will always be matte, it is forbidden to varnish it,
- if you deviate from the technology, chips may form,
- the surface is not very aesthetic and has the appearance of rough skin.
Dosage of the product
The retail chain sells it in special packaging. It contains four bottles with the main substance. The volume of a separate one is 0.75 liters. There is also a one liter bottle of hardener. The kit contains an anti-gravel gun, specially prepared for working with raptors.
All containers and the gun fit together. The sets come in black and dull whitish. The latter is easy to tint in different shades. The instructions have a detailed description and tips for use. This product is certified, the quality certificate and positive reviews confirm this.
Preparation
The raptor painting technique is not a very difficult process. It can be done with your own hands if you have the strength, patience, time and desire.
When painting the body completely, headlights, bumpers, turn signals, mirrors and other attached parts are first removed. Then rusty traces and peeling paint are removed from the body.
It is advisable to prime those points where the metal is exposed with ACID #8 primer. If necessary, the body is straightened and puttied in damaged areas.
You can degrease using S-2001 cleaner. The next stage is removing the gloss. P80 sandpaper is suitable. Before applying raptor, the body surface must be matte. Those parts that do not need painting and cannot be removed are sealed with protective materials and secured with tape.
As noted above, raptor has good adhesion. You can do the work outside and not worry about the influence of the sun and wind. But it’s still better in the workshop - there is no dust and there is an opportunity to thoroughly degrease the surface.
Painting technique
The instructions advise mixing raptor with hardener in a ratio of 3:1. The paint can is graduated and helps you add the optimal amount correctly. The total volume will be 0.25 kg. The jar is closed and shaken for several minutes.
This is necessary for mixing the paint and its hardener. They come with different drying times, this allows you to choose the optimal intensity of surface drying.
To reduce the surface texture, the company advises adding up to 10% S-2040 thinner to the container.
After connecting the paint container to the air gun, the initial coat of coating is applied. Work begins from the roof of the car, and with smooth movements. The gun nozzle is placed at a distance of 45 - 55 centimeters from the point of application and it is ensured that the layer does not have overflows.
The thicker the layer, the worse the strength. The initial layer requires a temperature of +19 degrees to dry and lasts up to an hour. Then the next layer is applied. After this layer, the paint must polymerize for at least 6 days.
But the machine can already be used if there are no large and significant loads on the surface.
Painting in different colors
To paint with raptor paint in any color, you should buy a kit from the manufacturer U-POL with a cloudy-whitish substance. It is needed for tinting. But there are also pigments of prepared colors. The best option is to contact a branch of the company.
You will be given advice on application and proper mixing of raptor and pigment. Mix raptor with hardener in a ratio of 3:1 and add 10% of the main pigment to the resulting mixture. In case of problems, contact a colorist.
The raptor itself has a milky tint, which is important to take into account if you want to maintain the light tone of the car.
Safety
Basic safety measures are described in the product data sheet. Should be considered:
- dangerous to the eyes, irritates them;
- flammable;
- the smell causes drowsiness and loss of consciousness;
- dries out the skin.
The conclusion is that the work requires the use of special clothing - gloves, goggles, a respirator and overalls. The room must be equipped with ventilation and fire extinguishing equipment.
Advantages and disadvantages of technology
Advantages:
- the work does not require special skills and knowledge,
- the coating is not afraid of humidity, temperature fluctuations and sun rays,
- protects the body from corrosion,
- reduces noise and vibration,
- excellent adhesion to the iron of the body,
- no careful surface preparation is required,
- can be applied with a roller and brush,
- you don’t need too comfortable conditions in the garage,
- preparation for work does not take much time,
- long service life,
- does not require varnish coating.
But the technology also has disadvantages:
- complete polymerization of the coating takes 3 weeks,
- the coating looks like orange peel (automotive cellulite).
https://www.youtube.com/watch?v=HV4-6JMvxXA
The price of this service is not cheap, it depends on the coverage area and the nature of the part, complexity. On average, painting one part costs 5,000 rubles. Paint the entire car - from 30,000 rubles. But the price is quite comparable to the cost of expensive SUVs.
Source: https://poliryi.ru/pokraska-kuzova/dorogaya-i-kachestvennaya-zashhita-avto-pokraska-raptorom.html
Painting a car with U-POL Raptor urethane paint
Paints for coating the bodies of modern cars have excellent characteristics and a glossy appearance.
However, on jeeps, pickups, and trucks operating in harsh natural conditions when transporting goods, ordinary paint can very soon become covered with scratches from branches or abrasions from transported goods. As a result, rust appears at the site of the scratches, and the car loses its attractive appearance.
There are many products on the market for repairing car bodies. We suggest you choose products from the U-POL brand, which has more than 60 years of experience in this field. Polyurethane raptor coating and consumables for it from U-POL are specially designed for application as a protective coating on the bodies of pickup trucks, SUVs and trucks.
Advantages and disadvantages of Raptor
When applied to a car body, raptor polyurethane coating forms a protective film, which has a number of advantages over conventional car paint, namely:
- high strength of the material;
- resistance to friction;
- resistance to most chemical elements;
- easy to clean;
- does not fade in the sun;
- reliable surface protection against corrosion.
Despite all the positive aspects of the coating, the raptor is not without its drawbacks. The following points can be highlighted from them:
- the coating cannot be varnished, so it will always be matte;
- the surface has the appearance of pebbled leather, which does not always look aesthetically pleasing;
- If the Raptor painting technology is not followed, it may chip.
Packaging and completeness of “Raptor”
Raptor goes on sale in a package containing four bottles of the base material, each 750 grams, and one liter container with a hardener. The kit also includes a special anti-gravel gun, calibrated to work optimally with the raptor.
Bottles with raptor coating are adapted for pistols. Consumers can order raptor sets, either black or cloudy whitish, which can be tinted in any desired color. The set contains instructions that contain technological recommendations and a safety data sheet.
Preparatory work before painting
Painting a car with raptor is not a complicated process and can be done by a car enthusiast, but it requires careful preliminary preparation. If painting will be done over the entire body of the car, then initially you need to remove all the attached parts from the body: bumpers, headlights, corners, mirrors, and so on.
Then traces of rust and peeling paint are removed from the body. It is recommended to prime areas of the body with exposed metal with ACID #8 primer. If necessary, the body is straightened and puttied in places of dents. The surface should be degreased with anti-silicone cleaner S2001.
At the next stage of preparing the body for painting, P80 sandpaper is used to remove the gloss. The surface to be painted with raptor should be matte. All parts of the car that remain on the body and will not be painted should be covered with protective material, using masking tape as fastening.
The instructions for using Raptor say that it has excellent adhesion to painted surfaces, so the painting procedure can be carried out even outdoors, without fear of the sun, wind and dust. However, it is better to carry out painting in a garage in the absence of dust, on a clean and grease-free body.
Raptor painting technology
After all the preparatory work, you can proceed to painting the body with raptor. The instructions for use recommend mixing the material with the hardener in a ratio of 3:1. In the can where the paint is located, there is a mark at which you should add the hardener - it will be exactly 250 grams.
High-strength protective coating U-POL RAPTOR
Close the jar and shake the contents for several minutes to mix the paint and hardener.
The company offers hardeners for Raptor with different drying periods, which makes it possible to select the desired drying speed of the coating.
And in order to reduce the texture of the applied coating, the company recommends adding 10% S2040 thinner to the bottle with the material and hardener.
We screw the gun onto the paint can, to which the hose from the compressor is connected. You can apply the first layer of raptor to the car body. Painting begins from the roof of the car using even movements. The gun should be kept 40 - 50 centimeters from the surface to be painted. You need to make sure that the layer goes on without overflowing.
The instructions say that thickening the layer leads to a violation of its mechanical strength. To dry the first layer, a temperature of +20 and 30-60 minutes are required. Then you can apply a second layer.
Upon completion of coating the car body with the second layer of raptor, the paint should polymerize within 5-7 days. The car can be used after 12 hours, however, without serious loads on the coating.
Painting a car in the desired color
In order to paint the body of a raptor car in the desired color, you need to purchase a kit from the U-POL company with a cloudy-whitish material, which is intended for tinting.
You can also purchase ready-made color pigments from U-POL.
To purchase, you should contact the company's representative office - they will give recommendations on how to mix the pigment and raptor and how it should be applied to the surface of the body.
Next, you need to mix raptor with the hardener in a 3:1 ratio and add up to 10% of the base pigment to the finished mixture. If you have difficulty selecting the right color, you can contact a colorist and use the selection system to determine the right component.
In the case when the color of the car is light, and the owner wants to preserve it, you need to take into account that the raptor itself is milky in color - this can give a peculiar shade.
Safety precautions when working with raptor
Painting the body of a car with a raptor should take place while observing personal protective measures. The passport that comes with the product itself indicates the main types of danger the raptor poses to humans:
- the material is flammable;
- irritates eyes;
- open contact with the material leads to dry skin and causes it to crack;
- vapors may cause drowsiness and clouding of consciousness.
Therefore, you need to work with a raptor in protective clothing and gloves, goggles and a respirator. The room where the work will be performed must be equipped with exhaust ventilation and fire safety equipment.
Advantages of painting a car with raptor
- Painting as a process does not require special qualifications of the performer.
- The coating is not afraid of moisture, salt, extreme temperatures, and does not fade in the sun.
- Protects the coating from rust.
- Reduces noise and vibration levels.
- Has high adhesion to body metal.
- Does not require meticulous preparation of the surface for painting.
- It can be applied not only with a spray gun, but also with a regular roller or brush.
- Painting can be done outside the garage, even outside, at a temperature of +20. An awning is desirable - it can protect from rain.
- Preparing for painting does not take much time.
- The coating retains its protective properties for a long time.
- There is no need to coat the raptor with an additional layer of varnish.
Disadvantages of painting a car with raptor
- Relatively long time for complete polymerization of the coating (according to the instructions, up to 21 days).
- The coating has the appearance of an orange peel.
Those car owners who decide to cover the body of their car with raptor are not embarrassed by these shortcomings, but the advantages leave them in full confidence that their car is reliably protected for many years of operation in the harshest conditions.
Tired of paying fines? There is an exit!
Forget about fines from cameras! An absolutely legal new product - NANOFILM, which hides your license plates from IR cameras (which are installed in all cities). Read more about this at the link.
- Absolutely legal (Article 12.2.4).
- Hides from photo and video recording.
- Installs independently in 2 minutes.
- Invisible to the human eye, does not deteriorate due to weather.
- 2 year warranty
Source: http://KuzovSpec.ru/pokraska/raptor/
Raptor paint: application technology and price of universal coating
Many car owners want the attractive appearance of the body to be preserved for as long as possible.
Dirt, scratches, flying stones - all this negatively affects the protective paintwork of the body. Cracks, scratches, chips appear, and then rust.
This is especially true for off-road driving enthusiasts, who care not so much about appearance as about protecting the body from corrosion.
The body can be protected using galvanic coatings, galvanizing and special primers. But all these methods are not effective and durable enough. Therefore, many people turn to using Raptor coating.
Raptor car paint protects the body from exposure to water, sand, stones, and gravel.
With such a coating, the car is not afraid of difficult operating conditions, so the Raptor is ideal for off-road vehicles.
Protective coating "Raptor"
Raptor is a 2-component polyurea elastomer (polyurea) of increased strength. The Raptor coating, due to its composition, allows you to obtain a seamless elastic insulating coating.
Raptor car paint protects the body from mechanical damage, corrosion, reagents, mold, and temperature changes.
The composition is also used to restore worn body parts. After applying the Raptor coating, a protective layer of increased strength is formed on the body, which protects it from exposure to water, mechanical damage and ultraviolet radiation.
Packaging, accessories and color
You can buy Raptor for car painting in a specialized store or online. Raptor car paint is sold in standard packaging - 4 0.75 liter bottles, plus 1 1 liter bottle of hardener, which is used to fix the paint.
The material of this kit is enough to cover up to 10 square meters.
m. of flat surface in one layer. Kits with a paint spray gun are also sold. It is used when it is necessary to ensure an even coating.
If you want to paint the sides or bottom, then the paint can be applied with a brush.
The Raptor is available in two colors – black and white. The most popular color is black. If you need a different color, buy white paint and mix it with the desired color.
Advantages and disadvantages of paint
Before you decide to paint your car with Raptor, you should take into account all the nuances and weigh all the pros and cons. Let's talk about it. Raptor painting reviews, pros and cons.
The advantages of Raptor auto paint are as follows:
- No special qualifications are required for application; it can be applied manually with a brush or gun;
- The coating increases the sound insulation of the body;
- Raptor paint for cars protects the body from moisture, reagents and extreme temperatures, etc.;
- The coating protects the body from corrosion;
- The composition is easily applied to various types of surfaces, metals and other materials, has a high degree of adhesion;
- No special room or conditions are required for application; you can even paint in the garage;
- Various application methods: gun, roller, brush;
- No careful preparation of the body is required before applying paint;
- Cost reduction of 20% compared to traditional coatings due to reduced application time and longer service life.
Flaws:
- Only one type of surface is possible - matte;
- Inherent roughness of the coating;
- The composition gains full strength only 21 days after application;
- It is difficult to remove from the surface if necessary.
The cost of "pleasure"
How much does Raptor paint cost? The average cost of a standard set of four cylinders with paint and hardener is about 6 thousand rubles. A set with a pistol will cost an average of 7.7 thousand rubles. The total price of Raptor coverage including the pistol will cost 13.7 thousand rubles.
Raptor painting price. To paint a car with Raptor you will need at least 3 sets, and this “pleasure” will cost 18 – 24 thousand rubles. subject to self-staining.
If you decide to paint the car in a workshop, then the price of painting the car with Raptor will be higher by the amount of the cost of the master’s work (about 10 - 20 thousand rudders).
Painting a Raptor with your own hands is carried out in several stages, let's look at it in detail.
Application technology
The Raptor painting technology is quite simple and can be done by any car enthusiast, but it requires preliminary preparation.
What is required for application
1) Materials
To apply Raptor, you must prepare the accompanying materials in advance. The technological process of coating requires the use of abrasive and polishing materials, hardeners, adhesive primers for plastic, acidic primers for metal, branded degreasers and solvents, putty, rags, etc.
2) Pistol
Also, for proper, even application of Raptor, a proprietary pistol is required.
This gun is very similar to a regular anti-gravel gun, but has a number of differences. The most important difference is the ability to adjust the size of the “pimples” or shagreen when applying the coating. With this gun you can create a smooth matte finish.
3) Quantity of materials
The final quality of painting largely depends on the correct choice of consumables.
It is best to entrust the selection of these materials to a competent specialist. To determine the amount of materials, you need to make some calculations. The quantity and composition of consumables depend on the area to be painted, the number and thickness of application layers.
Safety precautions when working
The product data sheet states that Raptor car coating is a flammable material, irritates the eyes, causes dryness and burning upon open contact with the skin, and vapors from the composition can cause clouding of consciousness. Therefore, as with any other painting, when painting a car with Raptor, all safety and personal protection measures must be observed.
General safety precautions when working with paint and varnish products (including Raptor car paint):
- The room where painting work is carried out must have good, proper ventilation. The room should be ventilated as often as possible. If the premises are insufficiently ventilated, you should work in them for a strictly limited time and use protective equipment: gauze bandages, respirators.
- Smoking is prohibited in these premises.
- The use of open fire is prohibited.
- Used materials must be kept in separate containers. Used rags should be filled with water.
- It is important to keep the room clean and avoid spilling paint materials.
- Work must be carried out in special clothing, rubber gloves, a respirator and safety glasses.
- Paint and varnish materials must be stored in a dark, separate room, inaccessible to unauthorized persons. Optimal conditions: 7-8 degrees Celsius. Any container must be tightly closed and labeled.
Painting stages
Painting a car with Raptor takes place in several stages:
For high-quality application, the Raptor coating needs a smooth, prepared surface. The paint can be applied to any surface – plastic or metal.
To prepare the surface, do the following:
- Disassemble the body: remove bumpers, mirrors, wheels, etc.
- Clean the surface of the body, remove old layers of varnish and paint;
- Clean body parts from corrosion, where required, and process thoroughly;
- Putty the uneven areas, cover up the corrosion areas and sand them;
- Prime the surface, preferably using ACID acid primer;
- Wait several hours until the preparation is completely dry.
Preparation of the composition. Before applying paint, you need to prepare the composition. A hardener is added to the paint in a ratio of 3 to 1. That is, 250 g of hardener is added to 750 grams of paint. The mixture must be stirred for several minutes, or simply shake the jar.
Painting work must be done in a box or garage with good lighting. What to do:
- First paint the inside of the body with the prepared mixture to see how the paint adheres;
- After making sure that the Raptor lays flat and well, paint the entire body;
- Let the paint dry.
After a few hours, you can assemble all the car parts in place. In the first days, it is best to use the car in urban conditions, and only after 14 days, when the composition gains strength, can you go off-road.
We recommend watching: DIY Raptor painting video
Conclusion
Raptor is an excellent solution not only for off-road enthusiasts, but also for car owners of all categories.
The Raptor coating protects the car body from aggressive environmental influences, this is especially true for regions with sudden temperature changes, and from mechanical damage.
You can also use Raptor to restore the body from corrosion.
Painting with Raptor paint saves money and keeps the car body in excellent condition for many years.
Share your information and tips in the comments, and you can also share this interesting article with your friends on social networks!
Source: http://enjoy-cars.ru/masterskaia/soderzhanie-i-uhod/kraska-raptor-cena-pokrytiya.html
The benefits of painting a raptor yourself
Over time, chips and scratches may appear on your car, and this is inevitable. This is especially noticeable on SUVs such as the Chevrolet Niva, since the paintwork is exposed to a large amount of dirt and branches while driving.
Therefore, every car owner has to choose between frequent visits to a service station to repair damage or treating the car with wear-resistant materials. The most popular method, which has proven itself well, is painting it with a raptor yourself.
POL Raptor paint forms a special durable layer on the car, and the improved polymer structure has high adhesion and fracture resistance.
Raptor paint is one of the highest quality and most durable coatings for body protection. It can also be used for processing disks and suspended structures. In addition to protection from mechanical damage, Pol Raptor is resistant to moisture and ultraviolet radiation. This helps make the car virtually invulnerable.
How did the distribution of this coverage begin?
Raptor was originally designed to protect concrete and wood surfaces to provide a protective coating against moisture. But high adhesion and constant improvement of the material have made it possible to use the paint on almost any coating.
There are several main advantages that self-processing of a car with Raptor provides:
- The paint does not fade in the sun
- Resistant to oil and other chemicals
- It is easy to remove dust and dirt from the surface
- When applied correctly, it avoids corrosion
One of the disadvantages is the appearance of the coating. Raptor produces a matte, rough surface reminiscent of an orange peel. This should be taken into account before painting, since this effect cannot be avoided due to the special structure of the material. It is prohibited to use other materials on top of the Raptor or polish the surface.
You should also follow the painting application technology to avoid the formation of coating defects and chips in the future.
Preparing the car for painting
This is one of the most important stages. The effectiveness of this coating will largely depend on how the car was prepared for self-treatment with Raptor.
Before starting work, all attachments should be removed from the vehicle. It is also necessary to dismantle such parts as:
- Wipers
- Mirrors
- Bumper
- Door handles
- Rubber door seals
- Mud flaps, etc.
If some parts cannot be removed, for example, glass, then you can seal them with newspapers, papers and masking tape. It is necessary to carefully approach the protection of elements, because after drying the paint becomes so durable that it cannot be removed with solvents. Only under mechanical influence of especially durable materials.
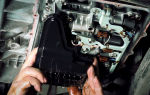
After protecting the elements, it is necessary to prepare the surface for painting. This work should be done in several stages:
- First, the paintwork must be completely removed. For this it is better to use a special grinder. It is optimal to use discs with fine abrasive.
- Then, using a compressor, you need to clean the surface from dust and dirt.
- Use putty to level the surface and remove small chips
- After the putty has dried, the surface is cleaned again
- Metal surfaces are treated with a special primer.
It is necessary to carry out the preparatory work carefully, because Raptor shrinks a little after drying to ensure tighter adhesion to the surface, therefore, in a place where the putty is applied insufficiently well, an air bubble can form, and over time, corrosion can appear.
Do-it-yourself Raptor application
Raptor is produced in two types: black and colorless. Additional pigment can be added to colorless to give the desired shade. It is necessary to apply Raptor diluted with a special hardener. To do this, use the gun included in the kit. It is distinguished by a special nozzle installed. Any other equipment will not be suitable for application.
Stir only in the amount needed for application. The diluted mixture can be stored for no more than 3 hours. For mixing, you can use the jar that comes with the kit. Paint fumes are highly toxic, so you should use protective equipment when painting.
It is necessary to spray from a distance of at least 40 centimeters to avoid smudges. In this case, the substance is applied in an even layer and does not form bubbles. The paint is applied in 2 stages. The second time you need to paint after 40-50 minutes.
For painting, choose a dry room, closed from drafts. Due to the fact that the paint dries quickly and has high adhesion, you can work outdoors in good weather.
It takes 20 days to dry completely. At this time, it is better to install the car in a well-ventilated closed area.
But if necessary, you can use the car already 8 days after completion of the work.
Source: https://expertniva.ru/kuzov/preimushhestva-kotorye-daet-pokraska-raptora-svoimi-rukami.html