How to Test a Battery – Electronics Basics

Today's article is about checking your car battery .
While operating a car, we periodically face the question of how to check the battery. This usually happens in two cases: when purchasing a new battery and when problems arise with the battery during operation.
So I advise you: if you don’t want problems, especially in winter, check the battery in a timely manner to ensure its functionality as a source of EMF for your car, since in some operating modes the battery can quickly become unusable. The reason for this is frequent undercharging or overcharging of the car battery.
The reason for undercharging may be frequent trips over short distances, turning on the warm-up mode in winter, as well as a malfunction of the car's generator voltage regulator.
As a result, such an unpleasant phenomenon as sulfation of the battery plates occurs.
The phenomenon is bad and this is the topic of a separate article, so if you don’t want to miss out, subscribe to new issues of ELECTRON magazine at the bottom of the article.
Now about recharging. Overcharging can lead to shedding of the plates, and if the battery is not maintained, then to its mechanical deformation. And overcharging occurs if, as a result of improper operation of the voltage regulator, an excessive voltage is supplied to the battery from the generator, as well as as a result of long and protracted trips at high engine speeds.
I hope I have convinced you that you should know the question of how to check the battery so as not to turn your battery into a piece of lead worth 300 rubles (at best) and take timely measures to increase the battery life.
In general, I would recommend carrying out the battery testing process by following the following points.
1. External inspection of the battery
2. Checking the electrolyte level in the battery
3. Checking the density of the electrolyte in the battery
4. Measuring the voltage on the battery with a voltmeter or multimeter
5. Checking the battery with a load fork.
So, let's begin.
External inspection of the battery
I recommend carrying out an external inspection of the battery at any opportunity when you look under the hood of your car. The reasons for this action lie on the surface of the battery. Namely, during operation, dirt, moisture, and electrolyte drips accumulate on the surface of the battery (evaporation during boiling).
All this leads to the occurrence of battery self-discharge currents.
And if we add to this the oxidized battery terminals, as well as leakage currents on the car’s electronics, then if you do not recharge the battery in time, the battery will be deeply discharged, and frequent deep discharges are a direct road to sulfation of the plates and a decrease in battery life.
You can verify the presence of self-discharge by connecting one voltmeter probe to the battery terminal and running the other one across the surface of the battery, and the voltmeter will show some voltage corresponding to a certain self-discharge current of the battery.
Usually, electrolyte drips are removed with a solution of soda in water (a teaspoon per glass of water), which is understandable: the electrolyte is an acid, the soda solution is an alkali (for those who don’t remember chemistry!).
The terminals are cleaned with fine sandpaper and the reliability of their connection to the wires and battery is checked.
Well, pay attention to the body as a whole. If the battery is poorly secured, especially in cold weather, when the plastic case is quite fragile, cracks may occur in the case.
Checking the electrolyte level in the battery
The next step, after checking and eliminating the self-discharge of the car battery, is to check the electrolyte level in it. Of course, this only applies to serviceable batteries.
The electrolyte level is checked using a special glass level tube, and the electrolyte level should be within 10-12 mm above the battery plates.
A level tube is an ordinary glass tube with divisions in millimeters marked on it.
In order to measure the electrolyte level, you need to place the tube in the battery filler hole until it comes into contact with the separator mesh, pinch the upper end of the tube with your finger and pull out the tube.
The upper electrolyte level in the level tube will correspond to the electrolyte level in the battery.
Basically, a low level is a consequence of the electrolyte “boiling away”; in this case, the electrolyte level is adjusted by adding distilled water.
Topping up the battery directly with electrolyte is done only when you are sure that the drop in level was due to a spill of electrolyte from the battery.
Before proceeding with further testing of the battery, it is necessary to assess the degree of its charge and carry out further testing of the battery after it is fully charged.
The degree of charge can be determined in two ways: either measure the density of the electrolyte in the battery, or measure the voltage on the battery.
Checking the density of the electrolyte in the battery (for serviced batteries)
A device for checking the density of electrolyte in a battery is called a hydrometer .
To measure the density of the electrolyte in the battery, it is necessary to place the hydrometer in the filler hole of the battery, use a bulb to draw the electrolyte into the flask so that the float floats freely and take the density reading on the hydrometer scale in accordance with the upper level of the electrolyte.
The density value for a 100% charged battery will depend on the temperature operating conditions of the battery.
Table 1. Determination of electrolyte density for various climatic zones.
Moreover, you should know that a decrease in density by 0.01 g/cm3 from the nominal value corresponds to a battery discharge of 5-6%.
Table 2. Degree of battery discharge at different electrolyte densities.
However, the values given in the table will be correct if you checked the density at an electrolyte temperature of 20-30 ° C. If the temperature differs from this range, then a correction should be added (subtracted) to the measured density value according to the table.
Table 3. Correction to the hydrometer reading when measuring density at different temperatures.
Typically, in car batteries that you can buy in a store, the electrolyte density is 1.27 g/cm3. Let’s say that when checking the density of the electrolyte in the battery, the hydrometer showed a value of 1.22 g/cm3 (that is, the density dropped by 0.05 g/cm3), this means that the battery was discharged by 30% of the nominal value.
In this case, the battery must be charged. After this, if the battery is in good condition, the electrolyte density will be restored to the nominal value. The most important thing is not to let the battery discharge by more than 50%.
It should be noted that its freezing temperature depends on the density of the electrolyte.
Table 4. Freezing point of electrolyte of different densities.
Therefore, the low density of the electrolyte in winter leads to its freezing, rapid loss of battery capacity, and sometimes even to physical deformation and the appearance of cracks.
Measuring battery voltage with a voltmeter or multimeter
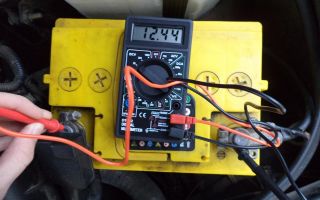
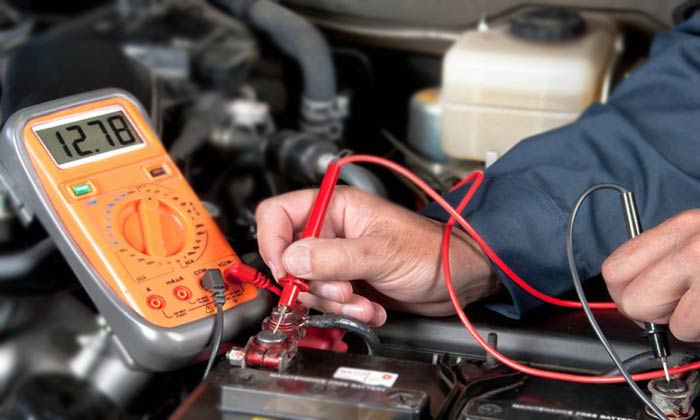
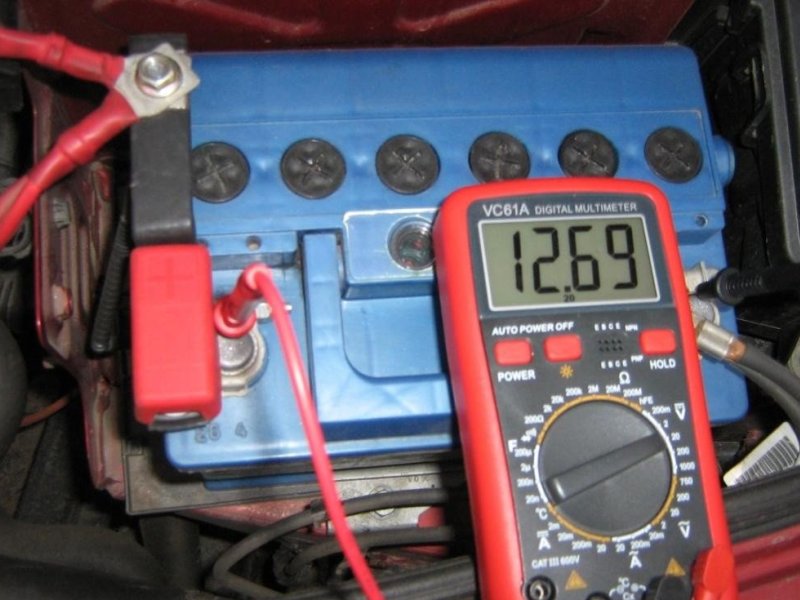
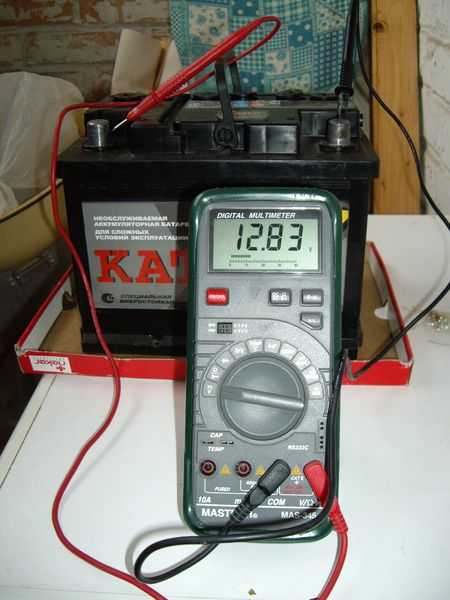
You can assess the state of charge of the battery by measuring the voltage on it. To do this, you need a voltmeter or a device that is popular nowadays - a multimeter.
To measure voltage using a multimeter, turn it on in DC voltage measurement mode, and set the range above the maximum voltage value on a charged battery. For example, for the popular inexpensive multimeter DT-830 (M-830) series this is 20 volts.
Next, connect the black (COM) probe of the multimeter to the minus of the battery, the red (positive) probe to the plus of the battery and take readings from the multimeter display.
The voltage of a fully charged battery should be at least 12.6 volts.
If the battery voltage is less than 12 volts, its charge level has dropped by more than 50%, the battery must be charged urgently! Deep discharges of the battery should not be allowed; this leads, I repeat once again, to sulfation of the battery plates. A battery voltage of less than 11.6 V means the battery is 100% discharged.
Again, you cannot be rigidly tied to a specific voltage value, since it is related to the density of the electrolyte in the battery.
A car battery consists of six cells connected in series. The voltage of one bank can be calculated using the formula:
Ub= 0.84 +ρ
where, ρ – electrolyte density;
Then the voltage on the battery will be equal to:
Uakb = 6*(0.84 +ρ)
With a battery density of 1.27 g/cm3, the voltage on the battery will be:
Ub = 6*(0.84 +1.27) = 12.66 volts
Accordingly, with different initial densities of the electrolyte in the battery, the voltage on it will also be different.
Checking the battery with a load fork
However, simply checking the voltage on the battery is not enough to fully and qualitatively assess its performance.
The next step is to check the battery’s ability to perform its functions when a load is connected to it.
After all, there may be a case when, when measuring the voltage, it is determined that the battery is fully charged, but the engine “turns” poorly or does not “turn” at all.
It can be assumed that such a battery has lost capacity as a result of long, and more often incorrect, use and it discharges so quickly that it “dies” in one second.
So, to check the operation of the battery under load, a load fork is used. The load fork diagram is shown in the figure.
That is, the load plug is a voltmeter that can be connected in parallel with its load terminals. For starter batteries, the load resistance is selected in the range of 1-1.4 times the battery capacity. This is considered the maximum discharge current for the battery. Not to be confused with starter current.
First, the battery voltage is measured without load and the degree of its charge is determined using a table.
Table 5. Dependence of battery charge level on idle voltage. (The battery is left at rest for at least 24 hours).
The second stage is to measure the voltage on the battery with a load connected and determine the degree of charge according to the table. The reading under load is taken at the end of the fifth second from the moment the load is connected.
Table 6. Dependence of the battery charge level on the voltage at the end of 5 seconds of testing with a load fork.
The values in these tables are taken directly from the load fork instructions.
Thus, with a 100% charged battery, the voltage measured under load should not be less than 10.2 volts. Otherwise, the battery is considered to be undercharged and needs to be charged.
If such a situation occurs that without a load the battery shows the voltage of a 100% charged battery, and when the load is turned on, the voltage drops significantly and is very different from the values indicated in the table, then this means that there is a malfunction in such a battery (sulfation, short-circuited plates etc.).
Therefore, it is necessary, if possible, to fix the malfunction or purchase a new battery so that one day it does not let you down.
That's all for today. In this article I only touched on the issue of checking batteries. I will tell you how to properly charge the battery, try to restore it after sulfation, and many other questions in the next issues of ELECTRON magazine.
Therefore, do not forget to subscribe to new issues of the online magazine on electrical engineering and electronics.
And now a detailed video on how to check a car battery:
Source: http://www.sxemotehnika.ru/zhurnal/kak-proverit-akkumuliator-avtomobilia.html
How to check your car battery for performance
Any car enthusiast with basic knowledge of electrical engineering and an accessible set of tools can independently check the performance of a car battery. Typically, problems with the battery appear when cold weather sets in, since sub-zero temperatures negatively affect the electrical equipment of the car, significantly increasing the load on the battery.
The ability to check the battery for performance may be needed not only during the operation of the car, but also to check a used battery after it has been restored, or to check the battery when buying a car second-hand.
It is necessary to begin checking the battery's performance with its external inspection. Naturally, before inspecting the battery, you need to remove it from the car and install it in a convenient, well-lit place. During the inspection, make sure that the battery case is not damaged and its surface is sufficiently clean (no traces of dirt or electrolyte leaks).
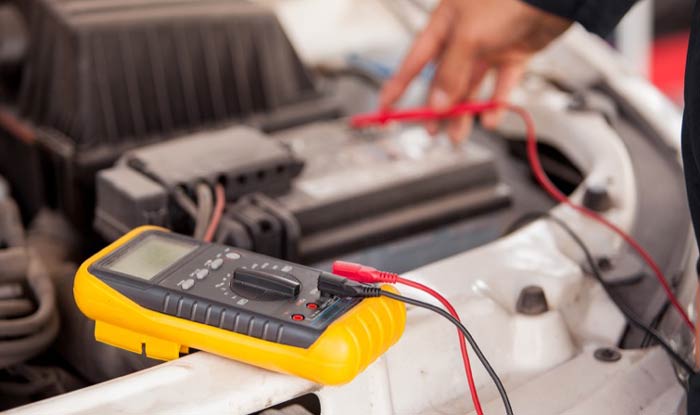
How to test a battery with a multimeter
A multimeter is one of the most popular and affordable instruments for measuring various electrical parameters. You can check the battery with a multimeter to determine the level of discharge of the battery and the presence of current leaks in it.
If, during inspection of the battery, electrolyte leaks were found on its surface, then most likely there is a current leak through them, leading to rapid self-discharge. Checking the battery for current leakage using a multimeter is very simple:
- Switch the multimeter to voltmeter mode (measure direct voltage up to 20 Volts);
- Connect the red probe of the multimeter (positive) to the positive terminal of the battery, and slowly move the contact of the black probe along the battery body in areas of electrolyte leaks or other contaminants.
- If there are current leaks, you will see voltage readings on the multimeter screen that will be greater than zero.
Even if the multimeter readings indicate that there are no electrical leaks, then electrolyte leaks and other contaminants should still be eliminated using a rag soaked in a 6% soda solution (one tablespoon of soda per glass of warm water).
To check the level of discharge of a car battery with a multimeter, you need, as in the previous case, to turn it on in the DC voltage measurement mode with a limit of up to 20 Volts, and measure the voltage at the battery terminals.
The table below shows the dependence of the voltage at the battery terminals without load on its state of charge:
| Voltmeter readings without load | >12.7 V | 12.5 V | 12.3 V | 12.1 V | 10.2 V | 9.6 V | 9.0 V | 8.4 V |
Source: https://unit-car.com/diagnostika-i-remont/206-kak-proverit-akkumulyator.html
What is the best way to test a car battery for performance: choose the appropriate method
Car owners and drivers sooner or later have to deal with the issue of battery health. When purchasing such an important component for your car and during operation, it is useful to know basic methods - how to check the performance of a car battery. This article is devoted to consideration of these methods.
Visual inspection of the battery
When purchasing a battery and every time you open the hood of your car, pay attention to the following issues:
- hull integrity;
- no dust or dirt on the battery;
- cleanliness of the terminals and the absence of loose white or light green deposits on them;
- absence of moisture and electrolyte drips;
- tight fit and tightness of terminals and fasteners.
Contamination of the battery case or the presence of moisture on it leads to accelerated self-discharge of the battery. If the terminals do not fit tightly enough to the output contacts, the resistance at the connection points increases. This leads to a decrease in the starting current at the starter and difficulty starting the engine. The terminals become noticeably hot. Battery charging deteriorates.
To prevent these problems, it is enough to keep the battery clean and tighten the fasteners in a timely manner.
Electrolyte leaks should be removed with a weak alkaline solution (5 grams of soda per 100 grams of water) and wipe all surfaces with a dry cloth.
Contacts and terminals are cleaned with fine-grained sandpaper and lubricated with technical petroleum jelly. Or when checking the oil level in the engine, touch the terminals with a dipstick; this is enough to lubricate them and protect them from oxidation.
Checking the electrolyte level and density
The condition (level and density) of the electrolyte can only be checked on serviced batteries. To do this, place the battery on a horizontal surface and unscrew the plugs covering the openings of each can. Visually check that the electrolyte in each jar covers the plates by approximately one centimeter.
To more accurately check the battery electrolyte level, use a graduated glass tube or a simple glass tube and ruler.
- Lower the tube into the hole until its lower end touches the plates.
- Close the hole at the top end of the tube with your finger.
- Pull out the tube and make sure that the electrolyte level in the tube is 10-15 mm.
- Take measurements in each jar.
In jars where the electrolyte level is below normal, add distilled water, after making sure that the body is intact.
Topping up electrolyte is allowed only if you are absolutely sure that it has been spilled. Add electrolyte whose density and temperature are identical to that in your battery. After this, charge the battery.
Checking the density of the electrolyte in the battery is carried out with an acid hydrometer at an air temperature of about 25 ° C after full charging. It looks like a glass flask with a rubber bulb at the upper end, in which a float with a graduation is placed - a hydrometer. The scale on such a measuring device is calibrated according to the specific gravity of the liquid in the SGS system (g/cm3).
When working with electrolyte, take measures to protect your eyes and skin, because electrolyte is an acid.
To check the density of the electrolyte, place the tip of the acid meter into the hole of any battery jar and draw the electrolyte into the flask with a bulb so that the hydrometer floats freely. The line on the hydrometer scale that coincides with the surface of the electrolyte corresponds to its density.
Using a special table that corresponds to the density of the electrolyte and the charge level of the battery, its suitability for use is determined. Typically, at an electrolyte temperature of 25 °C and when the battery is fully charged, the normal density of the electrolyte for the middle band should be 1.28 + -0.01 g/cm3.
A decrease in density by 0.01 g/cm3 means a discharge of the battery bank by 5-6%.
For example, when checking density, the hydrometer reading is 1.23 g/cm3. This is 0.05 g/cm3 less than the nominal value of 1.28 g/cm3. This means that the battery is discharged by 25-30% and requires recharging. Perform this check every six months.
Checking the battery with a load fork
Checking the battery with a load fork is carried out on serviced and unserviced units. Based on the test results, you can determine the state of charge of the batteries and draw conclusions about their performance.
The load plug consists of a voltmeter (pointer or digital), placed in a housing along with connected load resistors, and output contacts in the form of pointed pins. Measurements are made with the battery disconnected and serviced. The terminals and housing must be clean and dry, the caps on the cans must be closed.
Preliminary measurements of the battery voltage without load . To do this, disconnect the load resistor and firmly press the legs of the load fork to the terminals.
Record the voltmeter readings. When the electrolyte density is 1.28 g/cm3 and the voltage on the battery without load is not lower than 12.7 V, the battery is fully charged.
A voltage drop of 0.2V corresponds to a 20% battery discharge.
But the main purpose of the load fork is to take measurements while simulating the actual operation of the battery . To do this, connect a load resistor corresponding to 1-1.4 of the battery capacity.
When taking measurements, hold the legs of the load fork firmly pressed against the terminals for five seconds. At the fifth second, note the voltmeter reading.
The voltage on a working and fully charged battery will not be lower than 10.2V and should not decrease during this time.
If the voltage is lower or drops during measurements, the battery is not fully charged or is faulty. If the voltmeter readings are equal to or below 7.8V, then the battery is completely discharged.
A voltage drop of 0.6V from 10.2V corresponds to a 25% decrease in charge. If the battery has a 100% charge without load, and under load the voltage drops sharply, this indicates a faulty battery.
How to test a car battery with a multimeter
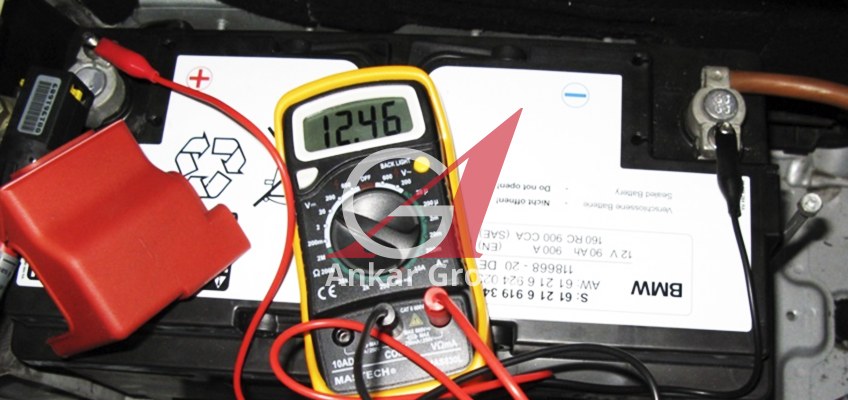
Taking voltage measurements with a multimeter can also determine how charged the battery is. To do this you need to do the following:
- Turn the multimeter into mode to measure DC voltage, at the appropriate measurement limits.
- Connect the black probe to the negative terminal, and the red one to the positive terminal of the battery.
- Record the readings on the multimeter display.
A battery is considered fully charged when the voltage is not lower than 12.7V. If a voltage of 11.7V is recorded, then the battery is completely discharged.
This means that we can approximately calculate the state of charge of the battery, taking into account that a voltage drop of 0.1V corresponds to a drop in charge level of 10%.
Test method without instruments
Modern maintenance-free batteries are available with built-in indicators or a self-diagnosis system. The condition of such batteries can be easily determined by reading the instructions. How to check the health of a car battery if you have a simple unit and do not have the necessary devices?
- Carry out an external inspection as indicated above.
- Remove contamination and secure the terminals tightly.
- Without starting the engine, turn on all the lights on the car.
- If the brightness of the headlights does not change within five minutes, then the battery is in good condition.
Also, any driver knows how difficult it is to start the engine with a faulty or discharged battery.
Now you know how to check the battery for performance. Do not charge or measure on frozen batteries. Maintain your battery properly and it will last a long time.
Video on how to check the condition of a car battery
Source: http://elektrik24.net/elektrooborudovanie/akkumulyatory/avtomobilnye/kak-proverit.html
How to check a car battery - tips and testing method
If your car won't start, your first thought will probably be that the battery is faulty or dead. You should know how to test a car battery.
First, its body is visually inspected for visible damage. Then you need to measure the density of the electrolyte - it should correspond to 80 percent of the battery charge.
The density value should not differ from the nominal value by more than 0.02 g/cm3.
How to check a car battery - final check
The final check should be made with the load fork. On a normal battery, the voltmeter will show 12.5-12.9 V. This measurement should be performed without load.
With a load, a healthy battery will show at least 11 V (this value should be maintained for ten seconds).
If the actual parameters meet the requirements, the battery is considered good and must be installed in the vehicle.
It is clear that car battery maintenance also includes charging it. The supply current is set to one tenth of the total battery capacity. The charging duration can be from 4 to 12 hours and directly depends on the degree of battery wear. A sign of full charging can be the gas released when the electrolyte boils in the battery banks.
When deciding how to check capacity, you should know some reference numbers:
- in a serviceable and fully charged battery, the electrolyte density will be 1.24 g/cm. cube in the summer and 1.28 in the winter,
- a decrease in electrolyte density by four hundredths of a gram per cubic centimeter indicates that the battery is discharged by a quarter,
- reduction in electrolyte density by 0.08 g/cm. the cube indicates that the battery has lost half its charge.
If your car battery discharges quickly, there may be several reasons for this. In particular, a sharp decrease in the level of working fluid.
If it is necessary to top up, you must first determine why the level has dropped. So, if the electrolyte splashes out or spills, then its deficiency must be compensated for with electrolyte.
If the electrolyte has boiled away, it can be topped up with distilled water.
Battery checks are preventative. They are quite accessible for drivers to perform independently. By the way, if you decide to install an alarm on your car, then do not forget that the load on the battery cell will increase.
Thus, the charging time will be short if possible current leaks are excluded. You can check the presence or absence of such leaks using simple measurements. After a night or several hours of parking, use a digital tester to measure the voltage at the battery. Its value should be 12.66 V. If it is lower than the required value, then you can go this way:
- keep in mind that when the car is parked for a long time, the battery may self-discharge due to “small” consumers (the same alarm system),
- if the current leakage is more significant, you should remove any of the terminals and connect a tester operating in ammeter mode to the resulting gap. The meter should display a reading between 30 and 40 mA. If the value in this case is significantly greater, you will have to look for a leak - of course, only if the battery does not power security cameras, additional alarms or an audio system,
- The amount of starting current that the battery supplies when starting the engine should not be measured for reasons of basic safety.
How to determine the state of charge of a battery
There are many recommendations on how to prolong the operation of machine components and mechanisms - for example, how to change spark plugs and so on. However, you must understand that the battery is not an eternal element and must be replaced after long-term use.
As already mentioned, the voltage measured at the terminals corresponds to a certain charge level:
- a voltage value of 12.6 V corresponds to a 100% charge,
- voltage 12.4 V - battery is three-quarters charged,
- voltage 12.2 V corresponds to a fifty percent charge,
- voltage 12.0 V - battery is charged to one quarter capacity,
- a voltage of 11.8 V indicates that the battery is discharged,
- a voltage below 11.0 V indicates that the battery has failed and needs to be disposed of. When using such a battery, you greatly risk the performance of the generator or charger.
By the way, there are also related automotive checks - for example, you should know how to check the lambda probe and how to check the generator. During the generator check, a visual inspection is performed, including checking the wiring and drive belt.
The voltage in this case is measured in the cigarette lighter - it should be about 14 V when measured in a “quiet” state and at least 13 V when measured under load.
A voltage value below the recommended values indicates that the generator regulator or rectifier unit has failed.
Video - “How to check the battery (English)”
Source: http://autoremka.ru/raznoe/kak-proverit-akkumulyator-avtomobilya-sovety-i-sposob-proverki.html
How to check the performance of a car battery?
Most car enthusiasts have at least once encountered the need to find out the condition of the battery, especially if the vehicle has been idle for a long time. Indeed, if the voltage in the on-board network is low, the culprit may be not only the battery, but also the generator.
It is impossible not to mention the purchase of used spare parts - for them, such a test is mandatory.
Such a check allows you to determine the future fate of the device - can it be repaired or is it heading straight to the landfill? We will talk about how to check the performance of a car battery in our material today.
Rapid diagnostic methods
Some rechargeable batteries (AB) boast an indicator designed for diagnostics. In this case, you just need to open the hood and look through the special peephole located on the device. The color of the indicator will tell you about the state of the battery. Possible options:
- Green – the battery is fully charged and in good condition.
- White – problems with the electrolyte level (more on this below).
- Black – The battery needs charging.
Battery charge indicator
It should be noted that such models cost 20-30% more than similar ones that do not have this function. Therefore, in most cases, this diagnostic option is not suitable for everyone.
An external inspection of the device is also important, because if there is dirt on the body, the contact connection may be broken, and a decrease in the electrolyte level may indicate its leakage and, as a result, a loss of voltage.
If the car has an on-board computer and a built-in voltmeter, some information about the state of the battery can be obtained immediately. A reading of 14.2V is normal.
Please note that this value may fluctuate depending on the time the vehicle battery is idle, air temperature, electrolyte density and other factors.
You should also understand that the first time after starting the engine, the generator operates at full power in order to replenish the battery charge that decreased during idle time. However, if the voltage differs greatly from the specified value, then it is highly likely that there are problems with the battery or generator.
The quality of electrical wiring, contact connections, the number of consumers (headlights, radio, air conditioning, wipers) - all this affects the readings, and therefore you should not fully trust such a test.
Also, the voltage may be low due to a poor contact connection, so before you mess with the battery, be sure to check all contacts for dirt or rust and, if necessary, clean them.
Using a Multimeter
This device is used to measure current, voltage, open circuits and other parameters necessary in electrical engineering. People call him a tester.
The condition of the battery can be determined by the voltage level it produces, and if there is an electrolyte leak, you can find out whether the battery is losing electrical current. To do this you should:
- Switch the tester to the voltage change mode up to 20V.
- Connect the battery terminal to the red (positive) probe of the device.
- Use a black (negative) probe to trace the leakage points.
If there are no losses, the display will show 0. In other cases, you should take the battery to a service center.
To measure the battery voltage level with a multimeter, you need to connect both of its terminals to the probes of the device, having previously switched it to the voltage measurement mode up to 20V. Based on the results obtained during testing, the percentage charge capacity can be calculated. You need to focus on the following values:
- More than 12.7V – the battery is fully charged.
- 12.5V – 75% of the nominal capacity.
- 12.3V – 50%.
- 12.1V – 25%.
- Less than 11.9V – deep discharge; use of a charger is required.
Measuring battery voltage with a multimeter
Work with the multimeter should be carried out with the battery removed and disconnected from the vehicle's on-board network. Otherwise, the results will be inaccurate.
Checking the electrolyte level and its density
Electrolyte is the “blood” of any battery. The service life of the device and its efficiency directly depend on the condition of this liquid. The electrolyte level can be measured with a measuring tube, and its density with a special device - a hydrometer. All measurements must be carried out with each of the cans separately.
To carry out the measurement you should:
- Open the jar.
- Lower the measuring tube into it until it stops.
- Pinch its upper part with your finger and pull it out of the container.
Normal values are considered to be 10-15 mm. If the level is lower, you need to add distilled water, and if the level is high, drain some of the liquid. By the way, pay attention to the color - the liquid should be transparent.
Otherwise, the plates will oxidize or some foreign objects will get inside the device, which can lead to its damage.
In some cases, you may need to make your own electrolyte (a mixture of distilled water and sulfuric acid) or buy it in special stores.
Measuring battery electrolyte density
The density of the electrolyte is measured as follows: a hydrometer pipe is lowered into a “jar” of liquid, then a certain amount of electrolyte is drawn into the device using a bulb (until the float or sticks float to the surface).
Density is also one of the ways to check the charge, since it decreases by 0.01 g with a loss of 5-6%. Thus, knowing the nominal values, you can calculate the remaining battery capacity.
These values range from 1.22 to 1.29 depending on the air temperature (the lower it is, the higher the density of the liquid).
Using the load fork
Measurements taken with a multimeter do not always give an accurate picture of the condition of the battery and its state of charge. It often happens that there is voltage and the electrolyte level is fine, but the battery still does not hold capacity well.
In such cases, you can resort to the most reliable method - using a load fork. This device, like a multimeter, also measures voltage, but during tests it simulates the operation of a starter or other “consumers”, i.e. loads the battery with additional work.
The measurement algorithm is practically no different from working with a multimeter, however, you should not load the battery for more than 5 seconds, as this will lead to its failure.
Load performance indicators are calculated at the fifth second of testing and provide the most complete picture of battery performance. In addition, using the nominal voltage values, you can determine the battery charge:
- More than 10.2V – full capacity,
- 9.6V – 75%,
- 9V – 50%,
- 8.4V – 25%.
- Less than 7.8V – the battery is completely discharged.
Measuring battery voltage with a load fork
More accurate diagnostics of a car battery can be done using a special digital multimeter, which combines the functions of a load plug, a tester and, in some cases, a charger. However, such devices are quite expensive and, as a rule, require special skills to operate such equipment.
Summing up
In conclusion, let us once again recall the main points that you should pay attention to when diagnosing a battery:
- There should be no electrolyte leaks on the device and, especially, external damage.
- The normal voltage in the vehicle’s on-board network is 14.2V.
- The optimal electrolyte level in the battery should be between 10-15 mm.
- The normal density value is approximately 1.27 g.
- When checking the battery with a multimeter, the voltage should be greater than 12.9V.
- When using a load fork - more than 10.2V.
If all indicators match, we can confidently say that your battery is in perfect order and the problem, if any, should be looked for in another car module.
Source: https://bodyshop-info.ru/sovety-i-rekomendacii/kak-pravilno-proverit-akkumulyator-avtomobilya-na-rabotosposobnost
How to check the battery with a multimeter, load plug and other devices?
The condition of the battery determines the ease of use of the car - reliable starting of the engine, good light, comfort in the cabin. Car owners hope for its impeccable performance, but sometimes it fails. The article will tell you how to avoid such a situation.
- Sheinin: “I speak for myself, anyone can cure prostatitis, take the proven Prost...”
Checking the battery on time and correctly means being sure that it will not fail. After all, the situation when the battery suddenly stops working is extremely unpleasant. It’s not so bad, if this happened in the garage, you can put it on charge.
But if this happened on the road, there is no envy here. Most car enthusiasts drive as long as the battery lasts, and then buy a new one.
Timely care can significantly prolong its life and help avoid unpleasant situations.
The quality of car operation depends on the charge level and condition of the battery - reliable engine starting, good light, comfort in the cabin
- They will protect the chassis and save you money, increasing ground clearance by 3 cm.
In addition to natural aging, other factors also affect the performance of the battery. The operating mode of the engine and the condition of the electrical equipment also affect the condition of the battery. A number of reasons can lead to undercharging or overcharging.
The battery is undercharged when the car is used for short distances. Heating and heating fans turned on in winter can also cause undercharging.
A faulty voltage regulator with low current does not allow the battery to charge normally when driving.
A constantly recharged battery does not last long either. Overcharging occurs, most often, due to a faulty voltage regulator. It produces an increased charging current, the electrolyte begins to boil.
In a maintenance-free battery, water boils away, the plates become exposed, and they become deformed. In other batteries they crumble. As a result, the battery becomes inoperable.
Overcharging can also be caused by long, long trips when the engine is constantly running at high speeds.
To increase the service life of expensive equipment, we recommend periodically checking the battery, following the following sequence:
- inspect the condition of the terminals, appearance;
- check the electrolyte: level and density;
- measure volts at the terminals;
- check it with a load fork.
Make it a rule: lift the hood of the car and inspect the battery. It will take a little time, but the benefits can be great. A dirty surface causes self-discharge. Dirt is not just sticky dust.
During operation, electrolyte gets on the lid, turning into a liquid state from vapor. If you add oxidized terminals to a dirty battery, current leakage, and do not recharge it in time, the battery will be discharged.
Frequent and deep discharges threaten sulfation of the plates.
No need to be embarrassed to inspect the battery once again when you open the hood
You can determine for yourself that a dirty surface leads to self-discharge. We connect the voltmeter with one probe to the terminal, and run the other along the battery cover. We see that the device shows the presence of some voltage. Dirt and electrolyte on the cover conduct current between the terminals, and the battery discharges itself. Caring for the surface is not at all difficult.
We wash the surface with an alkaline solution that neutralizes the electrolyte (dissolve a little baking soda in water). We wash the green deposits on the terminals with hot water and wipe them dry. You can use fine sandpaper for cleaning. The contact must be reliable.
We check the fastening: if it is unreliable, the body, especially in winter, may crack.
We got rid of self-discharge on the surface, it’s time to move on to the internal contents. In serviced batteries, we check the electrolyte level using a glass tube. We insert it into the jar until it stops in the plate separator, close it with your finger and take it out. The height of the liquid above the plates should be 10–12 mm. If it is insufficient, add distilled water that has boiled away.
When proceeding with further testing, you should evaluate the battery charge. This is done in two ways: by checking the density or measuring the voltage. Density is checked with a device called a hydrometer.
We place its tube in a jar, suck in the electrolyte with a bulb so that the float inside begins to float, and look at its scale.
Below is a table with the density of a fully charged battery depending on the climatic zones where it is used.
A downward deviation from the nominal density for every 0.01 g/cm3 means a voltage drop of 5–6%. The usual density of a new battery is 1.27 g/cm3. Let's say the density test showed 1.21 g/cm3.
This means that the battery capacity is insufficient, it is 30-36% discharged, and it needs to be recharged. In a working battery, the density is restored, which signals its charge. The discharge should not be allowed to exceed 50%. This is especially dangerous in cold weather.
In addition to the fact that the battery will not work, there is a threat that the case will crack: as the density decreases, the electrolyte freezes.
A multimeter is an inexpensive multifunctional device that runs on a AA battery. They can make various measurements with their own hands, but we are interested in voltage indicators. It’s a good idea for every car enthusiast to have such a device in their arsenal.
We turn it on in the DCV constant voltage measurement mode, set the range to 20 V. Connect the black probe to minus, the red probe to plus, and take readings. A fully charged battery should show 12.6 V. An indicator of 12 V or less indicates a discharge of 50% or more; urgent recharging is required.
If the multimeter shows 11.6 V, the battery is completely discharged.
It is better to take measurements when the car has not been running for some time. If you take readings immediately after the trip, they will be one, but the next morning they will be different. A charged battery can hold voltage for several days.
It doesn't drop much even if the car hasn't been used for weeks. With a discharged battery, the voltage drops rapidly, and it may happen that when you have to urgently leave, the engine will not start.
Therefore, advice: before a long break in travel, be sure to fully charge the battery.
Checking with a multimeter with the engine running will allow you not only to evaluate the performance of the battery, but also to check the serviceability of the electrical equipment. With the engine running, the device should show 13.5–14.0 V.
Indicators raised to 14.2 V or more indicate a poorly charged battery. The generator works hard to charge it.
In extreme cold, the voltage may increase because the battery has been discharged during the night, or the electronics are allowing more current due to very cold air.
We start the engine with the consumers turned off, connect the multimeter and monitor the readings
Increasing the voltage at the beginning of engine operation is not dangerous. If the electrical equipment is working properly, then after 10 minutes everything will return to normal, the usual 13.5–14.0 Volts will be established.
But if it does not gradually return to the optimal level, there is a danger of overcharging.
At maximum charging voltage, especially during a long trip, the electrolyte will gradually boil away and the battery will become unusable.
Now about the reduced voltage on a running car. If it is 13.0–13.4 V, the battery is not being sufficiently recharged. You should turn off all energy-consuming devices and measure again.
If the voltage has returned to normal, everything is in order, otherwise the generator may malfunction, especially if the reading is below 13.0 V. Do not rush to repair it, check the contacts.
If they are oxidized, a lack of voltage will be felt.
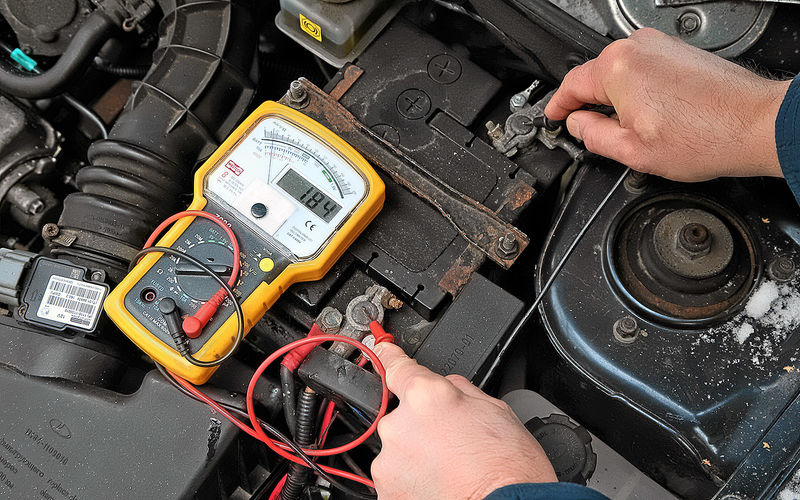
There is another way to find out the condition of the battery. We start the engine with the consumers turned off, connect the multimeter and monitor the readings. Gradually, one by one, we turn on the consumers: radio, low beam, and so on.
Every time you turn it on, we observe a voltage drop of 0.1–0.2 V. A significant drop indicates a malfunction of the car generator, most likely, wear of the brushes.
If you turn on all consumers, the voltage drop should not be lower than 12.8–13.0 V, otherwise the battery will be severely discharged and will not last long.
It happens that the battery has normal voltage, measured by the tester, but it does not want to turn the starter. Checking the condition with a load fork will give a complete and clear picture. The device is a voltmeter with a load resistance.
The load plug is connected with correct polarity to the terminals for a short time - 5 seconds. We record the readings at the end of this time. It should be noted that sparking is observed when connecting. There is nothing to worry about, because the load is connected.
The check should be carried out infrequently so as not to damage the battery.
We evaluate the indicators using the table or take information from the instructions for the load fork. If the battery is 100% charged, the load voltage reading will be 10.2 V. A lower reading indicates the need to recharge.
If measurements with a voltmeter without a plug show a normal condition, but with a load plug a strong difference is visible, the battery has a malfunction: sulfation, shorted plates and some others.
If possible, fix the problem or buy a new battery.
It happens that there are no instruments at hand, but you need to assess the condition of the battery. At home, we connect a load equal to half the capacity. For a 60 A/h battery it is equal to 30 Amperes. You can take 6-7 55 W light bulbs and connect them in parallel. After 5 minutes we evaluate the brightness of the light. If it becomes dim, the battery cannot cope with its duties.
Don’t be lazy to take care of your battery, check it periodically, then it will serve for a long time and reliably!
Source: http://tuningkod.ru/obsluzhivanie-avto/akkumulyator/kak-proverit-akkumulyator.html